How to make a well with your own hands without complex equipment. Technology for drilling a well at the dacha with your own hands How to drill a well under water yourself
As a rule, manual well drilling technology is used when it is necessary to provide a dacha or private house with water supply. Sometimes a well is chosen for this function, but a water well is still preferable - it has a number of advantages:
- Long service life;
- Aquifers lie deep underground, which helps produce cleaner water;
- The rate of water replenishment at wells (the so-called flow rate) is much higher than at wells.
There are several drilling technologies and borehole structures themselves. The process of drilling water wells with your own hands is much simpler than it might seem at first. The methods described below do not require the purchase and use of expensive, complex equipment or special highly specialized knowledge. Manual drilling of wells is within the capabilities of every man.
Types of wells
Verkhovodka
The uppermost layer is the upper waters - they lie approximately 10 m from the surface. Sometimes they are used to provide water, but this is not recommended. For the safe use of such water, constant sanitary checks are required - high water is rarely suitable for drinking; more often it is used for technical needs.

Well on sand
Typically, wells are drilled to a non-confined formation - it lies approximately 5-20 m from the surface and is much safer for drinking than water from the upper formation. A well in a non-confined formation is called a sand well. Before you start drinking water, it is still recommended to have it checked by a sanitary organization, but obtaining a positive conclusion is much more likely.
A free-flow layer has no pressure, and for safe operation it is necessary to filter small soil particles. The flow rate of such a well is approximately 2 cubic meters. m/day.
Well for limestone
The highest quality water is obtained from it. The depth of such wells for limestone can range from 7 to 50 m. The composition of the aquifer includes: loam, limestone and water-resistant rock. It is precisely such wells that contain water of very high quality, and therefore, to provide drinking water to the dacha, it is better to drill water wells with your own hands in limestone.

The formation has its own pressure - this helps to raise water to the surface. The debit is equal to 5 cubic meters. m/day However, before using the water, it is recommended to carry out a sanitary check. The important advantages of such a well over all others are:
- long service life;
- simplified water supply system, thanks to the presence of its own pressure at the well;
- stable daily debit;
- no need for a sand filter;
- high quality and purity of water.
An artesian well is located in interstratal waters and provides the highest quality and unique purity of water. The depth of such a well lies from 30 to 50 m deep, so it is almost impossible to drill it manually.

And it’s not worth trying to drill a water well in such a formation yourself, since artesian waters are considered a valuable natural resource and are protected by law.
Drilling depth
Before starting work, it is necessary to determine the depth of the planned well, for which you need to know at what depth the aquifer lies. To do this, it is necessary to conduct geological research or at least ask the neighbors operating the well about the depth of their well. Even today, there are folk experts, dowsers, who are able to find the closest location of water from the surface of the earth.
Based on their depth, wells are divided into three main types:
- Shallow- no more than 3 m. It is recommended to drill such a well if the water from it will be used only for technological and operational needs.
- Medium deep– no more than 7 m. Such a well is created if the extracted water will be used both for technical and drinking water, but with questionable quality;
- Deep- more than 7 m. This type of well is made when there is a need for a large amount of drinking water.
Methods for self-drilling wells
Hydro drilling
Hydrodrilling is carried out by pumping water into a drill string (pipe) at the bottom of which there are special holes. Water erodes the soil below and rises up into the pit into the gap between the drill pipe and the walls of the well. Most of the soil raised with water settles in the pit, and the water itself enters the second pit in purified form.

The drilling pump pumps out purified water from the 2nd pit and supplies it to the pump. As a result of the closed cycle, water consumption is relatively small.
As the well deepens, the drill pipe is extended with additional threaded pipes.
When the drilling work is completed, the casing is lowered into the well. The casing pipe is equipped with a filter in drilled holes or cuts and is located at the end of the casing pipe. Typically, the filter is about 1 m long.
Auger drilling
This type of drilling is carried out using a steel pipe equipped with welded blades in a spiral. Such a drill is also called an auger; it is convenient for drilling soft or medium-hard soils, but is contraindicated in the presence of stony or rocky soil.
Drilling technology using an auger drill is as follows:
- By rotating, the drill is driven into the ground.
- When the auger goes into the ground to its full depth (or the rotation force becomes very large), it is removed and the soil is cleared from the blades. To facilitate the rotation of the drill, you can pour water into the well.
- The pipe is extended from above to the drill and it is lowered into the ground again;
- The procedure continues until the aquifer is reached.
Mostly, auger drilling is used in professional drilling rigs, but work can also be carried out with manual augers. Working with such a drill is not easy; the process itself requires certain skills and knowledge.
Needle hole
Alternative name: Abyssinian well is, rather, not a drilling method, but the direct driving of a pipe through which water will flow into the ground. The tool is a rod with a cone-shaped tip, the maximum diameter of which is greater than the diameter of the pipe being driven.
Pipes for needle wells are thick-walled water pipes, the diameter of which varies from 25 to 32 m. A prerequisite for such pipes is tightness, since they are driven into the ground once and for all. If pipes are joined by welding, the welder must have sufficient qualifications to ensure tightness. If pipes are connected with a thread, sealing and sealing of the threaded connection is required.
Design of the Abyssinian well:
- Needle;
- Filter - drilled holes in the bottom of the pipe for the aquifer;
- Wire and a small stainless steel mesh over the drilled holes, which must be welded to the pipe so that they do not come off when hammered.
The wire must be made of stainless steel in order to avoid electrolytic corrosion when using wire made of copper or brass.
In order not to break the upper end of the pipe when driving it into the ground, you can use an eccentric or wedge device placed on the pipe. It consists of a ring with an internal cone, into which another conical split ring with an outer counter cone or separate conical plates are inserted. The ring is put on the pipe and wedged on the cones so that its downward movement becomes impossible. Next, take the headstock (it is also heavy and a large ring with two handles) and by hitting the wedged ring with the headstock, the pipe is buried in the ground.
Shock-rope method
The shock-rope method of creating wells has earned its popularity due to its simplicity and accessibility. However, this is a rather slow process, since this method requires a lot of physical effort. It can be used with almost any type of soil.
The drilling technology is simple and straightforward, and the process occurs as follows: a tripod is installed, at the upper end of which there is a pulley. A rope has the ability to slide along the pulley, at one end of which a drilling tool is installed; the second end is used to lift the tool manually. The tool is sharply thrown into the well, releasing the rope, and then the tool is pulled to the surface by the rope, where, upon reaching a penetration depth of about 0.5 m, the tool is cleaned.
The following tool is used for such drilling:
- drill-glass, otherwise called Sheetz projectile - designed for working with viscous, highly adhering soils;
- The bailer is a piece of pipe with a spring-loaded flap valve, which opens during impact and closes when rising upward, preventing soil from spilling out. Used when working with loose rock;
- a spoon drill is a piece of pipe with petals bent at the bottom. Used for loose or loose soil;
- a drill bit with a plate in cross section is used to penetrate rock layers.
With the shock-rope method, the casing can be installed and lowered as the well deepens. In this case, the pipe must be metal, since a plastic pipe can be damaged from the inside by a drill bit.
Types of casing
The diameter of such a pipe must be selected by checking the parameters of the well and the size and type of pump intended for use. Pipe materials are quite varied and not all of them are safe for use.
Pipe materials:
- asbestos pipes - contain a very strong carcinogen and are therefore very harmful for use;
- galvanized pipes - have a negative effect on the human body, there is a risk of poisoning;
- steel pipes are an economical and practical option, but over time they rust to the point of through corrosion;
- Stainless steel pipes do not have any harmful effects on the human body and, among other things, help to significantly increase the life of the well. The disadvantage of such pipes is the unattractive price of stainless steel and the complex technology of its welding;
- HDPE and PVC pipes (plastic) are one of the most commonly used materials, which have earned such respect due to their availability and low cost. However, they are only suitable for shallow wells (no more than 15 m), since they do not withstand heavy loads and can be damaged from the inside by a submersible pump.

Some nuances
- It is advisable for a drilled well to undergo pumping, during which water is poured into the gap between the well and the casing pipe and pumped out of the pipe. The option of pumping through a pipe and pumping out between the pipe and the ground is possible, but this method can disrupt the aquifer.
- Next, it is necessary to daily pump out the entire volume of water from the well to increase flow rate and increase water transparency.
- To operate a well, it is necessary to use a filter. It is optimal to mount the filter directly to the pump inlet.
- The service life of a well depends on the regularity of water intake and the amount of water pumped out.
In areas where the city water supply does not function, the problem of water supply is one of the main ones. Water is necessary in the country. Irrigation of plants, household needs, cooking are not possible without it. A well is the best option for obtaining moisture in the garden. Moreover, this can be done in the shortest possible time and without significant financial costs. The main thing is to pre-designate the place most convenient for drilling.
Methods for searching for water, establishing the depth and installation point of the well
If there are no obvious signs of water in the garden area (areas with lush vegetation), you need to look for it yourself. There are many reconnaissance methods; let’s analyze the most effective ones.
Soil water covers
In the soil, as a rule, there are three or more aquifers, broken up by hard rocks, the relief outlines of which can differ significantly.
- The upper one is located at a depth of about 25 m. It is formed due to the accumulation of water from melted snow and precipitation. Suitable only for technical needs, as it may contain fertilizer residues and other undesirable chemicals. elements.
- The middle one (ground) comes immediately after the first one. The water extracted from this layer has a stable chemical composition and is suitable for consumption.
- The lower (artesian) is located 40 m deep. Not every drilling rig can drill such a well, and it will be very expensive. But the waters of the artesian layer are distinguished by exemplary taste, organoleptic and biochemical qualities.
Based on this, we can conclude that a depth of 25-40 m is suitable for obtaining high-quality water. It will be possible to determine more precisely only during drilling operations, during sampling. It is worth considering that in summer cottages located in lowlands or close to rivers and lakes, the groundwater level can be much higher (from 10 to 15 meters deep).
Search methods
- Silica gel. Bags of beads are usually placed with shoes to absorb moisture, and can also be purchased at hardware stores. When dried (in the oven or in the sun), the balls are buried in the ground for a day, having previously been placed in a clay container (1m) in the place where it is planned to drill for water. After the specified time, the container is weighed, and the heavier it is, the closer the liquid is.
- Barometric. A 0.1 mmHg barometer (any one capable of showing elevation changes will do) shows a difference in elevation of 1 meter. That is, you first need to take measurements on the shore of the nearest body of water, and then compare them with measurements directly in the selected area. The difference between the air pressure differences in both places will be an indicator of the depth of groundwater. It will be much more convenient to use an electronic downhole cable level gauge.
- Preliminary drilling. An ordinary garden auger with an auger diameter of 30 cm will be enough to decide on the choice of location for the future source. Please note that you will have to go 6-10 m deeper, so take care in advance about increasing the length of the handle. It is recommended to remove soil every fifteen centimeters of the depression. This action must be performed until water appears in the extracted mixture. This is one of the most reliable search methods, but it requires a huge amount of labor.
Determining the location for the well
It is not advisable to choose a place for a well near sewerage structures, cesspools, garbage heaps and other sources of pollution. It is recommended to maintain a distance of 25-30 meters from them. An elevated area is best to prevent the pump from flooding.
How to drill a well on a site with your own hands
Many summer residents prefer to hire a team of people who have the appropriate equipment at their disposal, rather than trying to drill a well themselves.
In fact, the process is not complicated. You just need to understand the sequence of actions, prepare all the necessary equipment and get to work.
Subtypes of well structures
Regarding the depth of drilling, the volume of water produced, its quality and service life, the following types of structures exist:
- Sand or filter. It is a pipe with a diameter of 100-130 mm, deepened by a screw into the sand for 20-30 m. A stainless steel mesh is fixed at the lower end of the riser, acting as a filter. This design will last from 5 to 15 years, depending on the frequency of use: the less often it is used, the less it will function.
- Artesian or filterless. This is an underground water collection structure for extracting water from porous limestone rocks. The depth of this type of well is from 20 to 200 m, and its service life is at least 50 years. In comparison with the previous type, it is almost impossible to dig an artesian well with your own hands, since a special drilling machine is required for this purpose.
Do-it-yourself methods for drilling wells
Today, there are several common methods of extracting water with your own hands.
Manual drilling of water wells
Used for drilling wells up to 25 m deep.
Required tool:
- drill (its head is attached to the lower rod);
- rods (can be made from pipes, connecting them with dowels or threads);
- winch;
- siege pipes;
- drilling tower (if the well is planned to be deep, it will be used to raise/lower the drill with rods).
Process stages:
- Installing the tower at a height of 50-70 cm above the level of the bar (to make it easier to remove).
- Digging a hole for the drill (depth - two bayonet shovels).
- The initial rotation is easy, but then (as you dive in) you will need an additional pair of working hands.
- To facilitate the further entry of pipes, you can try to moisten the soil with water.
- Every 50 cm, you should raise the drill to the surface and clear the blades from the ground (since this takes a lot of time, you should try to capture as much soil as possible during each lift).
- You need to continue until the head falls into the waterproof layer.
- The slurry is pumped out using a submersible pump (AL-KO Drain 7000 Classic is suitable) until a clear liquid appears.
Manual drilling of wells under water has its advantages: low cost and does not disrupt the structure of the earth's cover. However, the dimensions of such a structure (both depth and diameter) do not allow storing a significant volume of water, and its service life does not exceed a decade.
Drilling a water well using the percussion-rope method
It consists of crushing rocks with a heavy object (a driving glass), which is suspended by a rope from a makeshift tower and falls down.
Before drilling a well with your own hands using the percussion-rope method, you must:
- Make a tower. It is made in the form of a tripod from steel pipes or wooden logs. The structure should rise 1.5 meters above the projectile.
- Prepare the driving glass. A cutting edge (a knife resembling an auger) is installed at the end of the steel pipe, and a hole is cut a little higher (about 50 cm) to extract the earth. The upper part of the projectile is attached to the tower with a cable.
- Stretch a rope that will winch the installation. Next, the same cycle occurs as in the previous method.
Shock-rope water extraction takes a long time and is troublesome, but is the cheapest method.
How to choose a pump for a well yourself
Before you drill a water well yourself, you need to carefully select the equipment. Since the diameter of the hole in the water well is not large (110-130 mm), the only option for supplying water to the surface is a pump. But making a choice in favor of one unit or another is difficult, since manufacturers provide consumers with a wide selection of products. Before making a choice, it is necessary to carefully study not only the passport characteristics of the pumping apparatus, but also the features of the well design.
Options for selecting a specific model:
- 24/7 water consumption. If you have an average family of 3-4 people, a pump with a capacity of 30-60 l/min will be sufficient, without taking into account additional costs for watering and irrigation. If there are such needs, you will need a more powerful device.
- Source depth. It is not difficult to take accurate measurements. To do this, just tie a piece of metal or a small stone with a strong thread and sink it to the bottom. After this, all you have to do is measure the length of the wet and dry parts of the “meter” and determine the total height of the riser. The model should be selected in relation to it (the depth for submersible pumps is indicated in the passport).
- Water residence rate (flow rate). You pump out all the water, note the time it takes for the liquid to drain and then fill, divide the first value by the second and get the result.
- Diameter of the siege pipe. When drilling water wells, you need to take into account that most pumps are designed for a four-inch opening.
- Quality of construction. Choose a unit designed specifically for wells, as they are equipped with fine mesh filters. Otherwise, you will have to change it soon, because it will not be able to cope with blockages (for example, washed-out sand) and will quickly fail.
Types of pumping stations
According to their functional features, all units are divided into two groups.
Superficial
Installed on the ground surface. A pipe or hose is connected to them (preferably a pipe, the hose under pressure can be pinched and water will not be able to circulate). The main advantage is that they are easy to install and operate. Centrifugal models are best suited (vibrating models are not designed for pumping dirty water and can destroy the walls of the source with vibration), such as Optima JET80S, Pedrollo PLURIJET 4/200.
Surface pumps have more advantages than submersible pumps. They have more power and protection against overheating. Since they are larger (their size is not limited by the parameters of the well), they have more advanced filters and are cooled better. They are also easier to lubricate or remove when repairs are needed.
Submersible
Suitable for pumping water from 40-70 meters depth. They are placed at the bottom of the tower and from there they push the liquid up. The characteristics of a particular pumping system are determined by the consequences of the measurements taken. To do this, using the method described above, a rope with a load is lowered into the well. Add 3-4 m to the remaining dry part - this will be the height of the water jet. If it is up to 40 m, a unit with low power (indicated in the passport data) is suitable, and if higher, select a high-power pump.
The best choice would be a fully automated device: in case of overheating or voltage drop in the electrical network, it turns off itself. Models: Pedrollo 4SR8m/13 - PD 2.2, WILO TWI 5-306 EM, Gardena 6000/5.
Bottom line
You can drill a well yourself without using rented expensive equipment. You may spend a little more time drilling and arranging the source, but in the end you will get a high-quality structure made by yourself.
Pay special attention to the choice of pump, since the hardware is very important when working with water. You need a truly high-quality device that is easy to repair and maintain.
A sensational article on Vitaly Kostenko’s blog
Central water supply is a privilege for residents of urban centers. Even on the outskirts of a metropolis it is difficult to connect to communications. Or need to spend a considerable amount for laying pipes, or access to the benefits of civilization is physically inaccessible due to the distance of utility networks.
There is nothing to say about isolated villages. The only way to get water is to drill your own well. The main thing is to find a suitable place. We will tell you the details about this important process, provide visual diagrams and show a thematic video.

We represent the people, and therefore very effective ways searching for water in the area.
Method 1. Ordinary clay unglazed pot with capacity 1-1,5 liters are filled with a mixture of jari (a type of paint based on copper acetate), white incense (tree resin), sulfur and sheep's wool in proportions 4:4:4:5 .
Pot hermetically sealed and weighed. It needs to be buried in the proposed location of drilling a well to a depth 30-35 cm. After a day, the container is again sent to the scales and, if the mass of the pot has increased, then the water is nearby.
Instead of old recipe for absorbent composition can be used silica gel.
Method 2. If there are no water sources nearby, you need to observe the chosen location for the well. Evening fog above the “destination” indicates that there is water here. Than fog thicker- those closer water.
Method 3 will give a result close to 100 % . Can be drilled manually with a garden drill to depth 5-10 meters. If the presence of water in the well is obvious, all that remains is to complete the deepening work.

The more water, the more likely it is to build a well rather than a well. The nominal drilling depth is 10-15 m. The location for the well must be chosen no closer than 30 m from contaminated areas. It could also be artesian well, that is, an underground pressure source.

Manual drilling uses shock-rope and rotary methods or Abyssinian well. The simplest thing is rotary drilling. Required tools and materials:
Drill rods.
Winch.
Drill tower.
Casing pipes.
Winch on the tower the drill with rods (drill string) is lifted and removed from the well. If the water is shallow, you can remove the drill manually using a block on a winch. Also, instead of a winch, you can build a regular gate (like on wells). The drilling tower is made in the form of a tripod from scrap materials.

Drilling rods- these are pipes with a threaded or keyed connection. A drill is attached to the lower rod. Types of drills: spiral or spoon.
Spoon drill (spoon drill)

Spoon drill(spoon drill) - a metal cylinder with a spiral or longitudinal thread. Its axis is eccentric relative to the center of the rod. That is, the axis of rotation of the rod and the lower drill must coincide, but for the “spoon” it is shifted by 10-15 millimeters.
Thus, the tool makes a hole with a diameter greater than its own. This allows the drill to move freely in the casing pipes, which can be lowered directly during the deepening process.
Length Borax-spoons - 700 mm, the diameter is selected according to the dimensions of the well.
On video Here's an example of how to make a tool yourself:
Homemade spoon drill made from ordinary thick-walled pipe with hardening. It can be used for drilling in wet sand, loam, black soil, alumina, and so on.
Spiral type drill (snake)

Boer spiral type (coil drill) is made from a twisted metal strip of tool steel and resembles a drill. The lower end of the tool is equipped cutting edge, the pitch of its spiral is equal to the diameter. Can be used for drilling in clay and clay soils with gravel filling.
Drilling process

To remove liquid mud from a well, use bailer. Its valve closes when rising and retains the “silt”.
Above the future well tower is being installed higher than the length of the rod. At the first stage, the drill string includes one rod and a drill. After every 600-700 mm column needs to be removed and cleared of soil. As it moves, the length of the drill string increases by attaching an additional rod.

Such necessary operations, How column lifting, disassembling the rod, her assembly and return descent take a lot of time. Therefore, it is necessary to capture the maximum amount of soil with the drill. If drilling is carried out in loose soil, it will fall down from the walls of the well. Therefore, one should lower oneself into the “well” casing, but not to the very bottom, but at a distance 0,5-1 meter from it.
The video shows the process in detail mechanized well drilling:
As the casing goes deeper, it lowers lower. Drilling continues until the waterproof layer. It is necessary to completely penetrate the aquifer so that water enters the well in maximum volume(this point is presented very clearly in video at the end of the article).
Drops to the bottom of the well fine metal mesh filter. The lower part of the casing pipes, in the walls of which holes are drilled, also serves as a filter. Before installing the filter at the bottom of the well, you need to fill 30-50 centimeters of coarse sand or fine gravel. Water is supplied to the house through a pipeline using pump, so it is necessary to install cables and metal-plastic pipes.

Drill a well deep more than 20 meters manually it will be very difficult.
Any ready A well-maintained water well will last for decades. Service is checking fasteners, lubrication and adjustment of pump parts, electrical work and so on. Typically, the “technical inspection” takes place on site, without requiring dismantling of the equipment.
It is also necessary to carry out well insulation, or rather its upper part.

Materials such as polystyrene (foam), mineral or glass wool are best used if groundwater is located close, as well as when the soil is deeply frozen.
It is advisable to make the insulation layer thick 35-50 centimeters.
How to analyze water quality

Drinking water is standardized according to the standards of the World Health Organization ( WHO). You can familiarize yourself with them in the “Guide to Drinking Water Quality”.
Water purification from a well is carried out in special laboratories after determining the presence of impurities as a percentage. The analysis must be carried out regularly, since the composition may change due to seasonal and even daily fluctuations. Based on the results obtained, the water well is cleaned in the most appropriate way.
Well water purification

Universal well water purification system - reverse osmosis. Several types of impurities are removed at once, ensuring high quality liquid. Therefore, to completely get rid of iron, humic compounds, viruses and bacteria, only this system can be used.
After laboratory tests you need to contact specialists who will select the most effective cleaning system.
There are such types water filters:
Jug type. Contains activated carbon, which partially reduces the amount of contaminants in water. "Jug" can't delete a large number of inorganic, organic impurities and bacteria. The water is filtered slowly. After a month you need to change the cartridge.
Carbonic. Contains activated carbon, which effectively removes chlorine from water. Due to a possible interruption in the water supply, the cartridge often becomes clogged, so the composition of the water can become doubly toxic. Does not reduce the number of bacteria, viruses and inorganic impurities.
Ceramic. Helps purify water only from “garbage” of large fractions. Organic and inorganic substances, viruses and bacteria are not retained. In addition, the filter quickly becomes clogged with dirt. Therefore, it requires frequent cleaning and disinfection.
With reverse osmosis. Significantly reduces the content of harmful and toxic impurities in water. Mechanical barriers and a membrane purify the liquid almost perfectly, but useful minerals are lost and a distillation effect occurs. Therefore, you need to connect a mineralizer to the filter. Does not destroy bacteria and viruses.
Coagulation method. When coagulants are added, the water is divided into 3 layer. Light impurities collect in the upper one, and toxins in the form of sediment collect in the lower one. The middle layer is drinkable. Requires special equipment. At home, the process is dangerous, since toxic substances from other layers can enter the water.
At the end of the material, we suggest you look video, which shows the drilling work:
Drilling a well for water is complex and difficult, but interesting and exciting work. And, today, the most affordable way to establish an independent water supply: at the current cost of drinking water the costs of independent drilling, equipment and well development pay off in less than a year. Unless, of course, you take a barrel to the river in a wheelbarrow, risking a serious accident with something that would make the doctors’ eyes widen over their masks.
The earth and the water in it are a complex natural system. Therefore, there is no point in giving step-by-step instructions and step-by-step guides to the drilling business: anyway, in the depths, something will turn out to be wrong. However, miners have long learned to overcome almost any surprise in the underground world. And this article, based on this experience, provides the information necessary for a novice driller to ensure that, if not the first, then the second well with his own hands produces water in the required quantity of good quality.
Where to drill?
The general scheme of the formation of aquifers in nature is shown in Fig. Verkhovodka feeds mainly on sediments and lies within the range of approximately 0-10 m. High water can be suitable for drinking without deep treatment (boiling, filtration through shungite) only in individual cases and subject to regular testing of samples by sanitary authorities. Then, for technical purposes, the perched water is taken from a well; The well's flow rate in such conditions will be small and very unstable.

A water well is drilled independently into interstratal waters; highlighted in red in Fig. It is impossible to drill an artesian well that provides water of the best quality for a very long time, even if you have a detailed geological map of the area: the depth is usually more than 50 m and only in exceptional cases does the formation rise to 30 m. In addition, independent development and the extraction of artesian waters is categorically prohibited, to the point of criminal liability - this is a valuable natural resource.
Most often, it is possible to drill a well on your own into a gravity-fed formation.– sand soaked in water on a clay bed. Such wells are called sand wells, although the free-flowing aquifer can be gravel, pebble, etc. Free-flowing waters lie approximately 5-20 m from the surface. The water from them is most often drinkable, but only based on the test results and after pumping the well, see below. The debit is small, 2 cubic meters. m/day is considered excellent, and fluctuates somewhat throughout the year. Sand filtering is required, which complicates the design and operation of the well, see below. The lack of pressure increases the requirements for the pump and the entire water supply system.
The pressure strata lie deeper, in the range of about 7-50 m. The aquifer in this case is dense water-resistant fractured rocks - loam, limestone - or loose, gravel-pebble deposits. The best quality water comes from limestone, and such wells last longer. Therefore, water supply wells from pressure layers are called limestone wells. The formation's own pressure can lift water almost to the surface, which greatly simplifies the construction of a well and the entire water supply system. The debit is large, up to 5 cubic meters. m/day, and stable. A sand filter is most often not needed. As a rule, the analysis of the first water sample passes with a bang.
Note: But how do you find out which layer is available and accessible in a given place? The methods for finding water for drilling a well are generally the same as for. In the central zone of the Russian Federation, free-flowing water can almost always be found within the first 20 meters of depth.
Important circumstances

First: Mass uncontrolled intake of free-flow water can lead to the so-called. soil suffusion, as a result of which soil failures suddenly and unpredictably occur, see Fig.
Second: The critical depth for self-drilling on flat terrain in the Russian Federation is 20 m. Deeper - the cost of a custom turnkey well is less than the direct and indirect costs of a self-drill. In addition, the failure rate is close to 100%
Third: The service life of a well greatly depends on the regularity of water intake from it. If you take water little by little as you use it, a well for sand will last about 15 years, and for limestone up to 50 years or more. If you periodically pump everything out at once or, conversely, take it sporadically, the well will dry up in 3-7 years. Repairing and restarting a well is so complicated and expensive that it’s easier to drill a new one. If this circumstance surprises you, keep in mind that it is not a pipe in the ground that is being repaired, but an aquifer.
Based on this, we can already advise: if you find free-flowing water no deeper than 12-15 m, do not rush to rejoice, it is better to drill as far as possible to reach the limestone. And it’s best not to be lazy and carry out exploratory drilling with a needle well, see below. It is possible to make an igloo well literally in a weekend; complex and expensive equipment is not required. And it can also be a temporary source of water supply until you decide on a permanent one in terms of time, money, etc.
Note: a water well is called an igloo (more details at the link). You can literally break through it from the basement of the house, as in the video below:
Video: Abyssinian well in the house
Well or well?
It is known that digging a well is immeasurably more difficult, complex and dangerous work than drilling a well, as is the fact that a properly equipped well is repairable. But there is also a fundamental difference between them. Water is drawn from the well as much as the earth will give, i.e. how much will flow from the formation. And the action of a well is similar to drawing blood from a donor’s vein. That is why the service life of wells is limited and they can catastrophically change the geology of the area. A well can provide water for decades and centuries, and a well made in rocky soil can provide water for millennia, without in any way affecting the local ecology and geology. Therefore, private water wells are drilled, with the goal of either building a collective artesian water supply system (artesian wells are durable and environmentally friendly), or, having mustered the courage and resources, to dig a well. At the same time, the water supply system of the house is being built completely, because... In general, she just needs pressure, except for some nuances, see below. And the abandoned well is plugged with concrete mortar and the land around it is returned to the farm.Types of wells
A borehole is a long, narrow cavity in rock called a borehole. When drilling, a drilling tool (a drill bit or simply a drill) is lowered into a shaft on a rigid assembly rod made of pipes (a drill string or drill rod) or a cable. A pipe or several concentric pipes are placed in the shaft - casing (case pipe, case string) - protecting the walls of the shaft from collapse and maintaining rock pressure. The casing can fit tightly in the barrel or with some gap - the annulus; it is filled with backfill or clay (clay castle) or poured with concrete. The lower end of the trunk can be open, plugged, or end in a stepped narrowing - the bottom. An intake device is made at the bottom or in the bottom of a production well for liquid minerals. The upper part of the casing is called the well head. A set of devices that make up the well arrangement is placed around the head or in it. Of the many well designs, most of all the types shown in Fig. pass independently; a more detailed diagram of the well with casing is shown there, pos. 5.


1 – needle hole. The drill rod, casing and drill string are one; the drill remains in the ground. They pass the needle hole using the impact method, see below. A core driver, a set of drilling tools, and other equipment for drilling wells with a separate casing for a needle well are not required, see fig. on right. The penetration speed reaches 2-3 m/hour, and the maximum depth achieved in this way is about 45 m. Needle wells are used for constructing Abyssinian wells, especially in the country. The output of the needle well is small, but in the summer it is quite stable. Its service life does not depend on the intensity and regularity of water intake, but it is unpredictable: there are Abyssinian wells that have been providing water for more than 100 years, but they can dry up in six months. The needle well cannot be repaired; it can only be drilled in not very dense and homogeneous soils. The maximum diameter of the drill rod when drilling without a copter is up to 120 mm, which is sufficient for a submersible pump with a caliber of 86 mm.
Note: when drilling an exploratory needle well, it is better to use a simple filter, on the left in Fig.
2 – imperfect well. She seems to be hanging in the seam. It does not require sophisticated knowledge of geology and drilling skills, but the flow rate is lower and the water quality is worse than the maximum possible for a given formation. The water quality can be maximized if the well below is plugged. In addition, perhaps the so-called pulling the drilling tool and casing deep. Self-propelled wells are most often imperfect; much of the following material concerns them. Wells in thick aquifers are also drilled imperfectly, because when deepened into the formation by 1.5-2 m, the debit stabilizes and almost does not grow deeper.
3 – perfect well. The casing rests on the roof of the underlying waterproof layer. The flow rate and quality of water are maximum, but to drill a perfect well, precise knowledge of local geology and the experience of the driller are necessary, otherwise, firstly, the casing may be pulled into the underlying formation if it is plastic. Secondly, when drilling, you can pierce the litter, and the water will go down; this is especially true in dry areas with thin layers. Thirdly, just one incorrectly drilled well can cause serious damage to the local ecology.
4 – well with bottom. It can be either perfect or imperfect. The bottomhole makes it easier to maintain the well and makes it repairable to some extent, but experienced drillers must drill a bottomhole well according to the local geology.
Note: in some sources the bottom of the well is called a sump. This is also incorrect in German; the bottom of a well and the sump of a well are completely different things.
Drilling methods
You can drill wells yourself in the following ways:
- Rotary, or rotary - the drill bit rotates, biting into the rock;
- Impact - they hit the drill rod, deepening the drill bit into the rock, this is how needle holes are drilled;
- Impact-rotational - the rod with the drilling tool is raised several times and lowered with force, loosening the rock, and then rotated, taking it into the cavity of the tool, see below;
- Rope-impact - a special drilling tool is raised and lowered on a rope, taking away the rock.
All these methods relate to dry drilling. When hydrodrilling, the working process occurs in a layer of water or a special drilling fluid that increases the compliance of the rock. Hydrodrilling is not environmentally friendly, requires expensive special equipment and high water consumption. In amateur conditions, it is used in exceptional cases, in an extremely simplified and limited form, see below.
Dry drilling, except for impact drilling without casing, can only be intermittent, i.e. the drill has to be lowered into the trunk, then removed from it in order to select the rock from the drill. In professional hydraulic drilling, crushed rock is removed with spent drilling fluid, but an amateur needs to know for sure: it is impossible to drill a shaft to a depth greater than the length of the working part of the tool in one drilling cycle. Even if you drill with an auger (see below), you need to lift it and shake out the rock from the turns after a maximum of 1-1.5 m of penetration, otherwise the expensive tool will have to be given to the ground.
Casing installation

The attentive reader may already have a question: how do they install casing in the barrel? Or how do they raise/lower the drill, which, in theory, should be wider than it? In professional drilling - in different ways. The oldest is illustrated in Fig. on the right: the axis of rotation of the tool is shifted relative to its longitudinal axis (circled in red), and the cutting part is made asymmetrical. The neck of the drill is made conical. All this, of course, is carefully calculated. Then, in operation, the drill describes a circle extending beyond the casing, and when lifted, its neck slides along its edge and the drill slips into the pipe. This requires powerful, precise drive of the drill string and its reliable centering in the casing. As the casing deepens, it is built up from above. Complex special equipment is not available to amateurs, so they can install casing pipes in the following ways:
- They drill a “bare” trunk without casing to full depth with a drill of a larger diameter than the casing pipe, and then lower the casing pipes into it. To prevent the entire column from falling down, they use 2 drill gates: one holds the pipe that has already gone into the well, see fig. on the right, and the second one is installed on the new one before removing the first one. Only then is the column pushed into the trunk if it no longer moves. This method is often used by amateurs on fairly dense, adhesive (sticky) and cohesive (not loose) soils to a depth of 10 m, but there are no statistics on how many wells collapsed, how many drills and casing were lost.
- The drill is taken with a smaller diameter, and the lower casing is made with diverging sharpened teeth (crown) or equipped with a cutting skirt. Having drilled for 1 cycle, the drill is filled, and the pipe is forced to settle; a crown or skirt cuts off excess soil. This method slows down drilling, because before starting a new cycle, you need to use a bailer (see below) to select the crumbled soil, but it is more reliable, makes it easier to fill the annulus with gravel and allows you to use an external sand filter, see below.
Drilling tool
Now let's see which drill to drill into which soil and in what way, see fig. on right:


The cutting edges of all drills are made of hardened steel. Drawings of a homemade drill-glass, an analogue of a spoon drill (the cutting blades are installed by a propeller at an angle of 3-10 degrees) and a diagram of the bailer are shown in the following. rice. on right. The outer diameters of all these drills can be changed depending on the caliber of the well.
How do they drill?
Mobile drilling rigs that allow you to drill directly from the ground, like the one in Fig. left,

Unfortunately, they are not available for rent: their management requires professional training, and the very fact of ownership, albeit temporary, requires a license for drilling operations. Therefore, we will have to start the old fashioned way, in the Gorshchitsky way - with a homemade copra, unless the woman beats the needle well.
Koper
The simplest pile driver is a tripod made of logs or steel pipes in the form of an equilateral triangular pyramid - a tetrahedron, pos. 1 in Fig. below. This design is very strong and rigid with minimal material consumption. The height of a tetrahedron is equal to 0.8165 of the length of its edge, i.e. from ordinary 6-m logs, taking into account the depth of the pile driver's legs into the ground, a tripod with a height of about 4.5 m will be obtained, which will allow the use of casing pipe bends up to 3 m in length. In general, the height of the piledriver is taken 1.2-1.5 m above the maximum length of what will be lowered into the trunk.

The legs of the piledriver can be fastened together with a frame made of the same logs/pipes to prevent them from moving, but in order to save material, you can also dig 0.7-0.8 m into the ground, placing a piece of log about 1 m long horizontally under the heel of each - a bed. Assembling the copra tent on the ground, pos. 3, the legs are simultaneously (three or six of them) inserted into the pits with the beds and the soil is poured back, compacting it tightly.
Note: strengthening the legs of a piledriver directly on the ground with crowbars or steel rods driven in from the outside is extremely dangerous!

The pile driver is equipped with a lifting and drilling gate (pos. 1 and 2), a block with a hook (pos. 1, 2, 4) and a rocking lever for lifting the drill, cable-impact drilling, setting casing pipes and working with a bailer, pos. 2. The block hook and drills that have an eye (a ring for fastening the rope) are tied with an anchor knot (it is also called a fishing bayonet, pos. 1 in the figure on the right), and long loads are tied with a cargo knot, pos. 2 there.
Shurf
Having installed the pile driver, a hook with a compact weight (a sledgehammer, for example) is lowered to the ground, this is where the trunk will begin. Around this point they dig (hammer) a hole measuring approximately 1.5 x 1.5 x 1.5 m. In the hole, they also mark the starting point and drill the first 3-4 m with an auger, constantly checking its verticality. This is an extremely important operation; the fate of the entire well depends on the first meters! Further, if drilling will be to a depth of more than 7 m, it is highly desirable to install a conductor - a pipe with a diameter larger than the diameter of the annulus of the wellbore. The conductor is carefully aligned to the vertical and concreted.
Note: Attention! When choosing the dimensions of the well, drills and pipes, tie them to the caliber of the submersible pump! The gap between its body and the nearest wall must be at least 7 mm or according to the specifications for the unit. The most common caliber of household submersible pumps is 86 mm.
Prokhodka
Methods of drilling with different projectiles on different soils are described above. Problems can arise, in addition to boulders, with dense dry clay, this is a very harmful rock. You can deal with it in different ways, for example, as shown here:
Video: drilling water wells in dense clay

In general, rotary-percussion or cable-percussion hydraulic drilling is used to penetrate dense clay, see figure on the right. There is no need to pump water that is not yet available. You can simply pour several buckets into the casing, wait half an hour or less, and try which one takes better - a glass or a spoon. You don’t have to try it with an auger, the clay will take it.
Casing and column
The drill string is assembled from steel pipes with a diameter of about 80 mm and walls with a thickness of 4 mm. Whether you take ready-made drill elbows or make them yourself, pay attention to the connection method. Only connections with bayonet couplings are suitable for manual drilling! Threaded and locking ones of any kind are not suitable: the rod will inevitably have to be turned in the opposite direction at some point and the rod will unscrew and the lock will come apart during any type of impact drilling.
During the drilling process, as already mentioned, casing pipes are also installed. Nowadays, even in professional drilling to shallow depths, plastic casings have become practically no alternative, but you need to take special casings:
- Lightweight, you can move it alone.
- Withstand forced settlement and soil pressure with a force of up to 5 tf.
- They practically do not slow down the internal filter, see below, when installing it.
- They do not corrode or spoil water throughout their service life, up to 50 years.

The only thing that plastic casing is afraid of is damage from the inside by the drill rod. Therefore, it is advisable to use drill pipe centralizers, see fig. on the right, 1 for every 3-5 m of the rod. The cheapest ones are steel spring ones, they are quite suitable. As for the complex ones with turbulators, etc., they are for professional hydraulic drilling.
Sprinkling
As the casing deepens into the barrel, it is necessary to add fine gravel into the annulus. Gravel filling of a water well will greatly speed up its pumping and extend its service life. And a sand well without backfill may turn out to be completely inoperable.
There is water!
The achievement of the aquifer by a needle well is judged by the increase in the rate of penetration, and the presence of water is checked with a snare - a piece of steel pipe welded at one end and lowered into the well on a cord. With other wells it is simpler: as the drill once again brought out wet soil, it means there is water. It remains to be decided whether it is necessary to go deeper. To do this, use a centrifugal submersible pump (the vibrating pump will immediately clog in such slurry) to pump out several buckets. If the water in the 5th bucket has not noticeably brightened, you need to go deeper another 0.5 m (1 drilling cycle) and check again. If you have already gone 2 m deep, but the sample is still the same - that’s it, there will be no more debit, and you will have to put up with a long buildup. Also, if the rate of penetration suddenly drops (and it is very difficult for an inexperienced driller to detect it using any drilling method other than rotary), then drilling is stopped immediately - we are at the bottom of the formation, the well will be perfect.
Note: When drilling stops or is interrupted, the rod with the drill must be removed, otherwise it will be pulled into the ground.
Rocking up
A drilled well will not yet provide water in the required quantity and quality. To do this, it is necessary to either open the aquifer or pump the well. Opening up the formation allows you to get drinking water within 24 hours. It requires large amounts of clean water and complex and expensive equipment. Please note: autopsy is carried out using direct and reverse methods. In direct drilling, water is pumped under pressure into the casing and drilling fluid is pumped out of the annulus. When reversed, water is fed by gravity “behind the pipe” and the solution is pumped out of the trunk. Direct opening is faster, but it disrupts the structure of the formation more strongly and the well lasts less. The opposite is the opposite. Keep this in mind when negotiating with drillers if you order a well.
Bore pumping takes several days, but can be done with an ordinary household submersible centrifugal pump; vibration is not suitable for the reasons stated above. To pump, first remove silt from the well using a bailer; You can see how to use a bailer in the video below:
Video: cleaning (swinging) a well with a homemade bailer
The rest is not difficult: the water is completely pumped out every time there is enough of it to cover the pump. It is useful to raise and lower it several times on the cable rope before turning it on to stir up the residual sludge. The swing can be done with a manner, but scooping will take a lot of work, and it will take two weeks.
Note: as the rocking progresses, the gravel backfill will settle; it must be replenished by adding more.
The pumping of the well is considered complete when the transparency of the water rises to 70 cm. It is checked with a white enamel or earthenware disk with a diameter of 15 cm (saucer, saucepan lid) in an opaque vessel, for example. clean barrel. When the edges of the disk begin to blur during immersion, stop, it’s already opaque. You need to look at the disk strictly vertically. Once transparency is achieved, the water sample is submitted for analysis and, if everything is OK, the annulus is concreted or closed with clay, and a filter is installed.
Filter
A well filter is the main device that ensures the quality of water from it. And at the same time, it is the component most susceptible to wear, so the choice of a well filter must be taken with full responsibility.
Artesian water is taken without filtration. For a well on limestone, most often a simple lattice filter in the form of perforation on the lower bend of the casing is sufficient; it will also serve as the basis for a sand well filter. The perforation requirements are:
- The diameter of the holes is 15-20 mm, up to 30 mm depending on the ground.
- The filter duty cycle (the ratio of the total area of the holes to the surface area they occupy) is 0.25-0.30, for which the distance between the centers of the holes is taken to be 2-3 times greater than their diameter.
- The location of the holes is in transverse rows in a checkerboard pattern.
- The total area of all holes is not less than the cross-sectional area of the casing pipe lumen.

For a sand well, firstly, gravel backfill is necessary; in this case, it is precisely this that ensures long-term water quality, as in a well. In view of this, well filters with a layer of gravel included in the design are available for sale. There is no harm in them, but the wellbore needs a larger diameter, which makes drilling difficult, and without external backfilling, the well still quickly silts up.
Next, if you follow the flow of water, there is the same perforated pipe, but now it will be a load-bearing element that absorbs rock pressure. To prevent sand, which gravel does not retain well, from spoiling the entire water supply tract, you also need a sand filter. It can be external or external (on the left in the figure) or internal (on the right in the same place). External filters have three advantages: minimal diameter and siltation of the well and pump installation depth. But they are easily damaged during casing installation, are unrepairable and expensive, because... due to the latter circumstance, they must be made of very high-quality materials: alloys for the mesh and wire of external well filters are more expensive than silver.
When installing a pump in a well with an internal filter, its bottom is considered to be its upper edge, so the volume of one-time water withdrawal is seriously reduced. The problem with all internal filters is increased silting of the well due to water seeping into the gap between the filter and the casing. Also, as a result, the service life of the filter is reduced, and pump wear increases, because sand gets into it. Often, therefore, the pump is placed in a separate pipe mounted on the outlet of the filter, which again requires an increase in the diameter of the well.

The best option is to connect the pump directly to the filter outlet, then both silting and sanding will stop. But this requires a centrifugal pump with an intake pipe on the bottom, which makes it much more complicated and expensive, and the vibration pressure is often low for sand wells.
The filter elements of sand filters are sometimes made independently from PVC pipes, stainless springs and polymer mesh, see fig. on the left, but they filter poorly and do not last long. It’s better to take a good store-bought filter; its operating conditions are too difficult, and taking it out, as they say, is quite a task. In this case, there are basically 3 options, see fig:

- Polymer stacked ring filter. Cheaper than others, but lasts less and is prone to silting, but it is repairable: you can lift it and sort it out, replacing bad rings. Requires an increased well diameter;
- Tubular-wire with a winding of profiled wire. A little more expensive than polymer, but it lasts a long time and does not silt. Repairs do not require a bulkhead; just wash the top. It would be optimal if not for one “but”: cases of fraud by manufacturers, traders, and drillers have been repeatedly noted - how completely stainless filters are supplied, in which the longitudinal rods are made of ordinary galvanized wire. It is impossible to check without breaking the filter, but harmful impurities soon appear in the water, and then the rods completely rust, the winding slips, and the entire filter has to be replaced.
- Support-free welded filters, wire and slot. They would be ideal (the latter can withstand settling into the barrel from the outside on the pipe), if not for the price: they are made from the same profiled stainless wire that costs about the same as silver.
Arrangement and automation

To supply water to the house, a well must be equipped and mutually coordinated with the water supply. The arrangement of water supply wells has undergone radical changes in recent years. The traditional scheme (see figure on the right) - a caisson, concrete or steel, or stone pit, which requires a large amount of additional excavation work and usable land area for itself, is becoming a thing of the past. Nowadays, water wells are increasingly equipped with well adapters, see fig. below. Installing the adapter is quite a painstaking task, but it is incomparable with a caisson-pit sweep:
- As soon as the water begins to flow, they judge by the speed of its clearing how much further it is possible to go deeper, and cut the last casing pipe to size from above.
- Before installing it, make a trench to the house to a depth greater than the standard depth of soil freezing.
- A hole for the adapter is drilled in the pipe in advance and installed, plugging the pipes. If you place it directly in a well, it may gurgle there.
- They place the pipe and drill further, orienting the outlet of the adapter into the trench at a depth greater than the freezing depth.
- They rock the well, install the filter, lower the pump, connect the pump supply pipe and the transit pipe to the house to the adapter fittings, and lay the pump cable.
- They put the well cap on, when the water has flowed into the tank, fill up the trench - that’s it.

Water supply to a private house from a well has its own characteristics, but they will not prevent you from later connecting to a collective water supply or drinking water from a well. You won’t have to redo anything, it will only be more reliable.
First, you need a pressure storage tank. The flow rate of a non-artesian well may, for unknown reasons, drop until it stops completely, and then the water flows again as if nothing had happened. Secondly, downstream of the tank along the water flow you need at least a 2-stage membrane filter. In public water supply systems, water quality is continuously monitored, which is not the case at home. What if there is a man-made accident or an unauthorized discharge of pollution somewhere in the reservoir’s recharge zone? Everyone had already forgotten when it was, and the bad water had just reached the well.
Finally, the home water supply must comply with the principle of gradual, uniform water withdrawal, which was discussed at the beginning. Cooperating with neighbors, as when building a common septic tank, is not the best solution in this case. Suddenly there won’t be enough debit for everyone, instead of a community there will be squabbles. Those. we need automation that turns on the booster pump as soon as someone somewhere opens a tap.
There are 2 options here. The first is a pressure tank with a float valve in a warm attic. All automation consists of a rod that passes in a sleeve through the tank cover and rests on the float lever, and a 6-10 A microswitch (micrik) with normally closed contacts in the pump power supply circuit. While the tank is full, the rod presses on the microphone lever, the pump is de-energized. As soon as water began to flow into the house, the rod dropped, the microphone went off, and the pump started pumping.
However, firstly, you need to insulate the attic, which costs a lot of work and money. The second is a pump, it will require an extra 4-5 meters of pressure, and for a 2-story house, all 8-9, so the pump turns out to be expensive. Thirdly, a leak in the tank or a malfunction of the float will at least lead to the ceiling getting wet. Therefore, modern automation for water supply wells, controlled by a microcontroller that monitors flow rate, water pressure and the frequency of turning on the pump, is still cheaper and more reliable. House plumbing is then carried out with a sealed membrane storage tank in the basement.
Afterword
The drilling masters who once developed Tyumen and Urengoy are still alive. There were no geophysical equipment that built a 3D picture of what was in the ground on a computer display, and there were no fully robotic drilling rigs at that time, but they already saw through the earth with their intuition, experience and were on friendly terms with all the spirits of the subsoil. And the then ministers and members of the Politburo, who had more arrogance than the old Testament boyars and appanage princes, addressed these aces as “you” by name and patronymic and respectfully shook their hands.
So, any of the old bison drillers have failed wells, which they are not ashamed of - that’s how they work. What then should we say to beginners who act independently? Don't be discouraged by failure; suddenly the first well turns out to be empty, or collapses, or the drill gets stuck. Not without that in the drilling business. But frustration and disappointment will instantly subside under the powerful pressure of, as they say now, positivity, as soon as your well produces water.
More and more people are thinking about drilling a well on their property.
Everyone can quickly make a well at their dacha, independently and correctly, both with a pump and manually.
But this process is complex, as it is often performed using special equipment and requires knowledge and compliance with certain nuances.
There are several reasons for installing a well on your site:
- Own water source at the dacha.
- Independence from utilities.
- Access to water 24/7.
- Pure water without chlorine and heavy metals.
- We drilled it ourselves once and for years.
Let's look at the question of how to drill a well with your own hands in all details: types of drilling, nuances and the drilling process itself for practical implementation.
We are not talking about a well, since this is a different type of well, which does not always justify the investment of time and labor.
There are several ways to quickly and correctly drill with your own hands.
Let's look at them in detail so that you understand not only the essence of drilling, but also the options for choosing a method in relation to your dacha.
Shock-rope
A special drilling rig breaks the rock, first rising to a height of 2 meters above ground level. The operating principle is reminiscent of the piston stroke in an engine: rise, strike, rise.
When drilling in this way, it is worth constantly pouring water into the well so that the walls do not crumble, and the rock in the well is softened and easily extracted.
When percussion-rope drilling, a tripod 2 meters high is needed, it stands directly above the drilling site. At the top of the tripod there is a block with the help of which the cable with the drill is pulled up and lowered.
You can easily drill up to 20 meters deep in a day. You can do without a tripod yourself, but you will be physically exhausted. Do not listen to such advice from “home-grown” drillers.
Watch the video: the tripod is very easy to assemble, and its role is invaluable.
Impact-rotational
The method is somewhat similar to the one described above.
The difference lies in the nature of the movement of the drill in the well - it does not just strike, but also rotates.
Soil is removed using a special bucket.
If the soil at the dacha is dense, then it is better to use this type of drilling.
Screw
The most common method that uses an auger is a metal rod with a screw thread along its entire length.
The auger has the advantage: it destroys the soil in the well and then brings it to the surface.
Auger drilling is performed in one of 2 ways:
- 1st – the blades are welded to the auger at an angle of 90 degrees. Disadvantage: the soil will still fall off the drill and will have to be removed separately;
- 2nd – the blades are welded at an angle of up to 70 degrees. No soil will get inside the well when extracting the drill, so this method is more profitable. You just need to have the necessary auger.
Please note that in order to drill a well quickly, correctly and without breakdowns, you need to supply water directly into the well itself, as it reduces the temperature of the drill itself and softens the soil in the well.
As a result, you can always pump it out yourself.
Core
This method is performed using a core bit, which looks like an upside-down empty glass with metal teeth.
When rotating and passing through the earth, the bit forms a well of the required diameter. All collected sludge accumulates in the bit and is then carried to the surface along with it and sand.
It is enough to hit the bit correctly with a mallet a couple of times, and it will immediately empty the entire “reserve” of soil from the bottom of the well. If the soil does not go, pick it with a rod. Only a clean drill can be loaded.
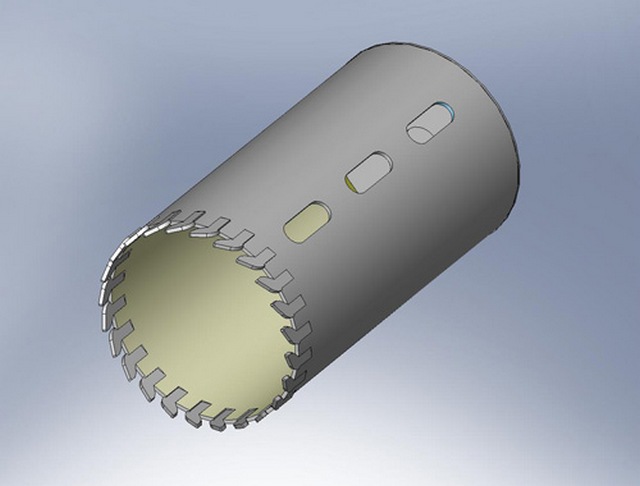
When drilling, water is poured into the bit through a pipe, which softens the soil. The core approach is suitable for any soil.
To summarize: of all types of drilling, auger drilling is less effective, although it is easy to do independently.
The auger is suitable for softer rocks; for hard rocks, only the impact-rope method or the impact-rotary method.
Types of wells
There are several types of water wells. Each has its own terms of use.
Well on sand
With a depth of 15 to 30 meters, such a well is drilled using an auger method.
The well in this embodiment is a pipe with a diameter of 10 to 12 cm, at the end of which there is a filter in the form of a perforated pipe wrapped in mesh.
When drilling a well, you need to find a layer of so-called aquifer sand and install a filter. Otherwise, such a layer is called a water lens.
The thicker the lens, the greater the well's flow rate - you will get more water per unit of time. The service life of a well reaches up to 20 years; in winter, the well can be mothballed.
Rarely does a well silt up - in this case, it is enough to clean it with either a powerful compressor or an injector. The last option is preferable.
Advantages of a sand well:
- low cost of drilling;
- drilling takes only 1-2 days, even manually;
- you can drill in hard-to-reach places, in the countryside, with small-sized installations;
- the water is not cloudy - no complex purification system is needed;
- Well licensing and registration are not required.
There are only two disadvantages: low durability compared to artesian, instability of water level and well flow rate. Water runs out quickly and takes a long time to fill.
At the same time, it is rarely cloudy, but is supplemented with sand - therefore a filter is needed. In a summer cottage, muddy water is only suitable for irrigation.
Artesian well
When drilling, a filter is not used.
Water accumulates in limestone layers, but it is not cloudy: porous limestone contains water and actively filters it, and its flow rate is up to 10 cubic meters per hour, which is a lot.
The service life of such a well can be tens of years!
Another advantage of such a well is that the water will not contain ammonia, microbes, suspended matter, and will not be covered with sand, so even a simple “Malysh” type pump will cope with the task.
Advantages of an artesian well:
- a certain depth (the geological map of the area is well studied);
- huge water yield, the water is rarely cloudy;
- durability - 30-40 years;
- constant water level;
- You can install a powerful pump at your dacha.
True, there are a number of disadvantages: drilling takes up to 7 days (but don’t do it manually!), it is necessary to purify the water in the well from high concentrations of minerals, and sometimes permitting documentation for drilling is required.
There is also the familiar well and its Abyssinian variation. We do not consider them, because technically they are not drilled, but dug, and the water in them comes from the ground differently.
There is always a risk of contamination from outside in a well.
Do-it-yourself well drilling
The drilling process consists of 3 stages. The description is followed by a detailed video of the process.
Stage 1 – preparatory work:
- We find out from the land committee or from neighbors the depth of the water layer;
- Get ready for machine drilling - it is impractical to work manually in a well at a depth of 20 meters;
- All sources of sewage should be located as far as possible from the place where you will make the well;
- The diameter of the well is always slightly larger than the diameter of the casing pipe - 10-12 cm. Prepare the pipes in advance;
- We dig a guide recess in the selected area: a hole with a diameter and depth of 1.5 m. We strengthen its walls with slate or metal sheets so that it is not covered with sand.
Stage 2 – assembling the tripod for drilling:
- We take 3 metal pipes or very strong timber, the length of the part should be 4-5 meters;
- We place the structure on the ground so that two legs are turned in one direction, and the third in the opposite direction;
- In each leg you need to make a hole for fasteners;
- We fasten the legs in the shape of a triangular pyramid;
- At the top of the tripod we place a block along which the cable will slide freely;
- We install a mechanical winch, which we will use to move the drill manually (an electric one is possible);
- We secure the cable and attach the drill on top.
The tripod is ready.
Stage 3 – drilling:
- We take a tripod with a winch, a driving glass, a rope (cable) and a shock rod;
- We place a tripod, on top of it - a winch with a projectile over the dug hole, directly above the drilling point;
- We lift the glass with a winch above the drilling point and lower it with force. A tool driven into the ground grabs the soil with a glass. When lifted, the sludge remains inside the glass. We take it out - this should be done after each lift;
- We continue to drive the drill into the ground with the impact rod. When it is full, take it out and shake out the soil;
- When passing a certain step, say 1 meter, we immediately insert a casing pipe whose diameter is slightly larger than the diameter of the drill itself. It prevents the well from collapsing;
- As soon as the auger lowers to the entire length of the projectile, we attach an additional rod to it;
- When drilling, we constantly check the evenness of the laying of the entire column: if you hear the sounds of the drill hitting the pipe walls, the barrel must be straightened immediately. How to do it: drive wooden wedges between the casing and the wall;
- Once the projectile has passed the aquifer, we do not bury the pipe further. After the water arrives, wait 1 hour, then pump it out with a garden pump and check for cleanliness. Repeat this until the water becomes clear;
- We pumped out the water in the improvised well for the last time - leave the well until tomorrow;
- The next day, we measure the flow rate of the well: we multiply the depth of the well in meters by the pump capacity (cubic meters per hour) and divide the result of the product by the difference between the dynamic and static water levels. Static level is the distance to the surface of the water (we lower the load on a rope into the water and measure along the length of the dry part of the rope), dynamic level is the distance from the surface of the earth to the water, but after pumping it out. If the difference between the two levels is small, then the well’s flow rate is very large. This means that more water comes in per unit of time than the pump is able to pump out in the same unit of time. The pump body always indicates its power - cubic meters per hour;
- If the flow rate is several cubic meters, then cover the bottom of the well: fill a layer of gravel or crushed stone, 20-30 cm wide;
- We fill the entire space between the wall and the casing with gravel and sand;
- We immerse a pump in the well (any pump, even a budget “Kid”, will do a great job) according to the manufacturer’s instructions and attach it to the surface, supply power;
- We connect the hose, disassemble the tripod and winch.
Important point! This point is not indicated in the video, but it is significant: it is better to take the first extracted, already clean water to the laboratory so that a series of tests can be performed on it - it may turn out to be completely unsuitable for drinking and contain traces of heavy metals, pathogenic organisms and an increased amount of minerals.
Conclusion
Now you know how to drill a well with your own hands at your dacha.
Pay attention to the process itself: in the video, all the work is done at home using equipment that can be borrowed from neighbors or rented for a couple of days.
After drilling, using a pump, you can organize water supply to any point on the site, even to your house.
Place a simple submersible “Malysh” in the well and it will easily cope with the supply of water in the required volume.