Foundation on floating soil. What is a floating foundation, when and where is it used? Creating a reinforcing frame
Various types of foundations are used to build houses. On our construction portal website we talked about two main types of foundations: and. But, probably, you have heard more than once about this type of foundation as floating. In this article we would like to supplement our base with this type of foundation.
What is a floating foundation
A floating foundation is a special type of foundation that consists of a solid monolithic reinforced concrete slab. This slab is made at the construction site by pouring concrete onto a previously prepared surface with mounted reinforcement, which acts as the slab frame.Now let's look at this in more detail. So, a floating foundation is a kind of large solid slab that acts as a foundation for a future building. As you understand, the building itself, no matter what it is, is quite large in size, so there is no point in buying and transporting a monolithic slab for the foundation, it’s easier to do it yourself, and taking into account the fact that sometimes construction planned on a monolithic slab involves the area is several square meters, then a monolith of this size needs to be poured only independently.
In what cases is a self-leveling foundation made?
A floating foundation is used if there is a high groundwater level in the area where the building will be erected. That is, if you initially know that literally a few meters above the surface of the earth there is groundwater on your land plot, or in the process of digging a pit for a strip foundation or digging holes for a columnar foundation - you came across water, then the only option for the foundation is - monolith.
Please note: a floating foundation should be used only as a last resort if you have a high groundwater level and the two previous types of foundation are not suitable for your area.
You should also take into account that in a building based on a floating foundation, there cannot be a basement, this goes without saying. As a rule, the foundation slab is the floor of the building, so initially, when pouring concrete, try to immediately level the surface of the slab so as not to incur unnecessary waste.

How to make a floating foundation
It is very easy to make a floating foundation with your own hands, but before doing this you cannot do without consulting a specialist. Why? Any mistake made at the preparatory stage and during its filling can become, no matter how loud it may sound, fatal. In view of the fact that the building will be erected on an area with a fairly complex type of soil, it is necessary to take into account how deep the pit should be dug, as well as what layer of foundation to fill.Floating foundation device
Now let's directly look at the design of a floating foundation. To begin work, you need to decide on the location of the future building. After this, a specialist must study your soil and make the appropriate calculations and draw up a plan. Based on this plan, you will proceed further.
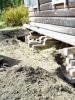
First of all, it is necessary to dig a pit; its depth will be indicated in the drawn up plan. A few words should be said about the depth: if the soil allows it, then the pit can be dug deeper, but if the groundwater level is very high, then the pit itself is not dug, but for this purpose the top fertile layer of soil is only removed.
When the foundation pit is ready, it is necessary to prepare the foundation. To do this, a sand cushion is poured onto the surface of the pit; in some cases, sand and gravel are used. When the surface of the pit is filled, it must be compacted very well, with periodic watering so that the sand is well compacted. This will be your so-called monolithic pillow.
Then you need to put a layer of waterproofing material. Bitumen-polymer materials can be used as waterproofing. In some cases, polystyrene foam may be laid, but again, all this will be told by the engineer who will draw up the plan for you. After laying the waterproofing material, we proceed to the construction of the frame for the monolithic slab.

Reinforced rods are used for the frame; a two-level mesh is made from them. The rods can either be welded to each other or connected with twisted wires and plastic latches. Place the first level of mesh a few centimeters above the level of the base so that the base of the slab is concrete and not made of mesh. The second level can be made from curved rods, attached to the first level and fixing the second one on them, or using special inserts. These curved rods must be dispersed in different places so that they can withstand the pressure of the concrete and not bend before it hardens.
How to pour a floating foundation
To fill the floating foundation, wooden formwork is first constructed around the perimeter. Then the concrete is poured. If you have a small slab area, you can prepare concrete yourself by purchasing or borrowing a household concrete mixer. If the construction area is quite large, then concrete must be purchased by ordering a machine with it.
The foundation is designed to distribute the load on the ground. Thanks to this, it is possible to avoid problems with soil subsidence, as well as other difficulties. In practice, builders now use a variety of types, this allows them to choose the most optimal option for each individual case. In this case, a floating foundation is often chosen. Let's take a closer look at what it is, as well as how to properly equip it.
What is a floating foundation
For heaving and swampy soils, it is permissible to use shallow or non-buried foundations. This is stated in SP 50-101-2004. This variety is called floating, which is due to a number of technological features.
As a rule, such bases are made in the form of a non-buried slab with high-quality reinforcement. Thanks to clearly calculated parameters, it is possible to avoid distortions during soil heaving. In this case, the slab simply rises evenly. In some cases, a lattice or columnar base is made using the same principle.
Laying depth
As already mentioned, this type of base is not buried. This allows you to significantly save on construction, but also without losing quality. The construction process itself is also simplified. In general, cost savings during work are 30-40%.
The recommended depth is 20-25 cm. But do not forget about the need to arrange a crushed stone-sand cushion; it must be at least 40 cm thick, which will ensure the stability of the created structure. But, here a lot depends on the characteristics of the chosen one; if it is shallow, then the depth is increased to 35 cm, so you will get the most optimal characteristics.
Types of floating foundations
In practice, you can find several types of floating foundations. This allows you to select the most optimal solutions for construction, because each type has its own characteristics. Take this fact into account when creating a project for your future home.
It is also necessary to determine the type due to the calculation of the required materials. Indeed, in each case a certain amount of materials will be required, and the requirements for them will be different. This is usually indicated in the project documentation.

floating slab
This type is considered the most optimal; it is quite durable, and at the same time can be installed at a low cost. Some disadvantage of this design is the loading of the mass of the building, but this drawback is avoided by correct calculation of the material.
In practice, you can find several varieties of such a foundation:
- Caisson slab. Rarely used, distinguished by the presence of a basement.
- Bowl. Standard type, characterized by increased strength.
- Inverted bowl. It differs from the previous version by the presence of cast stiffeners along the edges.
Each of the listed types is suitable for different cases. For example, a caisson slab will be convenient if you need to make a small cellar, and an inverted bowl is optimal on soils with high mobility.
Floating columnar

This type is considered one of the cheapest. But, it cannot be used on clayey and swampy soils, but it can be used on sand and/or rocky soils. It can be used in several types, but all of them are characterized by high survivability under conditions of regular soil displacements. Well suited for buildings made of logs or timber. Some disadvantage is the lack of a base. Therefore, you will need to make a “pickup”.
Floating grille

An invariable requirement for a non-buried foundation is sufficient strength. In practice, this is achieved by casting in the form of cross-shaped partitions or lattice. The second method is used in the construction of large buildings.
This technology costs slightly less than a full-fledged stove. But there is a drawback: they are less reliable, which in many cases is critical. Therefore, it was not widely used.
Foundation construction according to slab type
Of all the above, the best would be a slab foundation. It is characterized by high reliability and ease of construction. Here it should be taken into account that such a foundation must be created strictly according to technology. Otherwise, reliability will be poor.
During construction, provide for the introduction of communications in advance. After all the work is completed, this will not be possible. In some cases, stiffeners are installed, which allows saving on the thickness of the slab. Insulation must be carried out; if it is not done, problems will arise in the winter. Next, we will consider the option of constructing a tiled base.
Site marking

The arable layer has a high tendency to subsidence; therefore, the construction of any foundations resting on it is prohibited. Any work begins with marking the site, as well as subsequent removal of the surface layer of soil.
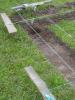
The initial marking is done simply; for this, stakes are driven into the corners of the proposed foundation and a rope is pulled between them around the perimeter.
Attention! On each side it is necessary to retreat 1.2-1.5 m from the proposed slab. This will allow you to make a blind area without any difficulty. Also, with this approach it is more convenient to connect some communications.
Digging a pit
This is a rather complex and important procedure. Often, various mechanized means are used for this, for example, a bulldozer or excavator. Now there is mini equipment that can be used to perform work in small areas.
After excavating the main part of the soil, the area is leveled. Be sure to ensure exact compliance with the project requirements. The pit is prepared with the expectation of constructing a cushion of sand and crushed stone.
Also at this stage, the laying of communications is prepared. Here it is worth considering their features. Even insulated water and sewer pipes should be buried to protect against freezing to a depth of 1-1.5 meters, depending on the region. Drainage wells are also installed in the corners of the future building.
Installation of formwork

This stage is quite important. In addition to the direct work of installing the formwork elements, other equally important actions need to be done.
First prepare the pillow. To do this, a layer of crushed stone is poured onto the bottom of the pit, and a layer of sand is placed on top of it. Each of these layers must be compacted with a vibrating plate. On some soils it makes sense to lay first. Extruded polystyrene foam is placed on top of the finished pillow. It serves as insulation, which prevents problems with soil swelling. You can do without insulation, but in this case the thickness of the slab is increased to 40 cm.
- Board or plywood panels;
- Polystyrene L-block.
If wooden panels are used as formwork, they should be made 10 cm above the design level of the slab. Polystyrene blocks perform the function of additional insulation of the foundation.
Reinforcement

It is important to carry out the reinforcement correctly. To do this, use reinforcement 10-15 mm in diameter. They are laid in one or two layers, depending on the thickness of the slab. The distance between the rods is 30 cm, but it is recommended to place them more often under load-bearing walls.
Concrete works

To prepare the solution, mixers of different capacities are used. During work, it should be remembered that no more than 2 hours should pass between pouring different batches of concrete. If it is not possible to fill during this time, then the dividing sides should be prepared in advance, and it is important to make them so that grooves are formed. They will allow you to firmly connect parts of the slab that were poured at different times.

After pouring and gaining initial strength, the foundation should be waterproofed. At the moment, several methods are used.
- Coating with bitumen-based mastic. A significant disadvantage is the limited service life.
- Pasting with fiberglass with a double bitumen layer. This treatment costs more, but can last up to 80 years.
Common Mistakes
The main mistake is neglecting waterproofing. In this case, the concrete is saturated with moisture in the fall and spring, and is destroyed upon subsequent freezing. It is also necessary to monitor the quality of the concrete mixture
On unstable soils - unstable, heaving, swampy - a floating foundation (otherwise known as a floating reinforced concrete slab) is often used as a foundation for structures.
A floating foundation is a strong solid foundation with high load-bearing capacity, which protects the building not only from mechanical influences from the soil, but also from groundwater.
Floating foundation - what is it?
The word “floating” does not mean that the plate is actually moving somewhere (floating). This means that, unlike static foundations (for example, piles), which resist loads due to high resistance, it compensates for destructive forces with its own plasticity and shock absorption. When the soil subsides, the slab makes vertical vibrations along with the building.
The slab is placed in a pre-prepared pit. Foundation structure on floating soil:
- sand cushion;
- waterproofing layer;
- layer of reinforced concrete.

The thickness of the pillow can reach 2/5 of the total thickness of the foundation.
Disadvantages of a floating foundation
The main disadvantages of this technology are economic and organizational:
- high price;
- labor intensity – large volumes of concrete and earthworks;
- the need for heavy equipment. Depends on the scale of the work: for a small house, you can make concrete yourself and dig the pit by hand. But a concrete mixer will be required in any case, because... It is recommended to fill the slab in one go;
- long construction times. It only takes a month for the concrete to mature. That is, another month after the completion of the main work.
DIY floating foundation
If you install a floating slab yourself, you can save a lot of money. When preparing a pit, keep in mind that, in accordance with regulatory requirements, the distance between the house and the neighboring property must be at least three meters. A minimum of five meters is left to the frontal boundary.
First you need to mark the site. For marking you will need:
- hydraulic level;
- roulette;
- marking cord or fishing line;
- pegs;
- a right triangle with legs of 30 and 40 centimeters, you can make it yourself.
A triangle is placed on the starting corner peg and both directions are marked along it. When marking the length and width of the pit, use a cord and pegs.

Control measurement - along the diagonals of the resulting rectangle: they should be equal, the difference is no more than two centimeters.
The next stages are cleaning and excavation. Remove dirt, remove turf. In addition to the area inside the perimeter, the turf around it is removed with an indentation of about a meter to create a blind area. When digging a pit, you need to monitor the depth and control the level.

If a dig has formed somewhere, the excess is covered with sand. The walls of the pit are made with a slight slope so that they do not crumble in the future.

When the preliminary work is completed, proceed to the installation of a floating foundation:
1. Pour a layer of crushed stone. Compact.

2. Layer of sand. Compact and pour water on top to settle and compact. Dry.
3. Waterproofing. Thick polyethylene will do.

4. Thermal insulation, if provided for by the project.
5. Footing. Some cheap brand of concrete will do.
6. Formwork. If the soil is dense and the slab does not protrude above the walls of the pit, you can do without formwork. Otherwise, walls made of boards (plywood, polystyrene foam, etc.) are installed vertically along the perimeter of the pit and carefully fixed inside and outside with supports. Fixation is needed from the inside so that the walls do not deviate from the vertical, and from the outside so that they are not bursting with concrete. The board for choosing is 2.5 cm thick.
7. The walls can be sealed from the inside with waterproof cardboard or roofing felt.

This article talks about floating foundations. Attention is paid to its strengths and weaknesses.
No structure will stand without a foundation. It is selected individually for each building and calculated based on the load. In this article we will talk about the types of foundations and dwell in more detail on its floating variety.
Types of foundations in construction
There are several types of foundations in construction. Each of them is intended for a specific case. Let's talk about each of them in more detail:
Strip foundation. Most common in low-rise and private housing construction. They are a concrete strip with reinforcement. It is located along the perimeter of the entire building. This foundation is perfect for houses with basements and garages. On such a foundation you can build both heavy brick houses and light ones made of wood. In the first case, it will be deepened, but for the construction of light structures a strong deepening is not required.
Columnar foundation. The name speaks for itself. It is erected by placing pillars in the corners of the building and at the intersections of walls. Between the pillars, lintels are made of concrete, brick or rubble. With such a foundation, it is impossible to install a basement in the house. In addition, it is suitable for the construction of light houses. It is best to build a columnar foundation on stable soils.
Monolithic. It is a single slab poured from concrete with reinforcement. This option gives freedom of planning and protects the structure from deformation due to soil subsidence. Its installation does not require special equipment, which allows you to carry out the work yourself.
Knowing the strengths of each type of foundation, you can easily choose the one suitable for building your home.
Foundation project
Drawing up a foundation project is the basis for building a house. All communications are marked on it, the basement is planned, and geotechnical surveys are taken into account. In addition, the number of storeys of the building and the material of construction are taken into account. All this influences the choice of foundation type. When planning, it is necessary to take into account that the cross-section of the foundation must be the same along the entire length of the external and internal walls. As already mentioned, the basement must be planned in advance. Another important factor that must be taken into account is the depth of soil freezing. Also be sure to take into account the reinforcement. After all, by calculating all the parameters, you will protect the foundation from subsidence and damage from soil mobility. If you find it difficult to design a floating foundation on your own, seek help from specialists.
Floating foundation
This type of foundation is used on moving soils or heavily swampy areas, where other types cannot be built, and is a type of slab foundation. It is also called a floating slab. It is in the strong reinforcing plate that the meaning of this variety lies. The load is distributed evenly over its entire area. And most importantly, no soil movements will affect the house.
floating foundation technology
The beginning of the construction of this type is no different from all others. First you need to mark it.
For this you will need:
- roulette;
- cord;
- building level;
- right triangle (you need to make 4 pieces for each angle).
We start by marking one corner, driving a peg into the ground. We attach a triangle to the peg and continue the line, measuring the length of the building on one side, its width on the other, and install the remaining pegs. Then you need to connect the pegs with a cord.
The next step is preparing the pit. To do this, remove the top layer of soil with vegetation, adding one meter on each side. This addition is needed for the blind area, which is made of concrete or asphalt, designed to protect the foundation from the effects of precipitation. The depth of the pit is strictly regulated by the house design and is individual for each case. We must remember that you need to dig it strictly to a given level, no more and no less.
floating foundation disadvantages
Despite all the advantages of this foundation, one cannot do without disadvantages.
These include:
- use of heavy equipment (excavators, dump trucks, concrete mixers);
- significant costs for building materials;
- exact dimensions of the pit (a depth greater than planned by the project can lead to cracks in the slab and destruction of the house).
Based on the above, it is necessary to strictly observe all dimensions and order special equipment in advance to facilitate the work.
how to properly pour a floating foundation
When pouring such a foundation, it is necessary to prepare a pit. This can be done in the following way. We fill in a layer of crushed stone 10 cm thick and compact it well. After this, we fill in a layer of sand and compact it using a special vibrating tool. After this, you need to lay a thick plastic film. If desired, you can lay a thermal insulation layer of polystyrene foam. Next, pour a thin layer of concrete. For this you can use the cheaper M-100 brand. The result will be a so-called concrete slab.
Now we install the formwork. We knock down shields from boards 20-25 mm thick and install them on the bottom of the pit. Moreover, they must be insulated with roofing felt or other waterproofing material. It must be taken into account that the width of the shield should be 5-10 cm greater than the height of the future foundation. The next step is reinforcement. All reinforcement must be well fastened together to form a single structure. Where the walls are located, the reinforcement must be brought out. In this way, the walls and base will be firmly connected to each other. The final stage is concreting. It is necessary to pour the solution in several stages 15 cm thick, leveling and compacting them well. The solution must be tamped until a shiny layer is obtained. A wooden strip may be useful for leveling.
On the first day, the poured foundation must be carefully monitored. It is watered with water at intervals of 4-5 hours, and also covered with film. This helps it dry evenly. Every day the frequency of moistening the slab decreases. Ideally, the foundation should sit for about a year, in other words, by pouring it this year, you can build a house next year. The minimum period from the construction of the foundation to the construction of the walls is a month.
House on a floating foundation
If you decide to build your house on a floating foundation, then you must follow the technology. We list the main mistakes that should be avoided when constructing it:
- you should not build a foundation above the freezing depth;
- Filling work should not be carried out in the cold season when the soil is frozen, this can lead to sagging of the slab;
- You should not skimp on waterproofing, otherwise the foundation will begin to actively absorb moisture, which will freeze in winter and lead to its destruction.
Taking everything that has been said into account, you will build a high-quality foundation and the house will stand on it for decades.
This article talks about floating foundations. Attention is paid to its strengths and weaknesses. Recommendations are given for preparing and pouring the slab. Using the information in the article, you can make this foundation yourself and build a house on it. published
The design of shallow and non-buried building foundations is permitted. They are called floating foundations due to their structural features. All of them have a large supporting surface (slab or grate) and powerful reinforcement. Therefore, when individual sections of the soil swell unevenly, the slab moves, then falls into place after the soil thaws.
A slab on clay soil, which swells when frozen, actually floats in the absence of an insulated blind area. The default slab is a ground floor, which makes it impossible for the soil to freeze under the middle part of the base of the house, which leads to undesirable consequences:
- the ground around the perimeter freezes and swells;
- in the middle part there is sagging, sometimes up to 15 cm.
In this case, a floating foundation requires powerful reinforcement and an increase in thickness to ensure bending rigidity.
Some experts believe that to equalize the temperature field under the base of the building, a layer of rigid extruded polystyrene foam (not lower than XPS grade) is needed along the entire perimeter of the slab (layer 10 - 15 cm). Others are sure that this is an aggressive advertisement from the heat insulator manufacturers, and to retain heat, an insulated blind area 0.8 - 1.5 m wide is sufficient. In any of these options, a failure in the central part is almost completely excluded. When the groundwater level (GWL) is below 2 m, it is recommended to backfill with a 40 cm layer of sand under the base of the foundation. If the ground level is higher than the specified mark, it is better to use crushed stone, leveling its top layer with sand to make a footing.
When the groundwater level is high, drainage becomes useless, so the following scheme is used:
- a foundation cushion made of a 40 cm layer of crushed stone under concrete structures levels the water level;
- even when the soil freezes, swelling is the same in all areas;
- there are no rolls or horizontal shifts.
The more verandas, porches, and extensions with independent foundations in a building, the more difficult it is to take into account the possible consequences of heaving forces. Different structural and operational loads, unequal depth and design of foundations lead to cracking of walls and destruction of slabs.
You can understand what a floating foundation is by placing a piece of foam plastic on the water. A significant disadvantage of the classical design is the loading with the weight of the building, which leads to uneven swelling of individual sections to a violation of integrity. The slab technology is more stable with measures incorporated into the design to reduce heaving forces - the soil under the house is protected from freezing, dried with drains, and replaced with a layer of inert material that does not contain intumescent clay.
There are several modifications of non-buried slab foundations:
- – the most durable of the existing ones, allowing for a concrete plinth of any height;
- – a plate with stiffening ribs located on the sole;
- coffered slab - an option for projects with cellars in one room (usually a kitchen).
Each modification is designed for specific operating conditions. For example, a caisson is convenient for a wine cellar; an inverted bowl reduces construction costs for light buildings.
Floating grille
Reinforcement and formwork

A concrete preparation (50-70 mm) is laid over the crushed stone layer, and waterproofing is laid on it. Then the bottom row of the slab grid is reinforced, the formwork is installed and strengthened, then the top layer of the slab is reinforced.
The classic floating foundation does not have insulation, so the project requires a slab thickness of 40 cm and reinforcement of 12 mm. By insulating the base and blind area, draining the perimeter, and replacing the soil with non-metallic material, heaving forces can be eliminated almost completely. This makes it possible to use the reinforcement scheme even on clay soil:
- lower chord – rods from 10 mm of periodic section along the perimeter of the structure;
- the upper belt is similar to the lower one, the mesh is tied with U-shaped elements at the ends;
- The grid spacing is reduced under load-bearing walls.
To provide a protective layer, gaskets are used under the lower mesh made of concrete and plastic, 2–3 cm thick. The upper armored belt is placed on special clamps (sometimes called “spiders”). The following can be used as formwork:
- polystyrene L-block – insulation of the end face of the slab, bonded with thermal insulation of the blind area;
- plywood or board panels - the height of the side is 5 - 10 cm above the design mark; polystyrene foam can be placed inside with anchors passed through it.
The minimum clear distance between meshes is 10 cm, the recommended mesh size is 10 x 10 - 30 x 30 cm. Wire binding is preferable to welded seams or polymer clamps, which usually fly off or weaken when moving concrete in the formwork.
Pouring and waterproofing
It is unrealistic to lay concrete in large-format formwork 20–30 cm thick in buckets. Therefore, mobile concrete mixers, mixers, and concrete pumps are used. The developer needs to realistically assess the possibilities, adjust the supply of mixers in order to maintain technological intervals between laying the mixture within 2 hours.

Ready floating foundation (slab).
If it is impossible to fill a floating foundation in one go, the partitions must be prepared in advance. In accordance with the pitch of the cells, cuts are created in them (top, bottom), into which reinforcement is passed, and the remaining cracks are foamed. After installing the jumper, it is recommended to fasten the strip along its entire length from the inside. After stripping, a groove is formed at the end of the slab into which the concrete of the next slab section will be poured, which promotes better bonding.
To ensure the maximum possible service life of all elements of the building’s load-bearing frame, it is necessary to waterproof all faces of concrete structures. The most commonly used complex insulation is:
- priming with a primer – increasing adhesion, strengthening the surface layer;
- coating with bitumen mastic - a waterproof film after drying;
- pasting with roll materials - fiberglass with a double-sided bitumen layer.
The maximum resource of combined waterproofing is 50 – 80 years. When impregnated with penetrating compounds, you can achieve an unlimited resource with a slight increase in the construction budget.
Myths about floating slabs or how a developer can reduce the construction budget
Due to the availability of information on construction forums, private developers often receive it in abundance, trying to apply all the technologies at once in their project. A floating foundation can be built much cheaper if you really evaluate the need for specific conditions for the following operations:
- USP only - in practice, it is often enough to insulate the blind area to obtain a complete absence of freezing;
- deepening into a pit - Sazhin’s guide, standards allow for the construction of non-buried foundations on the surface (the topsoil layer with a high content of organic matter will still have to be removed entirely);
- necessarily sand, crushed stone in the foundation cushion - any of these materials or their combination is allowed, since the drainage properties are high in any case;
- geotextiles under the underlying layer - necessary exclusively on soft soils (silt, peat, water-saturated) to increase the design resistance;
- built-in underfloor heating - water, electric or combined circuits can be laid later in the screed at the finishing stage.
All this allows you to save the construction budget without reducing the resource. If there are doubts about the advisability of using a particular technique, it is better to resolve it at the project stage. Technologies that are obviously unnecessary for specific operating conditions should be discarded.
Thus, the floating foundation is approaching the budget of MZLF and is becoming more popular among individual developers due to its maximum reliability in comparison with other housing foundations.
Advice! If you need contractors, there is a very convenient service for selecting them. Just send in the form below a detailed description of the work that needs to be performed and you will receive proposals with prices from construction teams and companies by email. You can see reviews about each of them and photographs with examples of work. It's FREE and there's no obligation.