Space design under the stairs: stylish and functional solutions (95 photos). Ways to design stairs in a private house Making a door under the stairs
No matter how many rooms there are in the house, . Someone has been dreaming of an office for a long time, someone needs another nursery or playroom for a baby, someone needs a workshop ... The owner of this mansion was sorry for the unused space under the ceiling - so much space is wasted.
He did not stop at just thinking about this idea and brought his wonderful project to life. It took time and effort to install the floor and special supporting structures, but the result is stunning! See what you can do extra room- I think it's even much easier than renovating an ordinary room.
How to use the space above the stairs
The idea turned out to be brilliant! Children's things are comfortably placed in the additional room, the windows fill the space with light. Such a playroom is the dream of any child. However, this place is so profitable that any room could be arranged here - a reading room, an office or an art workshop.
Spare guest bedroom is also an idea. If you have unused space in the house, remember that it can be adapted to your needs, you just need to try a little. Creativity always brings the best results.
Show everyone this story of the miraculous transformation of space. Create comfort in your home with inspiration!
Usually, the free space under the stairs occupies at least 2 m 2, and if the structure is swivel or there is still a platform of sufficient size on top, it can be used rationally and with great benefit by creating some kind of functional area there. Depending on the purpose of the object, there are many options for arranging the space under the stairs. In the article we will tell you about the main and most interesting ones.
Kitchen
Not everyone will decide to place a kitchen under the stairs. Indeed, in the process of arranging a working or dining area in such a place, you can encounter a number of problems. But to do this is quite realistic, given the many nuances at the stage of building a house and the general finishing of the entire room.
- Communications. Electricity, gas (if necessary), water supply, sewerage - they must be brought in advance, during the construction of the house. It is desirable that already at this stage you have a project for the location of kitchen furniture, because you need to bring out engineering communications in specific places. It is necessary to install a stove, sink, dishwasher. It is recommended that the electrical wiring in the place where the work area is supposed to be placed is immediately diluted for sockets at a distance of about 110-115 cm from the floor at the points you need. If necessary, also provide additional lighting. Don't forget about stretching. We'll have to extend a ventilation duct into our area. If this does not work, you can use the hood without an air duct.
- Riser. It is necessary that they be present in the staircase structure. Open marches will contribute to the settling of dust flying from above on the kitchen surfaces.
- Staircase protection. During the use of kitchen equipment, the stairs will be exposed to adverse factors such as high humidity, temperature changes. This must be taken into account when choosing the material for the stairs and how it is finished and processed. It is also desirable that the design is easy to wash.
When arranging the space under the stairs, it is possible to place a kitchen with almost any type of layout.

Bar and wine racks
A real decoration of the living room can be a bar under the flight of stairs. It will elegantly fit into the interior, bring comfort and be a spectacular location at various receptions and buffets. Quite often, bottle-holders or showcases for storing a collection of wines are placed under the stairs. 


Pantry
The place under the stairs can be successfully used for arranging a pantry. Various household trifles, household items, canned food will be conveniently located here. On special fasteners, you can place a vacuum cleaner, ironing board, mop, children's ice sled and even a small bicycle or scooter. The pantry can be open type or closed with a door.
Open structures are appropriate if they do not spoil the appearance of the room into which the stairs descend, these can be utility rooms or not the main part of the corridor or hallway.

Closed pantries under the stairs can be located in the living room or hallway. Sometimes, as part of the overall interior design, the doors are decorated. 

bathroom
The room under the stairs in a private house is quite suitable for placement there. If we are talking about a country house, then this is a great idea to rationally use the space by placing, for example, a small shower there.
There are several requirements that must be met.
- The minimum parameters for placing a bathroom: 2.3 m (length) x 1.2 m (width) x 1 - 2.6 m (height). So, a march of 10 steps may be enough.

- Communications - water supply, sewerage, electricity - must be summed up in advance. A ventilation system is required. It is better to entrust its arrangement to specialists.

Wardrobe
This is a great space saving solution. Outerwear, seasonal items, shoe boxes, umbrellas, bags, hats do not always fit in wardrobes located in bedrooms and hallways, and a dressing room under the stairs will help make their storage as comfortable as possible.
This option involves closed structures with various combinations of elements. The internal configuration of the dressing room may include sections of different sizes and shapes. These can be shelves, drawers, draw-out sections, rods in one or two rows, baskets.


You can use one or two swing doors or a compartment. Choosing the latter option, a rectangular area should be allocated for the passage to the dressing area so that the doors can freely walk along the rails. you can also find on our website.
Resting-place
Within the free space, a lounge area will be successfully located. Using high-quality finishing materials, textiles and decor, you can create a magnificent cozy, stylish corner where you can relax, read, chat with friends, listen to music and just dream about something. For maximum comfort, you should consider lighting modes and, possibly, provide for built-in musical equipment, niches or shelves for placing books or other items, depending on the hobbies and preferences of the owners. The location next to a window with a beautiful view will make the area completely magical. 

Even the idea of locating a mini-bedroom under the stairs is being realized.

Study
The option of placing a workplace here is very popular. Of course, it is not suitable for every room. It will not be very convenient within areas with high traffic. It is unlikely that it will be possible to retire and isolate oneself from the environment for quiet work. In such cases, a closed structure with hinged doors or sliding partitions will help to get out of the situation. The space will be small, but quite suitable for work, which can be a good solution to the problem of lack of free space. 

small library
Shelving with books under the stairs will look chic. If the owners are connoisseurs of books and have a solid library, this design will allow you to conveniently place the collection, saving space and decorating, for example, the living room or hallway, if the staircase is located there. And since the depth of the shelves will be very small, the free space located behind the racks can be used for other purposes by arranging there, for example, a storage area for other items or a small closet.

Interesting design solutions with the placement of bookcases directly in the flights of stairs. The books form a sort of riser. But it is important to remember that this will not have the best effect on bindings and covers, and washing such a ladder will be very problematic. 
Children's room
Everyone remembers Harry's famous little room in the closet under the stairs. Modern parents, of course, will not give their children a place in the closet, but equipping a play area in the space under the stairs is a very good idea. A wide variety of options are possible - from simple ones with carpeting and children's toys located there to unique and amazing in their beauty and believability in the details of fairy-tale houses. Such a magical building will give the child a lot of ideas for games, will develop fantasy and imagination. However, do not forget that the location of the steps of the stairs next to the play space creates the need to provide for the protection of the child. for children is a must. 


Place for pets
If you have pets, you can arrange a house or bed for them in a niche under the stairs. Such a room does not require much space, so the pet house can be successfully combined with other functional areas within the same design. 

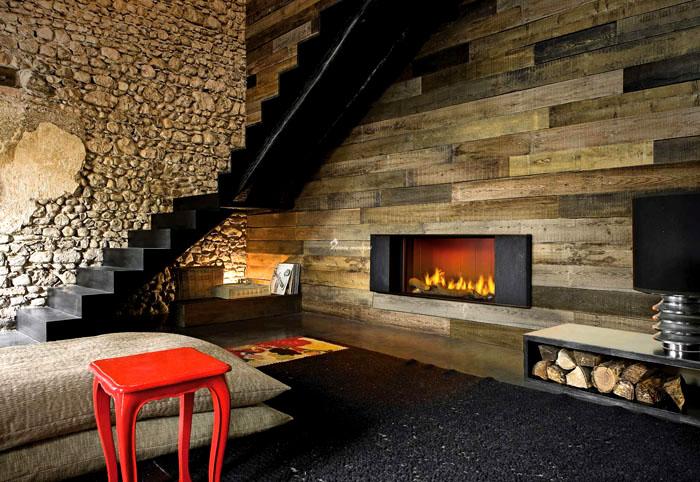
Fireplace
A fireplace is not only functional, but also an amazingly beautiful interior object that can make any room cozy and very special. It can be placed under flights of stairs, turntables and even built into free space inside a spiral staircase. To install a fireplace, you will naturally have to consider the location of the chimney. An excellent alternative to the standard one can be a bio-fireplace that runs on special fuel and does not require a chimney. Since the fire in both cases is real, during installation it will be necessary to comply with all necessary fire safety measures.


Garage for bicycles or strollers
A very good solution, especially if the front door is located in the immediate vicinity. Bicycles can be hung on special fixtures to a wall or a flight of stairs, which makes their storage as comfortable as possible and greatly simplifies cleaning.
![]()
mini greenhouse
A small winter garden or flower garden located under the stairs can become a real paradise. As part of the flight of your imagination, a wide variety of options are possible - from the arrangement of single plants to amazingly complex compositions with original decor and magical waterfalls.


Aquarium
The location of the aquarium under the flights of stairs is a very effective interior solution. Such a detail will give a living room, hallway or dining room a special flavor. After all, in front of us behind the glass is an amazing, colorful, unique and living little universe.


Decor or exhibition
If there is no need to functionally use the space under the stairs, you can simply decorate it in an original way. Paintings, shelves with photographs, figurines and other interior items can be located here. In the case when one of the owners is a collector, the collected items can be placed in showcases under the stairs, of course, if their dimensions allow it. A niche under a flight of stairs can also be an excellent place for an exhibition of works of art by household members.


When designing or even already building a two-story or two-level house, it is recommended to immediately think through the questions of how to arrange the space under the stairs. Lead time will be especially important in cases where the useful use of this area will require the summing up of various engineering communications, the installation of which is carried out at the stage of foundation construction.
Features of the arrangement of the under-stair space depend on several factors: on the location of the staircase itself, on its dimensions - width, height and length in plan, on the possibility of supplying water supply and sewerage to this section, and, of course, on the intended overall interior design.
There can be many interesting solutions for the useful use of such a seemingly “lost space” - it can be a built-in kitchen set, bookshelves, a bedroom or workplace, various wardrobes, chests of drawers, a pantry, a hallway and even a bathroom.
Types of stairs, and what space is formed under them
Before determining how the space under the stairs can be usefully used, it is necessary to choose its design, which will determine how much space it will take in the house, and what area will be formed under it.

There are many varieties of stairs, and the choice of a particular one depends primarily on how much space can be allocated for it in the house. At the same time, it must be understood that the more compact its design is, the less space is formed under it.
- it is necessary to provide for a rational arrangement of kitchen furniture elements for comfortable food processing and cooking, as well as for convenient dishwashing.

In order to determine all these nuances, it is recommended to draw up a detailed drawing indicating the location of each of the elements, and put down all the dimensions on a scale. Even if it is a simple drawing, like the one shown in the figure, it will still be easier to navigate with it when drawing up a detailed plan of your kitchen under the stairs.
- Bathroom.
Another rather difficult, but solvable task is the arrangement of a bathroom under the stairs.

If the staircase is located along the outer wall, then there should not be any special problems with the sewerage and water supply to the area under it.
In the event that there is a lot of space under the stairs, then it must be organized in such a way that it can accommodate a toilet bowl, a sink, and also fix a mirror and towel racks on the wall. Ideal if it also fits.
The increased complexity in organizing a bathroom in the space under the stairs is also due to the need to build a well-fitted door. In addition, it is very important to provide and install effective ventilation for this room, since condensation should not be allowed to accumulate on the walls, which will adversely affect the wooden elements of the stairs.
It is better to finish the bathroom in light colors and not choose large tiles, as it will visually make the room smaller. In addition, it is recommended to fix a mirror of a sufficiently large size on the wall - it will also contribute to the visual expansion of the room. An important point in this case is the correct lighting - it is desirable to make it sufficiently intense.
- Other options for arranging space.
When arranging a hallway, bed, cabinets, chests of drawers, pantry, workplace or other options under the stairs, a number of other nuances are taken into account:
- it will be necessary to carry out power supply and install a switch and socket, the organization of sufficient lighting of the space;

– accessories of the required functionality, suitable in size, should be thought out;
- a very important requirement is that the ceiling of the room or area under the stairs does not have cracks and gaps. The fact is that dust will inevitably collect under the steps, and with vibration from the steps, it can fall from above into the equipped space.
Video: several original solutions for the rational use of space under the stairs
We do it ourselves - an original spacious closet in the space under the stairs
One of the most popular ways to use the space under stairs is to install shelves or drawers. An example of how such work can be done under an existing staircase, with a drywall space under it, will be discussed below.
Prices for wardrobes
closet
Fabrication and installation of the frame structure of the cabinet
| Illustration | |
|---|---|
 | In this case, the space will be arranged under a small staircase, which means that the area under it will not be too spacious. But even such a small area can be used quite rationally. Earlier, during the construction of the stairs to the second floor, the space under it was sheathed with sheets of drywall, part of which, by the way, can be usefully used to create a future design. |
 | The first step is the marking of previously installed sheets. On them, with the help of a ruler, a building level and a pencil or marker, lines are drawn that define the area that will need to be removed. When marking, it is necessary to take into account the height of the steps of the stairs, as they must remain closed with plasterboard sheathing. In addition, the location of the guides of the frame structure, on which the drywall is fixed, is also taken into account. The areas where these elements are installed can be determined by the screwed screws. Vertical side lines are drawn indented from self-tapping screws by 25 ÷ 30 mm. The top line of the future cutout should run along the bottom points of the steps and be parallel to the cut line of the drywall fixed at the top points of the steps. |
 | The middle part of the plasterboard sheathing is cut along the drawn lines - an electric jigsaw is perfect for this operation. Here it is necessary to take into account the fact that in places where the drywall is adjacent to the frame guides, it is cut off with a sharp construction knife, and the screws are unscrewed with a screwdriver. |
 | After the excess part of the drywall is removed, the remaining edges are cut with a hacksaw around the entire perimeter of the opening. The vertical sides are cut exactly along the inner edge of the side vertical frame guides. In addition to removing excess material, the edges of the resulting triangle will also be aligned, with a truncated lower acute angle. |
 | When the finishing material is removed, a space will open that needs to be equipped for installing a cabinet in it. The cut drywall is temporarily removed for the time being, as it will now interfere with further work. |
 | In addition to the empty space, a wooden frame structure will also open under the stairs, which must also be carefully partially dismantled. |
 | The frame bars are cut along the top line of the drywall at the same angle as the remaining drywall facing. Work is carried out using an electric jigsaw or reciprocating saw. |
 | The vertical racks of the battens cut off at the top are detached from the lower horizontal beam, which then also needs to be carefully removed without damaging the floor covering. |
 | Further, in the lower part of the truncated triangle, at its upper vertex, the angle is measured (in the case under consideration, it was 49 degrees). This parameter is necessary for the end cut of the board, which will become one of the parts of the frame of the opening. The board is taken 150 mm wide and 25 ÷ 30 mm thick. |
 | The finished board, cut from the end at the right angle, is tried on to the place of its fixing. It must be installed exactly flush with the cut drywall. |
 | Further, in the same way, with an exact fit in the corners, the entire perimeter of the cut-out space is framed. The boards are fixed between the trimmings of the vertical racks remaining after dismantling. As a result, the installed ones should turn out to be a solid inner surface, on which external boards will then be fixed, which will create a “clean” frame of the cut out opening. |
 | This illustration shows well the resulting construction at this stage, after fixing the internal wooden lintels. They then need to be fixed with self-tapping screws and the cut edge of drywall - this will achieve maximum strength of the edges of the opening. |
 | If necessary, another wooden lath is fixed from below to the stringer of the stairs in order to add thickness to it to the general level of the drywall line and the boards fixed immediately behind it. |
 | Further, to the beam, installed vertically on the high side of the triangular opening, a board is fixed from its back. It will be necessary to fix the finished shelf design. |
 | The next step is to finish the frame of the cut opening. To do this, along its entire perimeter, to the previously fixed internal boards, boards are installed and screwed, which should completely cover the unsightly picture of the drywall cut. |
 | In order for the frame to look neat, the end parts of each of the boards are carefully adjusted to a certain, pre-measured angle. Only in this case they will fit snugly against each other. |
 | Before fixing these structural elements with self-tapping screws, their ends are smeared with carpentry glue, and glued together at the corners. At the same time, the vertical boards are leveled - if a skew is found, then small spacers are made from thinner wooden wedges between the inner and outer boards. |
 | The next step, at the place of future installation, is the frame of the front part of the shelf structure. The boards intended for this are temporarily fixed to the boards framing the opening already attached to the stairs. In addition, the frame boards are fastened together at the corners. |
 | Further, on the temporary frame, the installation of the middle vertical bars is marked. Marking is carried out using the building level. These elements will be the facade for the walls of the shelf structure. |
 | Then, the bars are sawn off at the angle of the stairs. Their height should be equal to the distance between the top and bottom, horizontally installed board. There should be two such jumpers, and they are installed at the same distance from each other and from the side racks, that is, the length of the opening is divided by exactly three. |
 | Further, the temporarily fixed bars are removed from the opening, and the front structure of the frame for the shelves is laid out on a flat surface. Then they are finally, according to the markup, fastened together. |
 | For the convenience of gluing individual parts into a single structure, short wooden blocks are evenly laid out under the mating parts. They will also help to put the frame on one level. This is how vertical bars are exposed and fixed, and then horizontal jumpers. |
 | The transverse structural elements will determine the number of shelves or drawers. They are laid between vertical guides so that the shelves installed in different sections of the structure are at the same level. Of course, it is important to observe the perpendicularity of the parts to be joined. |
 | The connection can be carried out in different ways - these can be wooden chopsticks (dowels, dowels), cuts and the installation of special fasteners in them on glue, for example, wooden dowels. After the entire structure is assembled and glued, it is clamped in clamps until the glue dries completely. |
 | This photo shows one of the elements with which the individual bars are fastened into a common structure - a wooden dowel installed in the place of the connecting node. |
 | While the front of the structure frame is drying, you can start making partition walls that will be installed between the rows of shelves. They are made of plywood with a thickness of 10 ÷ 15 mm, on which a frame of planks cut from the same plywood is fixed with glue. These elements are needed to strengthen the rigidity of the partitions. |
 | Glue is again applied to the fixed planks and another sheet of plywood is glued on top of them. The whole structure is additionally fixed with brackets or self-tapping screws, and compressed in thickness with clamps. There are three such walls, in this case - they have different heights, equal to the vertical bars of the front part of the frame of the structure that was assembled earlier. Their width should be equal to the depth of the space under the stairs |
 | The next step is to cut out the back wall, which will hold the partitions together. In order not to be mistaken, a finished front frame is laid on a sheet of plywood, then outlined with a pencil, and then the necessary figure is cut out with an electric jigsaw. |
 | The vertical partition walls are fastened with a common jumper - a board that will fix them in the front part from above. All planes must be set according to the building level. Then, the back side of the walls is also fastened along the top with a wooden plank. After that, the rear plywood wall is tried on and fixed to the structure. |
 | The structure is rotated and placed on the rear, just fixed, wall, and the end sides of the front part of the separating partitions are smeared with glue. |
 | The next step is to lay the wooden frame of the front of the structure on top of the smeared end sides. It is carefully aligned, and then fixed with screws. |
 | Now, with the help of glue, and then with self-tapping screws, you can fix the lowest wall, that is, the side wall from the truncated side of the triangle. All glued parts of the structure are again fixed with clamps. |
 | Further, the location of the roller guides for the shelves is marked on the inner walls. |
 | Two guides are temporarily fixed on both sides of the partition with a special lock, which allows you to set them exactly in the desired plane and screw them perfectly evenly on the surface and in relation to each other. |
 | In the next step, the guides are fixed on the walls with self-tapping screws 15 ÷ 17 mm long. |
 | After the roller guides are fixed, a wide board is dismantled from the upper part of the structure, which provided temporary fixation of the frame, as it is unnecessary. Instead, a sheet of plywood 8 ÷ 10 mm thick, prepared in size, is laid on the upper end sides of the partitions. |
 | Plywood is fixed on the end sides of the partitions and side walls with staples or self-tapping screws. |
 | In this photo you can see the assembled structure in full, and evaluate its quality. |
 | Then the finished frame gently slides into place - into the opening under the stairs. |
 | Before finally fixing it, it is necessary to check the verticality of the installation again. It's not too late to make small adjustments by placing thin wooden wedges in the right places. |
 | After the structure is installed perfectly even and fixed, the gaps along its perimeter can be closed with a neat narrow bead, and a decorative plinth can be fixed at the bottom. |
Production of drawers
Now we should consider a few important points for the manufacture of drawers.
In this version, the master chose plywood 20 mm thick, but high-quality 10 mm material is quite suitable for this purpose. Chipboard boards with a standard thickness of 16 or 18 mm are quite suitable for these purposes.
The main nuances in this process are the preparation of parts and their fastening, which will be discussed later.
The first step is to take dimensions from the opening in which the box will be installed - width, height and depth - according to them it will be made. In addition, you need to accurately determine the place of fixing the guides along which the shelf will walk.
| Illustration | Brief description of the operation to be performed |
|---|---|
 | According to the dimensions obtained, all the elements of the box are marked and drawn on the prepared plywood sheet. It is very important to ensure that all corners are right. The next step is to cut out all the details of the box, and their edges are processed to smoothness. |
 | In order for the assembly of parts to be even and strong, first the side walls are installed on the edges of the back, and their place of attachment is outlined. The same is done with the front wall. |
 | The next step in the marked places is to drill through holes with a diameter of 8 mm for furniture confirmations (Euro screws), through which the back and front walls will be screwed to the side ones. There should be two such holes on each side. |
 | According to the drilled holes, the centers of the holes are marked at the end of the side wall, with a diameter of 5 mm and a depth of about 50 mm. The walls are assembled, confirmations are inserted into the holes, and then they are twisted with a screwdriver with a hex bit. |
 | Other drawer junction boxes are assembled in the same way. Confirmates will provide good structural rigidity. True, if plywood with a thickness of 10 millimeters or less is used to make the box, then confirmations will not work, and you will have to use ordinary screws with a diameter of 3.5 ÷ 4 mm. |
 | To find out if the box is evenly assembled, it is necessary to measure and compare its diagonals - they must be the same length. |
 | Next, a hole is drilled in the front of the box, through which a handle should be fixed to the panel. It must be said that very often an additional panel of thinner plywood, but somewhat larger than the main wall, is attached to the front wall. It is first glued, and then fixed with screws from the inside of the box. The size of the self-tapping screw must be selected so that it is 5 mm shorter than the total thickness of the front wall together with the front panel. |
 | After fixing the handle, the bottom part is fixed on the box - usually this is done using self-tapping screws. The bottom panel will finally fix the box in the required rectangular configuration. After that, the finished box can be subjected to the necessary finishing - cleaning with fine-grained sandpaper, polishing, painting, varnishing, pasting with a laminating film, etc. Sometimes this operation is left until the very end of the work. |
 | The next step is marking on the side walls of the box, along the roller guides extended from the roller guides previously installed in the cabinet design. A careful fitting is carried out, and if it goes well, the guides can be fixed with self-tapping screws, the length of which should also not exceed 15 mm. All boxes are assembled in the same way, and, as we have seen, their front panel can have a more complex shape, and the height of the side walls can vary. But this does not significantly affect the technology of their manufacture and assembly. After that, it will already be possible to carry out the general assembly of the cabinet and its final finishing with all the accessories to the ideal. As a result, a beautiful and very functional piece of furniture appeared in the space under the stairs. |
For the space under the stairs, cabinets and another, simpler, or vice versa, of a complex design can be made, which, for example, are pulled out of niches on wheels, and the division into separate sections and shelves is already done inside. The advantage of this option is that the cabinets can always be fully pulled out of the niche under the stairs in order to carry out general cleaning inside it.

Even if there is enough space in the house for all the premises necessary for comfortable living, the space under the stairs will never be superfluous, and it must be used rationally to the maximum. There are always many useful things on the farm that their owners do not use every day, but they must have an established storage location. An equipped under-stair niche is also perfect for this.
Therefore, when planning the construction of a two-story house and wiring communications on it, it is advisable to decide in advance whether and how the area under the stairs will be used. Well, with the final finishing, all this can be arranged in the same style as the room in which the staircase design will be located. And then a well-equipped and beautifully designed usable space will organically, without weighing down the interior, fit into the overall design, and sometimes even become an eye-catching “highlight” of the room.
Perhaps there is no such homeowner who would not dream of expanding his possessions. The development of new territories is inherent in every person. One of the easiest and most economical ways to get hold of those extra square feet is to convert your attic into living space.
But with all the attractiveness of this occupation, the most difficult place is the device of the interlevel staircase. This article discusses the procedure for determining a place for a staircase, its type and obtaining an opening during the reconstruction of an attic space in an old house.
Undoubtedly, stairs made according to classical technologies using expensive materials give the house monumentality, importance and a special gloss. But modernity in the style of minimalism and a permanent crisis have led to the fact that nine out of ten economy class homeowners will vote for prudent use of space in their home and for saving money.
An interlevel staircase is an expensive structure. Especially if it's made to order. However, with some skill, you can do almost all the work yourself. This applies not only to the calculations and construction of wooden, but also welded metal stairs. But before you begin to implement your ideas in practice, you need to decide on the shape and location of the stairs, as well as prepare the opening.
Determining the location of the stairs in the house
Whatever it is, everyone knows that the stairs take up too much space. The flatter it is and, accordingly, more convenient for passage, the larger the size of the opening under it and the further you need to move the first step away from the last in the projection.
The most convenient staircase is one in which the width of the tread (the horizontal part of the step) is at least 30 cm, and the height of the riser (the vertical part of the step) does not exceed 17 cm. Such indicators can be obtained if the angle of inclination of the flight of stairs is in the range of 30 - 40 degrees . Here are a few simple rules, following which you can quite easily choose the location of the interlevel stairs in the house.
- If possible, locate the stairs in a non-residential part of the house. It is extremely inconvenient to use a living room if a bulky structure is installed in it.
- If the interlevel staircase leads to the attic, then try to position it so that the exit is as close as possible to the longitudinal center line of the attic.
- Use a simple geometric rule for an approximate estimate of the length of the opening - a leg lying against an angle of 30 degrees is equal to half the hypotenuse. That is, with a ceiling height in the room of 3 meters and a staircase slope of 30 degrees, the length of the opening will be 6 meters.
- Approaches to the stairs must be free. If something interferes with this, consider whether it is worth making winders.
- There are types of stairs that practically do not take up space in the room, for example, spiral ones, but it is problematic to lift anything along them. Consider such projects as a last resort, preferring simpler models.
- Stairs can be open and built-in. It is advisable to place open stairs where it is undesirable to clutter up the space with massive structures, and built-in ones where it is planned to use the space under the stairs (for example, for a guest bathroom or storage room for household inventory).
- Not in every place it is possible to knock out an opening in the ceiling of the upper floor. If we are talking about a monolithic overlap or overlap with reinforced concrete slabs, it is necessary to develop a separate project and endorse it from the author or an organization recognized as the author of the project of the whole house.
- If the size of the opening does not allow you to fit the staircase in the place that you have determined as the best according to the above indicators, then you can shorten the opening by increasing the angle of inclination, but in this case change the shape of the steps into a “duck step”. Such a ladder is more difficult to manufacture, but very convenient at slope angles from 45 to 70 degrees.
Stair calculation
Most stairs do not require grandiose mathematical calculations. It is important to be able to determine, using basic knowledge of geometry, the angle of inclination of the stairs, the number of steps, the height of the riser, the width of the tread and the length of the opening.
The initial data for these calculations is the height from the finished floor of the lower level to the finished floor of the second level. This means that if wooden floors are laid on top of the concrete screed, then the height is measured from the concrete screed, since the wooden floors are not clean. The same rule applies to the floors of the upper level.
For example, by measuring the height of the ceiling at the installation site of the stairs, we got a result of 3 meters. The most convenient slope angle of the stairs is 30 degrees, which means that the length of the opening will be 6 meters. With a tread width of 30 cm, 20 steps can be laid on the projection of the opening. Dividing 3 meters of floor height by 20, we get a minimum riser height of 15 cm.
However, most often such a long opening cannot be found even in a large house, and what can we say about a small one! Therefore, the next step will be to optimize the spatial arrangement of the stairs in the house while adjusting the size of the steps and risers, which is achieved by choosing the shape of the stairs.
Stair type definition
In most cases, an internal interlevel staircase should provide a comfortable ascent and descent to a height of 2.5 to 3.2 meters. It is important that the opening takes up as little space as possible. And you can minimize the size of the opening by installing stairs of a suitable type, which can be classified according to the following criteria:
- By the number of marches, one-two- and three-flight stairs are distinguished;
- By the presence of an intermediate platform, stairs with one and two intermediate platforms are distinguished. Straight and rotated 90 or 180 degrees;
- By the presence of winder steps, stairs with lower, upper, combined winder steps, as well as spiral staircases are distinguished, as an extreme case of the use of winder steps;
- Stairs with straight treads and specially shaped treads that facilitate ascent and descent at slope angles of 45 degrees or more.
Also of great importance is the choice of material from which the staircase will be made. After all, assembling a ladder on a single bowstring made of wood is fraught with great technical difficulties. Such stairs are made of metal, which is much cheaper. In addition, under equal conditions, in terms of bearing capacity, wooden stairs will be much more massive than metal ones. Therefore, designers prefer metal stairs in cases where it is necessary to install an open staircase. But the choice of the material of the steps still most often remains with the type-setting - glued blockboard.
So, the choice of a two-flight staircase with one intermediate platform allows you to reduce the length of the opening by up to 30% and change the direction of movement along the stairs from 0 to 180 degrees.
The choice of a single-flight staircase with winder steps allows you to change the direction of movement along the stairs up to 180 degrees and reduce the size of the opening up to 20%.
The choice of a spiral staircase allows you to reduce the size of the opening up to 80% and change the direction of movement up to 360 degrees.
Changing the angle of the slope of the stairs with a simultaneous change in the shape of the steps and combining with winder steps allows you to reduce the size of the opening up to 60%.
Installation of the frame floor and the allocation of an opening in it
Work on the device of the stairs begins with punching an opening in the ceiling of the upper level. In this case, the material of the floor is essential. If the floors are monolithic or made of slabs, then self-dismantling is not possible. This kind of work must be carried out by a company licensed for this type of activity. All work must be carried out in accordance with the agreed and approved project.
Self-dismantling is possible only if the ceilings of the upper level are wooden and do not carry a load. At the same time, it often happens that in old houses there are practically no attic floors. What is most often associated with the hasty post-war reconstruction of the house. In this case, the overlaps are best removed completely and replaced with new ones based on frame technology.

Photo 1. A fragment of the floor, restored using frame technology
Photo 1 shows a fragment of a remote attic floor, which was replaced by a frame one based on 50x120 mm bars, resting on one side on the rafters through special support shoes (photo 2), and on the other side, on an I-beam steel beam that acts as a run (on photo 3 the beam is shown from its underside). Reliance on shoes allows you to significantly increase the maximum allowable load on the floor, as the risk of breaking old rafter boards is significantly reduced, and dividing the floor by a beam in half allows you to dismantle the floor in parts.

Photo 2. The support shoe is installed on the rafter

Photo 3. Support beam as a run
Photo 1 shows that in the cells of the frame there is an opening for the stairs. Here it should be borne in mind that the pitch of the rafters is 60 cm. And this size has not changed since the time of these. And the width of the stairs may vary. In this case, the width of the stairs along the steps is 65 cm, and the opening is 72 cm.

Photo 4. Mortgage board to expand the opening by an arbitrary amount
The solution to this problem is shown in photo 4. As you can see in the photo, the frame beam does not rest on the shoe, but on the mortgage board, which is installed between two adjacent shoes. Using this method, you can change the width of the opening by any amount up to the next beam.
After the frame is assembled, it must be sheathed from below with OSB sheets. For this purpose, a sheet with a thickness of 10 mm is quite suitable. When sheathing, it is not necessary that the edges of the sheets fall on the beams or cross members of the frame. After all, the final lining will be made of drywall.

Photo 5. The overlap is sheathed from below OSB
A fragment of a floor sheathed with OSB from the bottom is shown in photo 5. After that, you can proceed to the heat and sound insulation of the floor. As a heater, it is best to use mineral or basalt wool due to their incombustibility. But before you start filling the cells of the frame with insulation, you need to lay out each of them with a vapor barrier. Photo 6 shows the cells of the floor frame, in which the film is laid and fixed with a stapler.

Photo 6. Laying vapor barrier on the bottom and walls of the cells
When all the cells are insulated, you can start laying the insulation. Its thickness should not be less than the thickness of the beams. In this case, 120 mm. Mineral wool can be laid more densely with the expectation that it will then settle a little.
By the way, the same insulation scheme was used in the construction of a house back in 1940. Only instead of basalt wool, white glass wool was laid in the ceiling, carefully packed in bags of thick black paper. But over time, the glass wool stuck together and became completely flat, completely losing its insulating properties.

Photo 7. Cells after filling with mineral wool
Photo 7 shows the appearance of the cells after filling them with mineral wool. On top of the mineral wool, you need to cover with another layer of film and fix it with brackets. This stage of work is shown in photo 8.

Photo 8. From above, the mineral wool is covered with a film
And the last stage of work on heat and sound insulation is the OSB sheathing of the ceiling from the attic side. When performing this work, in contrast to the sheathing of the ceiling, it is important to hit the edges of the frame with the edges of adjacent OSB sheets. Otherwise, at the joints, they will bend under the weight of a person. Photo 9 shows the appearance of the floor from the side of the attic after laying the OSB.

Photo 9
The thickness of the sheets depends on the pitch of the frame. So, with an average cell size of 40x40 cm, a sheet 15 mm thick is enough. If the cell size exceeds this value, then the sheet thickness must also be proportionally increased. The part of the opening that will be above the back of the stairs can be reduced, but it is important not to forget to take into account the growth of a person above average. This size is 190 cm. The opening should be reduced in order to reduce heat loss during heat exchange between levels.
The sidewalls of the opening, formed by the extreme beams of the floor, must be even. This is necessary because drywall will serve as the basis for finishing, which is simply screwed to them with self-tapping screws.
opening cladding
Facing the opening begins with the installation of a false plasterboard ceiling at the lower level. Otherwise, it will be impossible to calculate the size of the side slopes of the opening. Plasterboard ceiling installation is best done on metal profiles, and not screwed drywall directly to the floor OSB. The fact is that when walking on the ceiling from above, in this case, the load will be transferred directly to the sheets, which will eventually rub on the heads of the screws. When drywall sheets are hung on profiles, dynamic loads do not occur over the entire floor plane, but only at the points where the hangers are attached to the ceiling. Such loads are quickly extinguished in ceiling structures without causing deformations. In addition, under such ceilings it is easy to hide all electrical wiring and other communications.

Photo 10. The ceiling plane next to the opening is sheathed with drywall
Photo 10 shows the working moment when the entire plane of the ceiling next to the opening is already hemmed with drywall along the profiles. The remaining part, which includes the attached ventilation pipe and the reduction of the opening along the back side of the stairs, is sewn up last. In this case, you can take a larger sheet of drywall, screw it into place, and then cut out the outline according to the footnotes made using the vertical level. These manipulations are shown in photos 11-14.

Photo 11

Photo 12. Cutting along the contour marked by the level from the inside

Photo 13. Drywall exactly follows the contour of the opening

Photo 14. Bottom view of the opening and plasterboard ceiling
After the contour of the opening is highlighted on the ceiling, the side slopes can be screwed on. It is enough to fix them with self-tapping screws directly to the beams. The process is illustrated in photo 15.

Photo 15. Installation of the side slopes of the opening
The edges must be reinforced with perforated aluminum corners. They are fixed with brackets using a stapler (photo 16). Then they are smeared with putty (photo 17) and then two more layers of putty are applied to the entire plane of drywall with intermediate and final sanding (photo 18).

Photo 16. Installing perforated corners on the edges

Photo 17. Putty edges and seams

Photo 18
The opening prepared in this way is ready for most types of fine finishing, from painting to decorating with thin plasters, wallpaper or PVC panels.
- The use of facade putty will significantly expand the list of types of decorative finishing of the opening. After all, it is made on the basis of white cement and is much more reliable;
- It is not necessary to line the slopes of the opening with drywall at all, if it is planned to be sheathed with clapboard;
- After grinding, it is necessary to prime each layer of putty;
- It is better to remove the wiring on the floor from OSB in non-combustible boxes.
The example of the opening used in the article as an illustration, and the technology of the work being carried out are demonstrated on the example of the repair of an old German house built in 1940. The house was badly damaged during the war and post-war years. It was partially repaired by the household method, but no one has ever made a major overhaul in it. Therefore, we can consider the above example as the most indicative and most difficult when arranging an opening for an inter-level staircase in a private house.
In the next article, devoted to the independent manufacture and installation of an internal staircase, we will talk about how to carry out welding work using the example of a metal staircase with one bowstring, open steps and stringers.
Maxim Fedorov, rmnt.ru
Part 1: How to prepare an opening for an interlevel staircase
Part 2:
The stairway is a kind of window in the interfloor ceilings. From this review, you will learn about the types of openings for stairs, the features of their calculation and device.
4 types of openings for stairs
For comfortable, safe movement, it is necessary to choose the optimal parameters of the stairwell.
The design of the gap in the ceiling that completes the rise can be very different. It depends on the configuration of the stairs, design solutions. According to the shape of the ceiling holes are classified as follows:
- Rectangular. The photo shows a standard option, it is most often chosen by owners of private houses. Design and execution in this case is the least complicated. The length of the opening varies depending on the configuration and dimensions of the flight of stairs.
 The ease of use of the staircase structure depends on the correctly selected parameters of the opening.
 - Semicircular. Suitable for marching ascents, and for screw. Our range also includes stairs suitable for this opening:
 Spiral staircase "Prestige" - ideal for small openings. Our company offers this product at a price of 73.691 thousand rubles.
 - Non-standard. The whole variety of forms falls under this definition. Their implementation, as a rule, is caused not by the impossibility of using standard solutions, but by the creative flight of the designer's imagination. Creating an opening in the form of a trapezoid or a polyhedron is not easy, but if the result is most important, then you should think about this option.
 Creating an opening of a non-standard shape, as in 4 photos, is not easy and only a specialist can do it
Opening size calculation
The calculation of the area for the construction of a staircase has its own characteristics. When performing it, the layout of the first and second floors is taken into account. The site for the installation of the stairs is determined in advance and the boundaries for the opening device are outlined. You can learn a lot of useful information about the calculation of the staircase itself and the opening under it when watching this video:
If the stairs lead to the attic or to one room, then an opening 0.6-0.7 m wide is enough. When you need an exit to a hall that combines several rooms, then for convenient movement you need an opening width of at least 0.8 m.

Features of calculating the dimensions of the opening in the ceiling are as follows:
- First you need to design the staircase itself - determine the number of steps, slope, geometry.

Here you can not do without calculating the following parameters:
- span height;
- the width of the stairs;
- structure length;
- riser height;
- tread depth.
- Based on the height of the span and the size of the steps, it is determined which step will be at the level of the upper floor. For this, a special algorithm is used:
- determine the distance between the floor and the floor, for which the thickness of the floor is subtracted from the interval between the floor of the first floor and the floor of the second;
- one step height is subtracted from the result in succession;
- stop when the result is less than 2 m, which means that the number of steps taken will fit under the floor, and the rest will go beyond the opening.
- If it is planned to install a turning staircase, then the width of the opening is determined by the level of winding turning steps, and the length is equal to the length of 2 marches. A hatch for a straight staircase will be large due to the lack of a turn. For a helical structure, the opening is equal to the circumference of the stairs.

 Straight staircase "Solo" from our company takes up a lot of space and is designed for large openings. Price 70.858 thousand rubles.
Arrangement of a staircase
 The technology of opening the opening of different types of ceilings differs in varying degrees of complexity
 It is best when the location of the stairs is already taken into account in the design of the house. Then the opening in the floor is left during the construction process, but it happens that you want to change the project or you decide to install the stairs in a completely different place, then everything has to be done in the already mounted floor.


Successful resolution of the issue depends on the following 4 factors:

This video will help you determine the parameters of the stairs:
Staircase in the wooden floor of the house in 4 steps
The easiest way is to make an opening in a wooden floor, although there are some nuances here. If the distance between the supporting beams is sufficient for its installation, then no problems arise, but if there is not enough space, then the procedure is as follows:
- Remove the floor and ceiling covering along the contour corresponding to the future opening.
- Cut 1 or 2 beams in the place allotted for the opening, but no more, otherwise the floor will lose its bearing capacity.
- Mount paired beams, the same size as the main ones. They are needed in order to attach 2 more to them to form an opening. To strengthen the structure, transverse bars are added, the cross section of which is equal to the cross section of the main beams.
- All elements are interconnected using a metal corner profile and self-tapping screws. If the opening is adjacent to a brick wall, then one side of the beam is attached to it.
Hole in concrete slab
The opening under the stairs in the concrete floor is best left during the construction of the house. In size, it will correspond to a standard reinforced concrete slab.

The staircase usually occupies a smaller area, so after equipping the opening, the remaining space is concreted. The technological process consists of 8 operations:

To make the metal frame invisible, it is mounted 2-3 cm higher in relation to the lower edge of the slab. When the mortar is poured into the formwork, it will flow under the profile and hide the frame. To prevent the cement from peeling off, short metal pins are welded to the lower part of the profile, and a plaster mesh is attached to them.
If, when designing a house, the issue of arranging an opening for a staircase was missed, then it can be done independently using a powerful grinder, a puncher and other auxiliary tools. You only need to do it at the junction of the plates, otherwise you will weaken the overlap, and the consequences can be the most unpredictable.

You need to act according to the following scheme:

Since the floor slabs will have to withstand the weight of the stairs and the monolithic section, it is possible to make an opening in the above way only for narrow stairs. It is unacceptable to arrange an opening under wide massive stairs using this method.
To obtain an excellent end result, accurate calculations and adherence to basic rules are necessary. The opening in the ceiling is an unsafe design, so its installation should be approached with all seriousness. If you do not have experience, please contact us. Our professional team will help you with advice, if necessary, perform calculations, select the best opening option for the stairs you like.


