How to make a portable table for a car? Car table - the best New Year's gift for the driver
Car trips differ not only in the quality of the road, but also in travel time. Those who often travel long distances and have lost faith in roadside cafes cannot do without at least a light “snack”. And in this case, a table is very useful. Even a ten-minute rest with a cup of coffee and a sandwich will help, if in fact there is an opportunity, as they say, to have a human bite. That is, a sandwich is not on the front panel and there is also a beveled glass of coffee, but all this is on the table.
You can make such a car table yourself. Moreover, the place for its fastening is different: in the area of \u200b\u200bthe “glove box”, between the driver’s seat and the passenger seat, behind the first row of seats, that is, as in an airplane on the back of the seat in front.
Here the choice is determined by the owner of the car and the space. And yet, a table in the car with your own hands will be very handy.
Here is one of the options, and the most straightforward and, perhaps, the easiest to perform even for someone who will make his debut in this business. But it fits the car that has a cup holder. You will need a piece of PVC and a piece of pipe that is suitable for plumbing. And be sure to glue: all structural elements are attached with glue.
Such a homemade table will be inserted into the glass holder. Therefore, first of all, we accurately measure its diameter. According to its size are selected in the household store:
Two knees with angles of 90 degrees; coupler; pipe; flange; adhesive.
And then - the process itself. Three parts of the pipe are cut off within 2-3 cm, and the entire structure is mounted, but without glue, as it were, it is baited. The coupling must fit very tightly into the glass holder, reach its bottom. You may need to apply sanding. It should be borne in mind that when gluing the pipe will sit deeper in the hole, about 5 mm. If everything is adjusted, it is necessary to degrease all surfaces to be glued, smear with glue, insert a pipe into the fitting and turn it 90 degrees. Wipe off any excess glue with a rag.
Now it's up to the table top. The plywood sheet must be adjusted to the intended size. On the surface, mark and cut (cut) holes for, for example, a coffee cup or a travel plate. You can also under the legs of the laptop. It remains to plant and fix the countertop to the flange. And the final touch is aesthetic: paint the table with acrylic paint from a spray can.
Second option:
https://www.drive2.ru/c/1243343/
I’ll explain right away, I mostly travel alone, without passengers. In order to avoid possible injuries by passengers in the event of an accident, the table is made easily removable.
It is located quite high above the knees, it does not interfere with the entrance-exit at all (Next's cabin is quite spacious in this regard).
As I did, everything is clear from the photo.
I will say right away that I am not a master cabinetmaker, not a carpenter, not a joiner, and not even an engineer.
There is such a niche in Gazelle Next, here we will collective farm ...
we will make a template out of cardboard, transfer it to plywood and cut it out with a jigsaw ...
trying on…
The table area is quite impressive.
from the remnants of plywood we make the sides of the table ...
and a cupholder...
we cover it with varnish in two layers (I didn’t have impregnation and drying oil), then with a bodysuit ...
I used urea spray. But you can also use Body in a spray can (anti-gravel), the effect will be about the same. Analogues --- Raptor, anti-gravel Body 950. The coating is elastic. Like rubber. Doesn't scratch. Wear resistant. Pickup truck bodies are also covered with this so that they do not deteriorate from cargo ...
in three layers with intermediate drying, we throw the third layer with the effect of * pimples * ...
put-look, fastened to one bolt in a niche, on the far wall. (You can see it in the third photo).
place for a glass with a diameter of -73 mm.
Many thanks to the author AleksNext
Have you ever wanted to grab a bite to eat on the go but couldn't find a place for that sandwich? Well here is your solution! I present to you a table in the car! In addition, I will show you how to make a place for a notebook and a pen and how to make, if necessary, a set of glove boxes. Thank you and I hope you enjoy!
First, you need to cut a large circle out of plywood. Mine was about 12 inches in diameter.

Secondly, it is necessary to clean the burrs well with sandpaper. Usually sandpaper is marked according to the size of the abrasive, for example 80,100,150. We start with a coarser sandpaper and finish with a thin one.

Now we paint "under the tree" and polish with a rag.

The better the plywood is sanded, the better the paint will lay down.

After drying one side, move on to the other. More than 1 coat will likely be required.
While the countertop is drying, cut out a piece of CPVC (CPVC) pipe with a diameter of? inches and 12 inches long. The edges should be cut evenly, at a right angle.


Can we paint this tube and adapter with a spray? V? inches.

To facilitate the work, we insert some kind of rod into the pipe and stick it into the ground. We paint in several layers with a break of 15 minutes for the previous layer to dry.

Choose an undamaged metal can. Remove the sticker from the jar and the remaining glue with sandpaper.

Prepare it for painting by sanding. Paint any color of your choice, just like the CPVC pipe, and let dry.

While the jar is drying, using another jar of the same type, draw 2 circles on the plywood and cut it out. We paint one of these circles on one side, like the countertop.

Select a drill according to the size of the pipe. I used 3/4 inch. Drill a through hole in the center of two small round pieces of plywood. If necessary, widen the hole a bit so that the CPVC pipe can pass through.


Now drill a hole with a diameter? inches in the center of your table, but only half the thickness of the plywood! This hole must exactly fit the 3/4-1/2" adapter. Glue the 1/2″ end of the adapter into the hole. After that, we screw in 2 small short screws from the inside for greater strength. Unfortunately, there are no photos for this step.

Take a dried jar and insert an unpainted round piece of plywood into the bottom. 4


Then take the second piece and place it at the top, flush with the rim of the can, with the colored side facing out. Fasten the plywood to the rim with 2 screws. The screws must not reach the hole in the center. Insert the pipe as shown in the photo. 
Connect the tabletop and the finished leg.

Now you have a portable, durable table in your car. If it does not fit into the cup holder and is too small in diameter, then seal with foam or something similar.
If you need a pen and paper on the way, use Velcro and silicone spray.


Cut out Velcro, the right size for a pen and paper. We apply silicone spray on the back of the prickly Velcro and glue them to the table and to the necessary objects (pencil / pen and paper). 4

Well, that's all, our small but cozy table is completely ready. In my opinion, it turned out well.
Photo
New
DIY
Homemade table in the car
As I wrote earlier, I had an idea to make a folding table ...
And today I decided to bring it to life)
To do this, a piece of plywood (10 mm thick) was bought at the nearest “cut”, and in a store not far from the cut, screws, hinges and corners were bought.
Some time ago, walking around the household department of the supermarket, I saw in it just such - absolutely wonderful cup holders, which for some reason were called “cups for pens”.
I immediately bought them, and since then I have been haunted by an obsession - to stick them somewhere in the car.
And when I decided to make a folding table, I already knew that my coasters would be in it)
I will have a table with dimensions - 60 by 40 the main folding tabletop, and 15 by 40 the fixed part of the tabletop.
I made a pattern on a piece of plywood.
I sawed the plywood with a “grinder” and processed the edges with it and made rounded corners at the table.
He circled the cup holders on the non-folding part of the table.
I made holes for the cup holders with a drill with a regular drill.
I “processed” the edges of the holes with the same drill (I didn’t try hard here - anyway, these holes will not be visible))
Screwed the hinges and corners.
The table is almost ready - there is a leg left, I will make it tomorrow and post it here.
(I spent three hours on everything, an hour of them on the cut and in the store)
As promised - continuation, I am making a leg for a folding table.
I bought a piece of square-section chrome-plated pipe at the construction market)
I took a plug for it there, bought a molly dowel and corners for furniture in neighboring boutiques.
Cut off the excess from the leg.
I cut off a corner so that the leg can fold.
The worst thing here is drilling a chrome leg, I had regular, black drills and yellow ones.
You can drill with black, but it seemed to me that yellow copes with the task much better.
I also made a hole in the corner for the bolt.
All collected - it works!)
Folding table for Gazelle
And this is how it looks in the final version in the car.
The main tabletop is covered with varnish, and a small fixed part of the tabletop is pasted over with the skin of a young leatherette. (window will be)
For those who want to do something similar, I advise you to take thicker plywood (not 10mm).
But otherwise, while I'm happy with everything, let's see how it will be in operation.
Specifications
Tuning car interior. Table in the car.
I don’t even remember how many tables I had to put in the salons of different cars. They made their own designs, but more often they used ready-made ones from the interior of another car for tuning. The most convenient to install and suitable size table can be borrowed from the Volkswagen Multivan.
Of course, such a table will not fit in a passenger car, but in a minibus it will fit “like home”. How we attached it in the cabin, I will tell you using the example of tuning the Chevrolet Express.

This Chevrolet is a big bus, there is plenty of space inside and you don’t have to think much about where to insert the table. Usually, in tuning the car interior, a table for passengers is placed on the side or between the seats. The transformation mechanisms of such tables differ in the trajectory of unfolding and fixing the tabletop.

Photo 01. The design of the Volkswagen Multivan table is designed for a wall position, which means that we just have to lean it against the side trim in the right place. In addition to the table, I placed a thermoelectric cooler (aka heater) for a bottle or glass on the side of the car.
I have already given an example of installing an electric drive on a bar movement mechanism in tuning a car interior. So, in stock, the Volkswagen Multivan mechanical table in tuning can also be equipped with an electric drive. Often we do just that - we mount the window regulator mechanism with minor modifications on the table frame. There is, however, one trick with opening the lid of the table ...
 Photo 02. In order to rigidly fix the table on the car and drown it flush with the side trim, you have to cut the original trim of the Chevrolet Express interior. In tuning the interior of a car, locksmith work probably takes up a third of all resources and time. Therefore, I work only with experienced professional guys. A good master does not need to explain what kind of piece of iron to make - he himself will explain everything to you (in an accessible language).
The table is bolted to the floor and wall of the car body through steel brackets.
Photo 03 Especially in my case, when a movable panel is supposed to be in the skin, fixed on a separate table, and not on the skin itself. These details hide the complexity of tuning the car interior. But if everything is done in order, fixing the structural elements and plating, then distortions and withdrawals of gaps can be avoided. 
I make the body of the overhead sheathing of the table from hardboard (fiberboard) with the expectation of attaching it to the native side sheathing with external self-tapping screws. I immediately mark and cut out the window for the swivel hatch of the table.

Photo 04 This will strengthen the part as a whole and allow me to cut the corners of the hardboard from the outside without losing strength. This way of tuning the car interior allows you to save on time and materials. Moreover, very complex shapes can be made from hardboard, and even with a stretched (rounded) surface. Therefore, I choose plastic, on the one hand, smooth hardboard. And the reverse, fleecy side absorbs polyester resin well, sticking to fiberglass to death.

Photo 05 Front panels, where possible, I always round and smooth the surface with sandpaper. The lining of the table in the car is also adjusted in place with the help of putty. I rub the gaps between the table lining and the native side lining of the car with “hairy putty”.

Photo 06. The table in the car from Volkswagen Multivan has a design feature. In the upper part of the table, when opening, the lid first leans back, turning. From the outside, in the closed position, the lid is flush with the front panel of the table casing. Therefore, I make a separate part that looks like a hatch from the outside.
Hardboard will also work well here as a basis for fiberglass.

Photo 07 You should not just mold too thick a layer of plastic so as not to deform the side walls of the part. They may lean inward relative to the surface of the lid.
Hardboard tuning of the car interior, in places such as a rectangular table cover in a car, is difficult to distinguish from parts made of fiberglass or sheet plastics.

Photo 08. Not the last specialist in car interior tuning is an electrician. It is not easy to find a good electrician with extensive experience in tuning. But to revive the table in the car, I ask a proven pro, whom I have known for a long time.
In general, there are almost always some inconsistencies with the electrician. A couple of times to assemble and disassemble the interior due to problems with electricity in tuning the interior of a car is a normal thing.

Photo 09 The trim has already been covered in leather with Alcantara and screwed to the native side panel of the Chevrolet Express. I am in no hurry to paste over the hatch cover, because I am going to refine its contour, finally setting the gaps. At this stage, it is advisable to start the table already from the button, and not just by applying wires to the screwdriver's battery.

Photo 10. Beauty! The table in the car works like clockwork. It is a pity that you do not hear the sound with which this tongue falls out into the car.
There is, however, one not very pleasant, as it seems to me, moment in the tuning of the table. Before you press the button to close the table in the car, you need to fold it manually. And you can forget ... however, I have not yet heard reproaches from the owners of the car tuning salons made by us.

Photo 11. The issue with the control buttons for the interior tuning functions, and in particular the table, is solved differently. Usually, buttons from cars of other models are used, for example, a Mercedes 220. A panel is cut out under them and the buttons are arranged in the desired order. This time, the remote with buttons was made from a piece of Plexiglas, but more on that in the next part.
tuning
Description.
The table in the car can be used as a convenient stand for a laptop, as a desk for papers and office supplies, for food, drinks and much more. Easy to install, change the angle of inclination.
The compact table folds up and does not take up much space.
The table has a universal mount that allows you to securely mount it on the steering wheel and on the back seat using special hooks (included). The mount is universal, suitable for any seat and steering wheel. The table has special recesses - coasters for drinks, as well as for small items.
Characteristics of the table for the car:
Material: chromed steel and impact-resistant plastic.
Dimensions (l x w x h): 230 mm x 355 mm x 40 mm.
Convenient combination for using a laptop in a car: car table, car inverter (220 volt socket in the car) and cigarette lighter splitter.
| car table |
 |
| seat headrest table |
 |
| table in the car |
 |
| table in the car |
 |
| table with steering wheel |
Going on the road..
Numerous traffic jams in city blocks, long journeys, waiting for their managers or clients
Meeting a loved one at the airport - all this takes time, which seems endless if you spend it behind the wheel of a car. A laptop will allow you to pass the minutes - a small device that can work for several hours without recharging. With it, you will get the opportunity to play an interesting game or watch a new movie. But where to place this equipment in the car, because there is not enough space here even without it. A laptop table will save you. Popular models of this type of portable furniture amaze with a list of their positive characteristics. How to choose the best car tables?
First, the furniture must remain comfortable to use. Modern tables are easily mounted on the steering wheel of a car or on the back of the seat for passengers. You can also take them off quickly. In a matter of seconds, a table for a laptop in a car should be rolled up if suddenly the cavalcade of the vehicle in front moves and the “cork” begins to dissolve. You should choose only those products that fall down or fold in half, while not blocking the view or free space near the legs.
It is worth paying attention to the package of documents that is attached to the purchase. A high-quality table for a laptop in a car must have a certificate and instructions. The last document describes how to properly fix furniture and how to use it on the road. Many companies - sellers, as well as manufacturers, offer a guarantee, which is equivalent to 6 months - 1 year.
And, of course, an important parameter when choosing the type of furniture in question is the aesthetic component. There are many products on the market in a variety of configurations and colors. You can purchase a table for a laptop in a car to match the color of the upholstery or dashboard. And you can choose the standard colors - silver, black or "wooden" models. Just pay attention to the base. The frame must be either metal or plastic, but made of high-quality dense materials that can withstand the declared load.
In conclusion, it should be emphasized that many tables for a laptop in a car are additionally equipped with coasters for a glass, pens or a small hole for small things, such as flash cards or a charger. But such models are usually cumbersome, and the declared functionality is rarely used for its intended purpose, and therefore has no practical benefit. Therefore, it is better to choose a simple, but beautiful and easy-to-use thing.
How to decorate a car interior?
To give the car an exclusivity and a unique appearance will help "tuning" the interior. In this case, you can solve several problems at the same time: create a unique design that will perfectly match your lifestyle and give the car interior the practicality that is so necessary in our life. Previously, we have already considered various examples of how you can decorate a car and even learned what airbrushing is and how it can transform a woman's car.

Now, we will pay special attention to the design of the car interior. When decorating a salon, do not be afraid to experiment and try, because a truly unique and chic salon can only be created by the method of numerous trials and often mistakes. You just need to start and try to bring something of your own into the daily routine of your car interior.

The first steps in the question - "How to Decorate a car interior?" you should start with leather decor elements. Make a leather steering wheel braid with combined inserts. For example, let's say your car is red. Then, in this case, the black braid of the steering wheel with separate red leather inserts will look great. You can make the lower or upper part of the steering wheel red, or you can make the entire steering wheel red. It is only necessary to take into account the following, that for the individual tailoring of such a leather braid, you will have to remove the steering wheel and give it to the studio. Only in this case it will be sewn perfectly in size.

If you have enough money that you plan to spend on decorating according to the tips from the “How to Decorate a Car Interior” category, then you can order a leather interior. The ideal option would be if it matches the steering wheel braid in color. The central part of the front seats can be made in any color, and the sides in traditional black leather. You can limit yourself to this element only for the design of the front seats. This decor will give the cabin a sporty look. In addition, leather seats are more practical than fabric ones, because they are easier to clean.


Plastic decor elements of the car interior can be changed to plastic, made under the "tree". Such elements will look stylish and rich. However, if you want to maintain a sporty style, wrap them with carbon film that would contrast with the main interior color.


Another tip would be to create interior lighting. The diodes on the tape are attached to the double-sided tape at the bottom of the torpedo. As a result, you will get the original illumination of the pedals. Diodes can be made both in one color and multi-colored. You can connect diodes to low beam, ignition or dimensions. And if you wish, you can generally display a separate toggle switch to turn on / off the backlight.


For even brighter interior lighting, you can install a neon tube in the cabin. They come in various thicknesses and absolutely all color shades. Unlike diodes, a neon tube will last you longer.

On the pedals themselves, you can install chrome lining. They are available in a wide range of sizes and can be customized for you. Now it is not uncommon to find pads already on sale with backlight. Especially this model will be useful to those women who have recently got behind the wheel and are still confusing the pedals.
Have you ever needed a table in your car? Maybe you needed it in order to have a snack while traveling by car, so as not to put everything on your knees. Or you needed it in order to write something down on paper. Unfortunately, most of the cars do not provide us with the opportunity to use the tables, since they simply do not exist. But there is a way out.
Any of us, with the help of simple means, can have a small table that can be useful to us on the road. True, in order to secure the table inside the car, there must be cup holders. Unfortunately, not all car models have them. But if your car has cup holders in the right place, then assembling the table is a very simple task. to make it, fixing it in the subsequent table cup holder.
In order to make a table in the car we need:

- Round blank plywood
- Two types of sandpaper
- 4 short screws
- PVC tube
- Knife for cutting metal-plastic
- Roulette
- Spray paint
- Paint for wood
- Drill and drill for wood
- Can
- Pencil
- Marker
- Vise

 At the first stage, you must process the round blank with sandpaper. Next, you need to paint the round blank with wood paint.


 In order for the paint to lay down evenly and beautifully, use a cotton rag.
Remember that for perfect plywood painting, you need to first apply one layer and wait until it dries. Then you need to apply another layer.

 After that, take a PVC tube and, having measured the required size, cut it off using a special tool for metal-plastic.

 Next, you need to paint the tube with spray paint. You need to apply at least 2-3 coats in order to fully and accurately paint the plastic tube. Remember that after each application of paint, you must wait 15 minutes for the paint to dry. After applying the last coat, the tube must dry for at least 1 hour.

 Take a used tin can and remove stickers or typographic designs from it using sandpaper. Next, paint the jar with spray paint in the color you want. Apply the paint in the same way as you painted the PVC pipe, remembering to let the paint dry for at least 1 hour after all coats have been applied.
 Before you paint the jar, do not forget to take the size (diameter) from it to make two wooden circles. While the painted can is drying, you can make wooden blanks with exactly the same diameter as the can. As well as a large round blank, everything needs to be painted with wood paint.


 After the small wooden blanks are cut and painted, it is necessary to drill a hole in the center with exactly the same diameter as the PVC tube. After drilling, you need to widen the hole a little.
A car is one of those things in our life that can be significantly improved in terms of comfort with the help of all sorts of gadgets and accessories. And now we will immediately talk about 16 such incredibly useful devices that will surely come in handy for most drivers.
1. "Pocket" for the phone
Bright silicone "pocket", which is attached to the headrests of the front seats, for storing your phone, charging or any other necessary little things.
2. Computer desk
Compact folding computer table that easily attaches to the front seat and allows you to comfortably work, watch a movie or take notes on the go.
3. Protective case
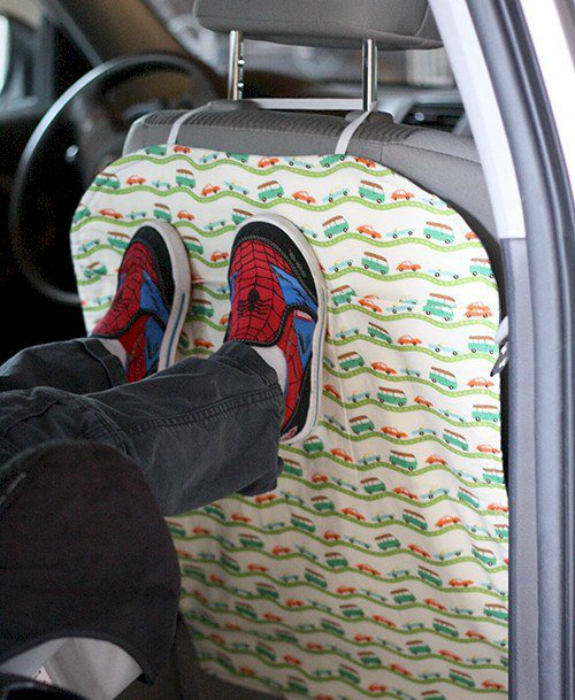
Children soil the backs of the front seats with their feet? Sew or buy a special protective cover that will keep the upholstery clean.
4. Travel table
A folding car table with cup holders is an invaluable item for long family trips.
5. Thermal bag
A small functional thermal bag that will allow you to create stable temperature conditions for storing food and drinks, and additional compartments and pockets will allow you to accommodate a lot of little things you need on the road.
6. Phone mount

Ordinary rubber bands for money attached to the air grill will allow you to securely fix the phone.
7. Car hanger

A car hanger will allow you to forget about bags and packages under the seats, as well as clothes scattered in the back seat. A car hanger can be purchased or made independently from ordinary carabiners.
8. Organizer for documents
Travel organizer for CDs, documents, money and other small things, which is attached to the car visor - an indispensable thing on trips.
9. Napkin holder
To cope with minor troubles, such as spilled coffee or a soiled shirt collar, napkins from a special napkin holder, which is securely attached to the car visor, will help.
10. Organizer for toys

So that the children do not get bored on the road and do not distract the driver from the road, you should take care of their comfort in advance. Toys, books, coloring books, water, cookies, napkins and other little things you need on the road can be placed in a rag organizer that is conveniently attached to the back of the front seat.
11. Waste container
To forever forget about used napkins, empty bottles and cups lying around in the car, every motorist should get a compact waste container with a convenient mount.
12. Cup holder
To prevent an open container with a drink from accidentally tipping over and splashing on the way, use a special car cup holder.
13. Portable table
16. Dog seat
Get a special booster to ensure the comfort and safety of your pet on the road.
In reality, the number of useful devices is simply incredible. In continuation of the topic, I would like to tell you more about in his car.


