How easy it is to make a garden path from tiles in a country house or plot - 5 steps with a photo
beautifully designed garden paths in the country or at home undoubtedly pleasing to the eye and carry a certain functionality. You can choose the material and the appropriate technology to create your garden path. Paving slabs in all its variety, wood, also in various versions of concrete, gravel, plastic and so on - everything determines your choice. How to make a tile path in the garden, cottage or plot?
If you chose paving slabs, then you will undoubtedly be able to lay it yourself following the proven, but expensive and costly laying technology using a gravel pad, cement-sand mortar, curbs, and so on, that is, following all the harsh rules of builders. However, there is a proven a simple and cheap way to lay paving slabs yourself with your own hands when creating garden paths in a country house or plot, which allows you to spend a minimum of effort and materials.
Check out the information below. If you decide that this method is too simple for you, read the article. But do not rush, making a path out of paving stones on your own, as the manufacturer recommends, is not an easy task.
And so, you have identified a place for your new garden or garden path, purchased the necessary materials for its construction, prepared all the tools and fixtures and chose a free day to work. You are ready!
List of required tools:
- bayonet shovel;
- shovel;
- level;
- rubber mallet;
- four pegs with twine;
- rake,
- log for ramming the earth;
- watering can;
- brush with hard bristles on a long handle.
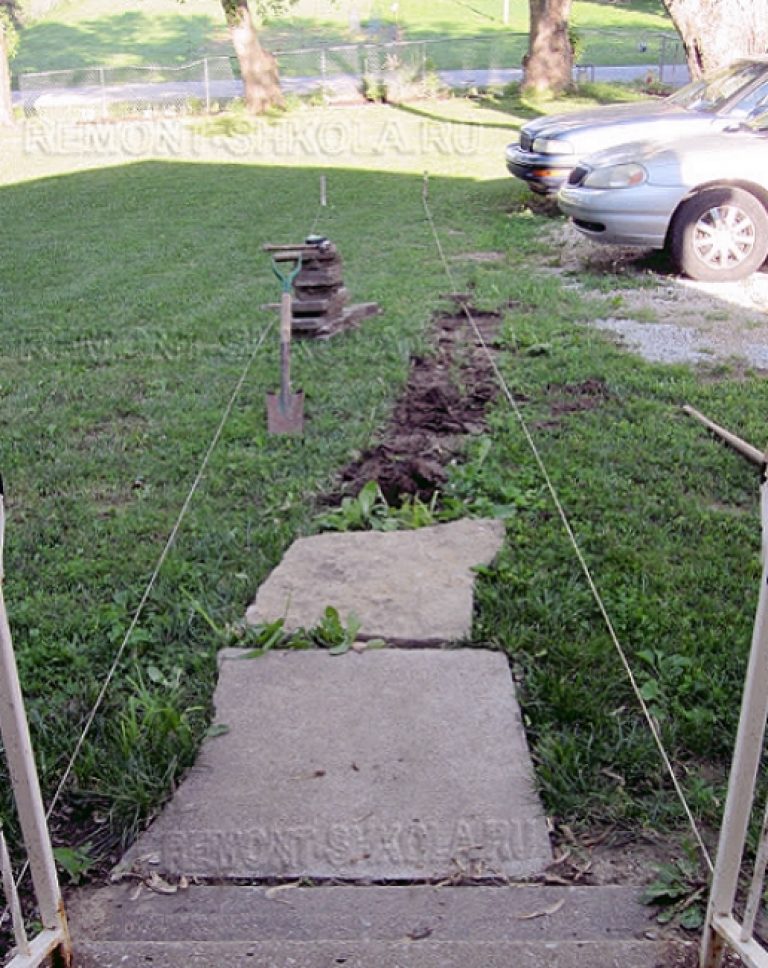
Before you start making the tile path itself, determine its length and width and plan the path directly on the ground.
When planning the width of the track, consider the size of your paving slabs. Its width should correspond to the total width of the row of tiles. Be neither narrower nor wider. To plan the track on the site, use pegs and twine.
List of required materials:
- paving slabs;
- sand.
Remove foreign objects from the territory of your future path, and mow the grass, it will be easier for you to continue further work. In this case, we are considering the construction of a straight garden path, so drive in stakes at the corners of the path and stretch twine between them, which will serve not only as a border, but also as a level.
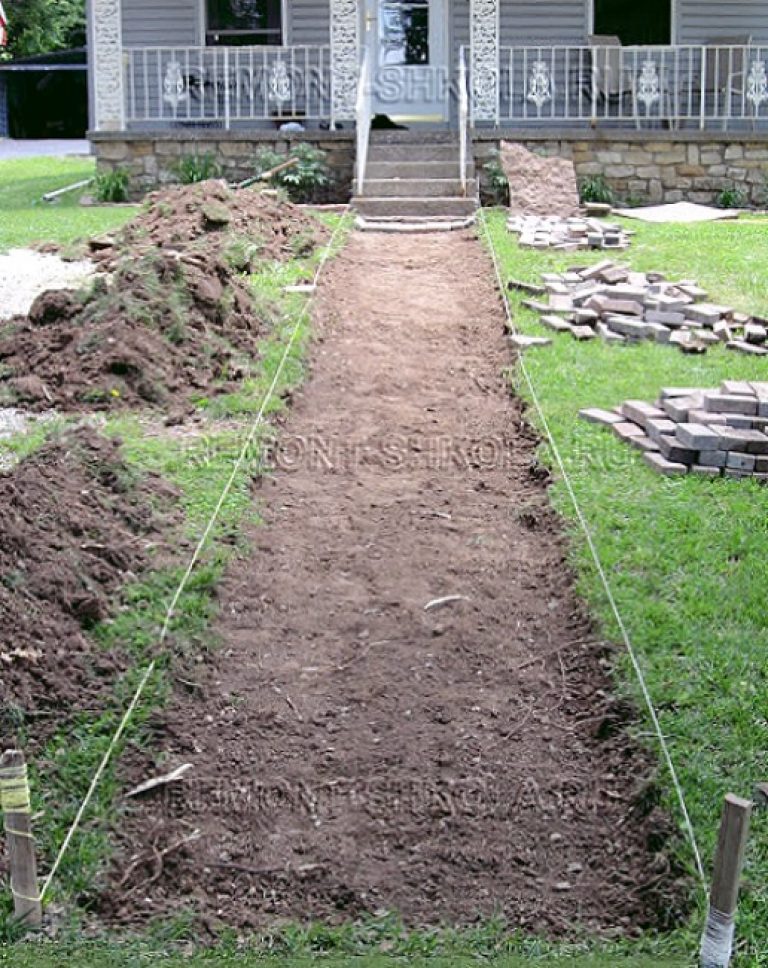
2. Bed preparation, excavation, ramming
After preparing the territory of the future track, you can begin to excavate excess soil. The soil is selected to a depth that is determined by the thickness of the tile plus 3-5 centimeters of sand cushion
If, for example, your tiles are 10 cm thick, then the excavation depth will be 13-15 cm
The result is a track flush with the surrounding surface. To excavate, first pierce the soil vertically with a bayonet shovel along the entire perimeter of your path, then excavate directly from the area of \u200b\u200bthe path itself, controlling the depth of its excavation. At the end of the excavation of the bulk of the soil, clean the bed of the track with a shovel. Next, compact the soil in the bed of the track using a log.
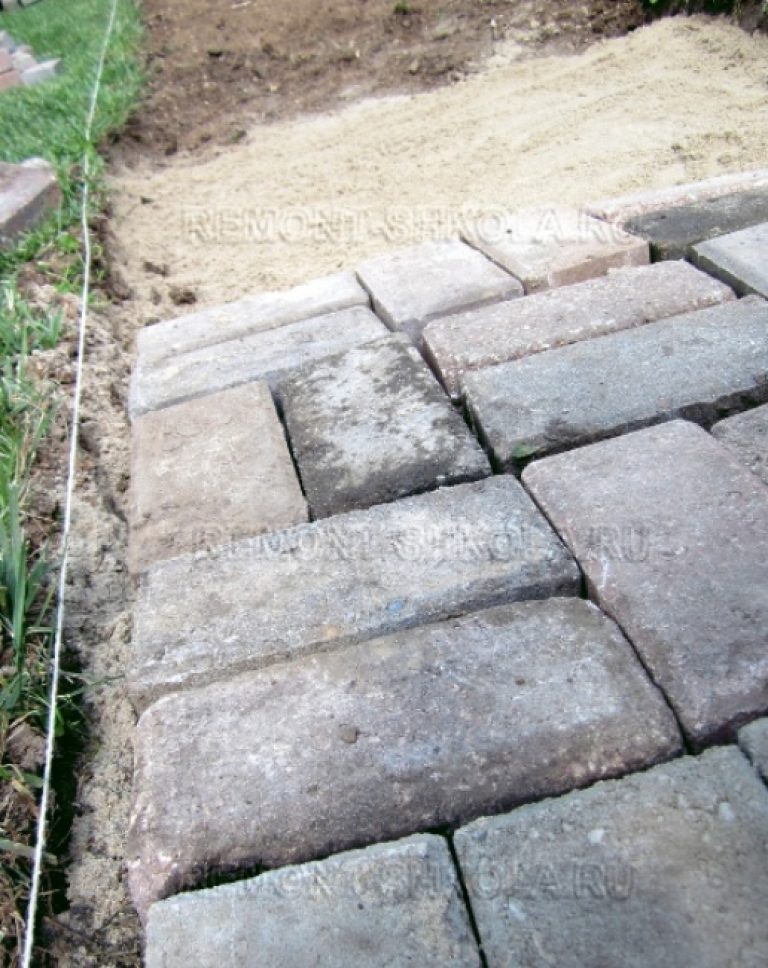
3. Laying sand cushion and tiles
After preparing the garden path bed, it is necessary to lay a sand cushion about 3-5 centimeters thick. After you have scattered the sand, level it using a piece of flat board a little narrower than the width of the track and spill it well with water, then re-level it. Cover with sand only the area that allows you to lay the tiles, located on the section of the path without sand.
Now start laying paving slabs. You can easily choose the laying pattern yourself, it also depends on the shape and size of the tile. In this case, a random, chaotic pattern was used.
When laying tiles, use a rubber mallet and a regular spirit level. Do not try to look for perfection and super-evenness, a slightly uneven path has its own beauty. Continue laying tiles until the entire bed of the path is filled.
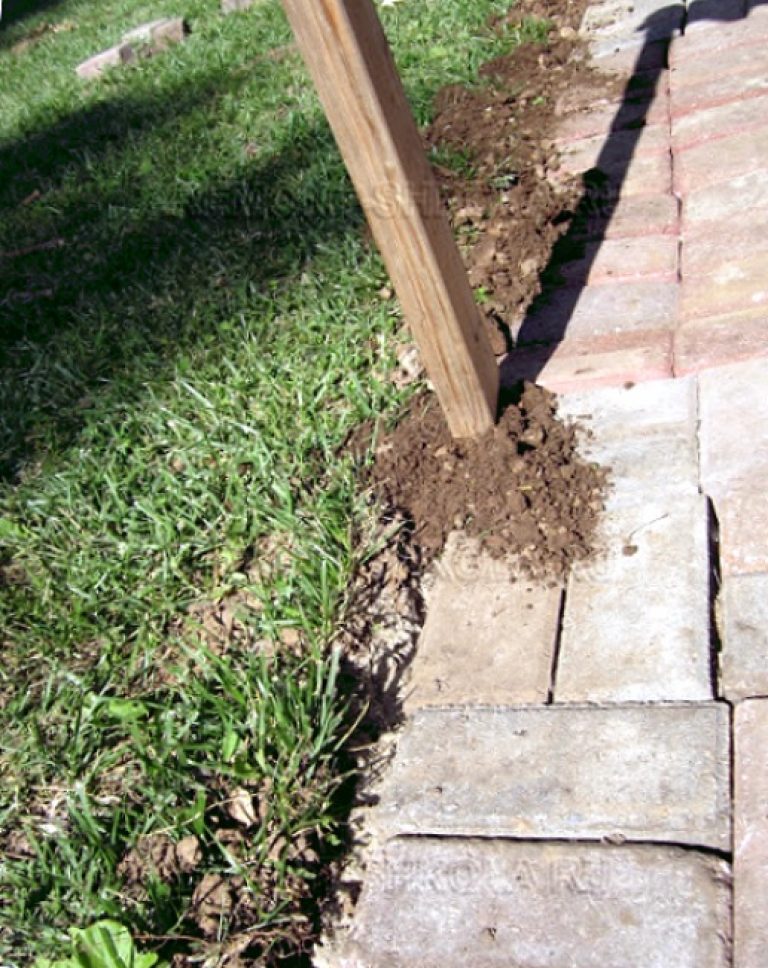
4. Strengthening the edges of the track
If you miscalculated a little in the dimensions of the width of the track, this is not at all scary. You can strengthen the edges of the path using the earth you have in abundance and the appropriate size timber, as in the photo. But this step is not required at all.
5. Filling tile joints with sand
At the end of the laying of the tiles, it is imperative to fill the existing voids in the seams between the tiles with sand. To do this, after pouring sand on the track, use a brush to rub the sand between the seams. Take your time, this work is not hard, but quite long.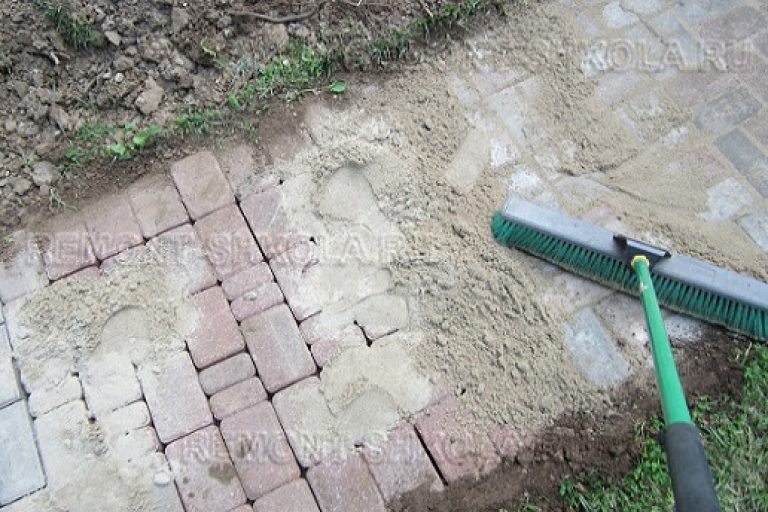
After finishing the work on grouting the seams with sand, do not remove all the sand from the tile, it will still be useful to you, because no matter how hard you try to fill the seams completely the first time, it is quite difficult.
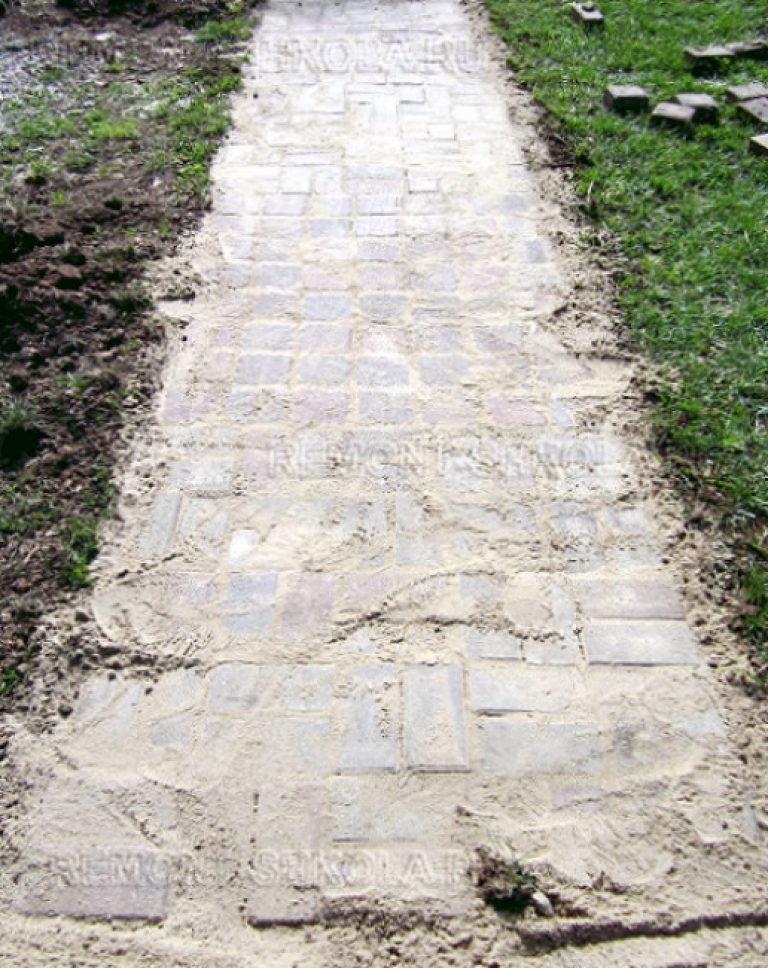
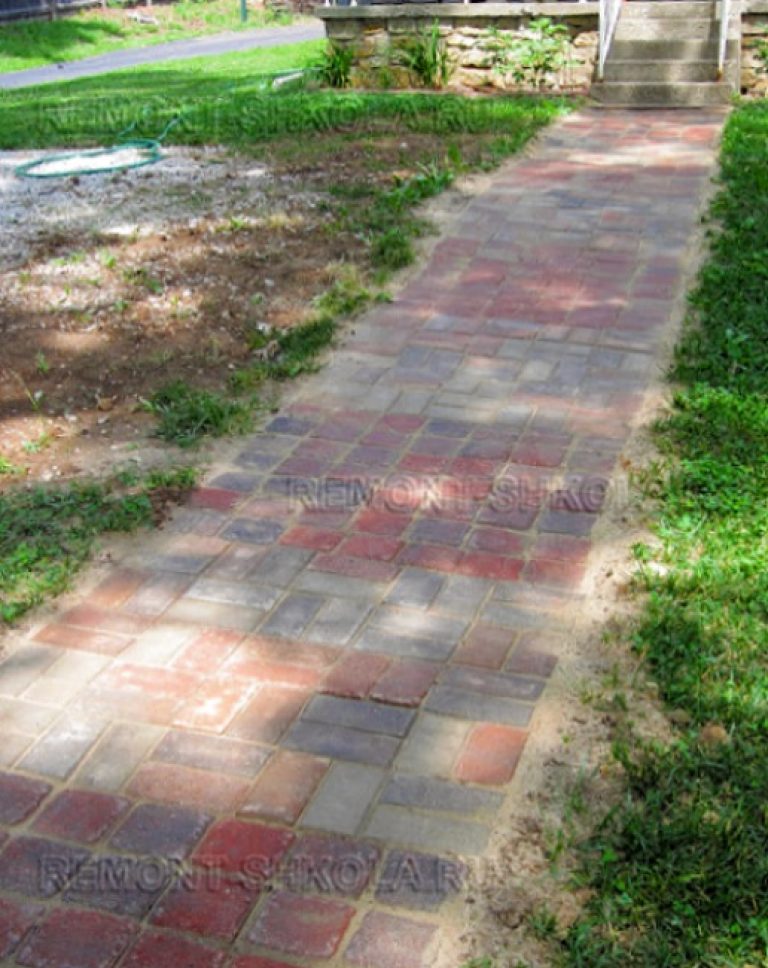
Basically on this construction of a garden path for a summer residence or a personal plot of paving slabs finished. Everything is really simple and clear even for those who will do it for the first time.
6. Construction of a flower garden
If you still have paving slabs, you can make a small but pleasant flower garden to decorate the site. It is made even easier and faster than the track itself.
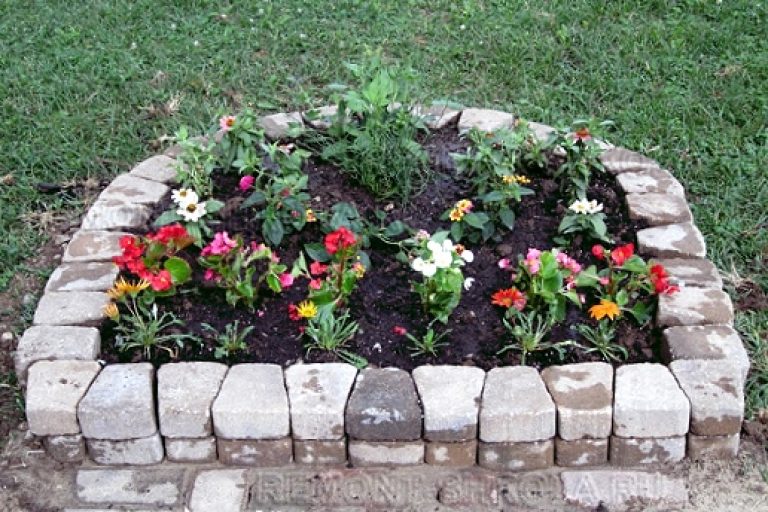
You can simply lay tile on tile without the use of cement mortar or tile adhesive, cover it with earth, and now the flower garden is ready.
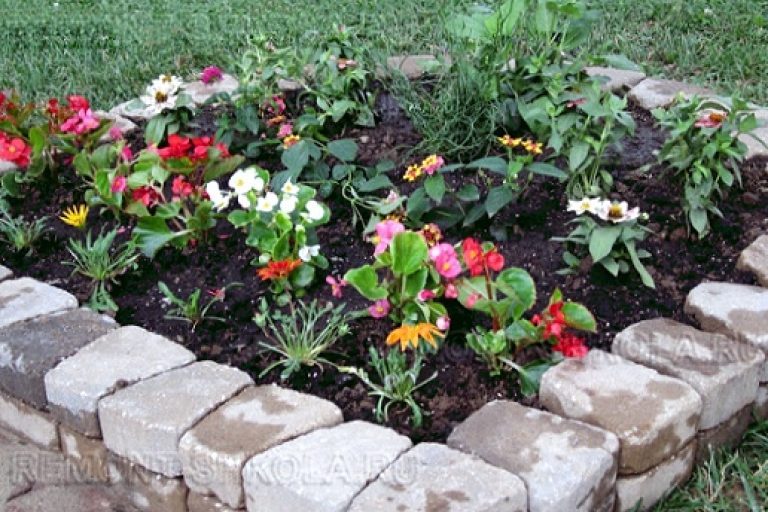
If you have time and desire, you can make a flower garden by fastening the tiles with a cement-sand mortar, while you can choose, for example, white cement, then your new flower garden will be beautiful and eternal, but in this case it is recommended to prepare a base more serious than 5 cm of sand.