How to make a hammock with your own hands?
How nice it is to relax in a hammock in the fresh air, when the weather is beautiful, warm, a light breeze blows you with its freshness, and you just enjoy the moment. Sounds tempting, but don't have a hammock? This is not a problem, because you can make it yourself. We have described for you some simple ways to make a hammock with your own hands.
How to weave a rope hammock
There are several varieties of hammocks, the most traditional is considered rope. It can be hung outdoors without fear that it will get wet in the rain.You will need:
- Two wooden sticks meter long, 3-4 cm thick. Preference should be given to hardwood;
- Durable cotton cord;
- Two iron rings with a diameter of about 10 cm;
- Stationery knife;
- with drill.
The whole rope is cut into pieces, the number of which is twice as many as the holes in the wooden plank. Each piece should be three times longer than the estimated length of the hammock itself. For example, for a hammock 90 cm wide and 2.5 m long, 150 m of rope is taken, plus 1.5 m for fastenings.
Making holes in the plank
With a total length of a wooden stick of one meter, the width of the hammock itself will be 90 cm, since the extreme holes are drilled at a distance of five centimeters from each edge. The step between the holes should be equal to five or six centimeters. It is recommended to round the edges of the holes so that the rope does not break when rubbed. The diameter should be slightly larger than the thickness of the two ropes.
Weave a hammock
Two pieces of cord are inserted into each hole in the wooden plank. From one end we leave 70 cm of rope. From the other end, we begin to weave knots. There are many ways to weave a hammock. We will consider two of the simplest and most versatile methods.
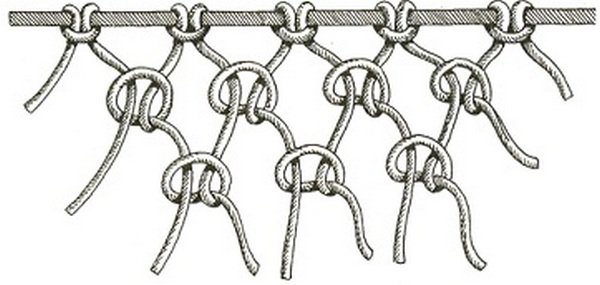
We complete the manufacture of a hammock
The remaining seventy centimeters of the rope are passed through the holes of the second bar. Two cords per hole. We connect the four ends into knots, then all the ropes are tied to a metal ring, as shown in the photo. A strong rope is passed through the extreme cells, it can be twine to strengthen the structure.
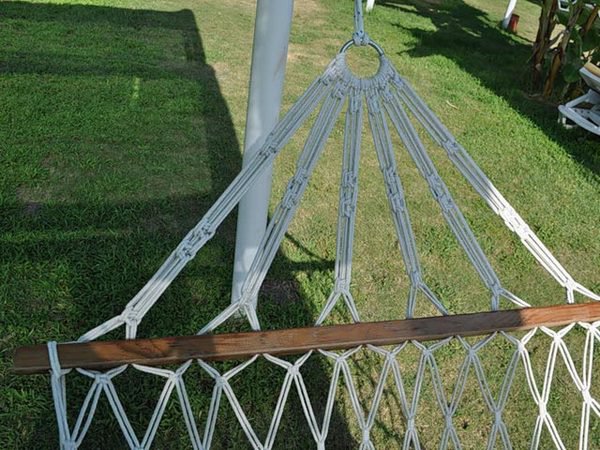
You can take such a hammock with you to nature and hang it behind the trees, but for giving it is convenient to use a special frame for a hammock, which can be placed anywhere on the site. The hammock stand can be metal and wooden, you can make it yourself or buy it in a store.
Another way to make a rope hammock is shown in the video below.
Hoop hammock
An unusual version of a hammock can be made from a metal hoop. By its design, it resembles a swing, which is suitable not only for summer cottages, but also for an apartment, for example, you can hang them in a loggia.You will need:
- A metal hoop with a diameter of 90 cm, steel is better than aluminum, as it is more durable;
- Two pieces of fabric 140 by 140 cm, the material must be durable, it will be better if it is moisture resistant (canvas, tarpaulin, mattress teak);
- Lightning 90 cm long, if there is no such length, then two locks of 45 cm each can be used;
- Sewing machine;
- Rapeseed tape or strong rope;
- Carbine.
We put two pieces of fabric together, put a hoop on top. We draw a circle, retreating 25 cm from the edge of the hoop. The larger this circle, the deeper the swing will be. And vice versa. Cut out the circles. Sew a zipper in the middle of one of the circles.
We sew the basis for a hammock
Fold two circles right side to each other. We sew them together on a sewing machine, after opening the zipper, in order to turn the circles right side out. To strengthen the edge, you can apply a topstitch.
If you want to make the hammock more comfortable, you can place a layer of synthetic winterizer between the layers of fabric. The hoop can also be wrapped with a soft layer and sheathed with the same fabric.
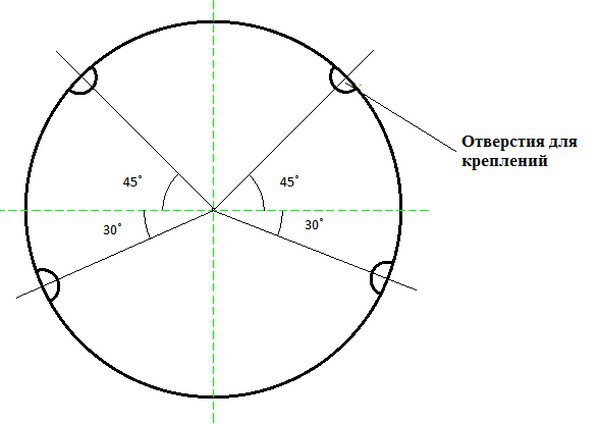
In order to be able to fix the rope or ribbon on the hoop, four holes in the shape of a semicircle are cut out of the fabric in our circle. We process the edges with an oblique inlay. The diagram below shows exactly where to cut the holes.
Final stage
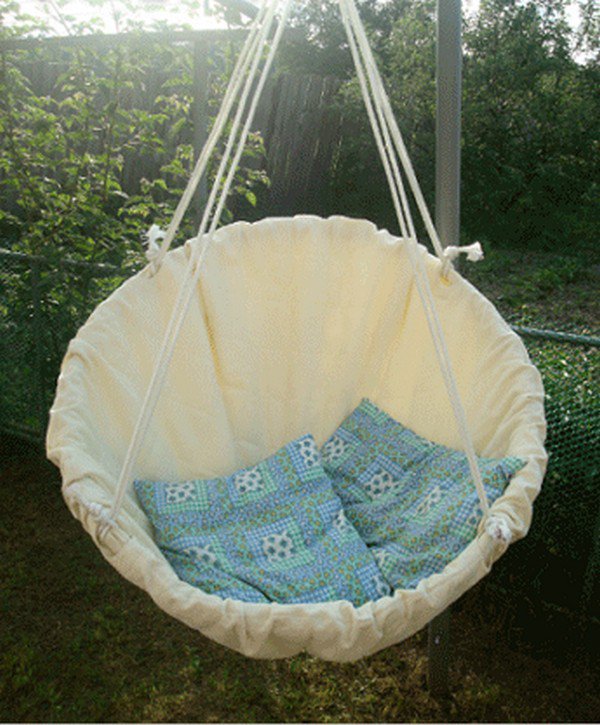
We insert a hoop through the hole with a zipper, four pieces of cord or rapeseed tape are tied to it, one for each hole in the case. The length of the segments is adjusted depending on the desired height of the structure. The upper ends are conveniently fixed with a carabiner.
The result is a stylish hammock chair, as shown in the photo.
cocoon hammock
This hammock is also called Mexican, it is very easy to make, when folded it takes up little space and weighs only about 1 kg.You will need:
- Two pieces of dense, strong fabric, you can take coarse calico, canvas or tarpaulin;
- Strong rope 20 m long.
To make a hammock suitable for the whole family, you need to take the height of the tallest person as a basis, add another 60 cm. A width of one and a half meters will be enough.
We sew the base
We sew two pieces of fabric of the required length and width along the long edge. Can be left unsewn with a hole on each side so that a synthetic soft rug can be inserted through them, which can be removed during washing.
Fasten the rope
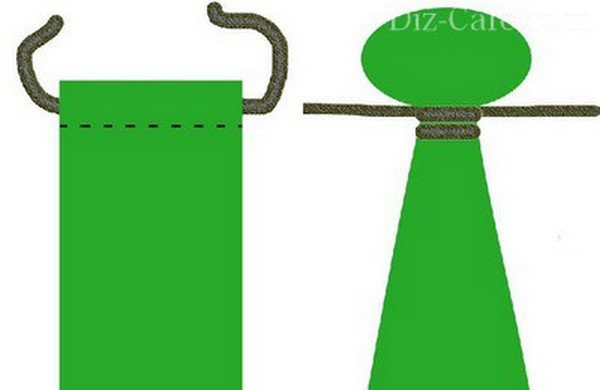
We tuck the wide edge by three centimeters and stitch it so that a kind of tunnel remains. Through this tunnel we pass the rope. We do this on both sides.
To secure the anchor point of the rope, both ends of the rope are crossed and tied into a knot around the seam. More details are shown in the diagram below.
The finished hammock can be attached to trees or special frames. Choose a beautiful, colorful fabric to brighten up your yard, and you'll not only have a comfortable seating area, but also a stylish piece of landscaping.
Video on how to make a hammock with your own hands
As you can see, making a hammock with your own hands is not difficult at all. Take one of the options described as a basis, bring something of your own and create a unique hammock that will not look like any other. From the outside it will seem that this is a designer thing that costs a lot of money.