Construction of a wooden barn in the country - stages, photos
Do you want to know how to make a barn in the country quickly, beautifully and most importantly cheap? Then this information is for you! This little wooden cottage shed was built from the material that was left after the construction of an extension to the main house.
The extension itself is a foam block building 4 meters by 10 meters, consisting of two rooms, plus a terrace, sheathed with clapboard on the inside and vinyl siding on the outside. That is, a fairly decent amount of various building materials were used for its construction.
As it always happens, at the end of the construction of this extension, quite a lot of not only scraps and pieces of this material remained in stock, but also absolutely whole boards, timber, siding, roofing corrugated board, plywood sheets, paint (most importantly -).
An extension to the house, from the construction of which materials remained.
All this was successfully removed to the garage and waited for no one knows what.
Extra materials after repair.
But the time has come and the garage area was needed for other purposes. Then it was decided to free the garage from the old material and make a barn out of it on our own. That is, one shot to kill two birds with one stone. Consider how to build it in stages with a photo.
2. Construction of the foundation, base and frame of the barn
It all starts with foundation for a shed. Since the soil at the site of the barn is predominantly sandy, and the weight of the planned building is not large, the easiest way to build the foundation for the barn was chosen.
About 10 cm of the top layer of the earth was removed along with the turf according to the size of the future barn. The entire selected volume of land was replaced with sand, and the sand was spilled with water and carefully compacted. Further, slightly chipped and defective concrete tiles 6 cm thick, which remained from the old paths, were laid directly on the sand.
The next step was shed frame assembly. First, the base of the frame is made. The base is a rectangle assembled from two longitudinal and five to six transverse lumber elements (logs).
In practice, this means that you can use the lumber that you have available: it can be a bar (150x150 mm; 100x150 mm; 100x100 mm;) edged board 100 and 150 mm wide and 50, 40 mm thick. In a word, what you have, make it out of it.
Having assembled the base from the board, you need to fasten it by making the floor of the barn (rough or finish - whatever). In this case, the floor of the barn was thick, oil-painted, moisture-resistant plywood.
If when assembling the base you use not a bar, but a cut board, then install the board only on the edge.
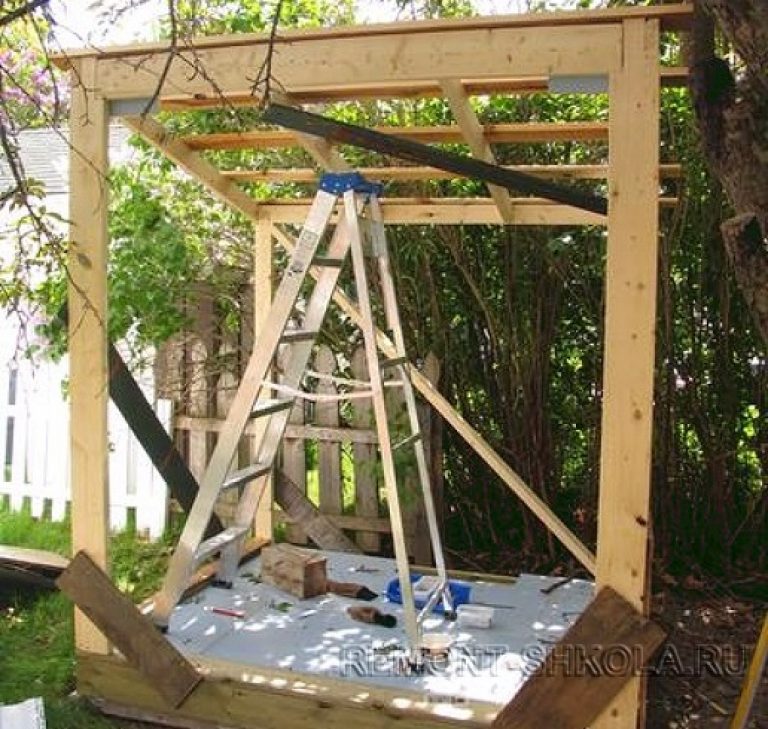
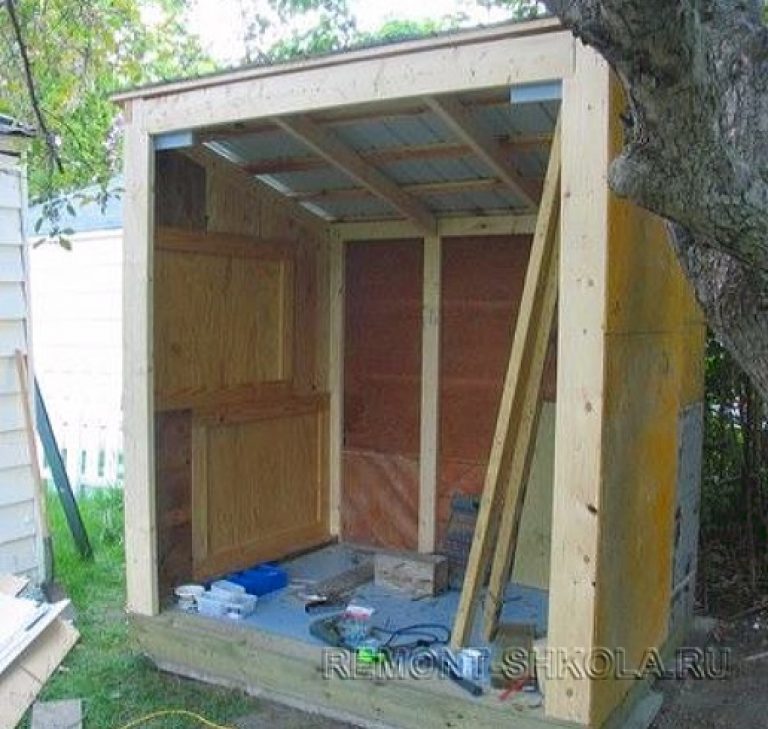
Now you can proceed directly to the assembly of the frame of the barn. We install corner posts at the corners of the base of the barn. Shed roof shed, so the rear corner posts should be shorter than the front ones.
Install additional racks, and since the shed is not large, their number is determined by the size of the material (plywood, chipboard) that you have available, which you will later sheathe it with. Although the installation of additional racks can be postponed until the rough wall sheathing.
For temporary fixation of the corner posts, install side supports (it is better not to nail, but use self-tapping screws - then just unscrew).
Shed frame installation
Next, using self-tapping screws and connecting corners, we mount the upper trim. The upper harness, like the lower one, can be made from both timber and boards. The elements of the upper trim are fixed to each other, and are also attached to the corner posts.
You don't have to use angles, but if you don't want to fiddle with filing, then this is the sweetest thing. Galvanized plates for wooden structures are perfect.
After that, we install the roof lathing. Once again, I repeat, both a bar and a board can serve as a material for the crate. The distance between the details of the crate is in the region of 40-50 cm. The edges of the elements of the crate should protrude 10-15 cm beyond the perimeter of the base of the barn.
3. Arrangement of the roof of the barn
Many of those who are looking for answers to how to build a barn seek not theory, but practice. Further, according to the theory, as a rule, there is a process of sheathing the walls of the barn, but sometimes it is possible and necessary to do otherwise.
The barn, as already mentioned, has an optimal shed roof structure. What does it give? This design makes it possible to install a fairly high door in the front and at the same time, does not make the entire shed excessively high.
When you cover relatively large areas with roofing material, always, when calculating the necessary material, take it with a small margin. From the roofing material, which was purchased to cover the extension to the house, the roofing profiled sheet remained. In fact, the size of the shed was predetermined by the remnants of the profiled sheet, since I did not want to buy additional material.
Frequent rains determined the further order of work. And although the construction of the barn consists of their successive stages, the construction of the roof went on. Laying of the roofing sheet is carried out with an overlap.
The profiled sheet is fastened with the help of special roofing screws with a rubber gasket (sealing washer), which excludes the penetration of water through the fastening hole.
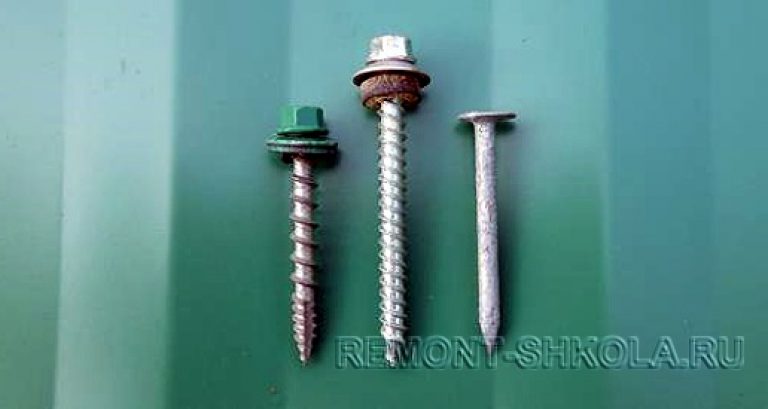
If desired (or lack of roofing screws), you can pick up painted screws to match the color of the roofing material. According to the rules, 8-10 pieces are used per 1 meter squared. Again, according to the general rules, the corrugated board is attached to the elements of the roof lathing at the points of contact with them, and to connect two sheets together in the upper part of the wave of the sheet. The angle of the roof slope, among other things, determines the distance between the hardware: the larger it is, the smaller the distance between the hardware.
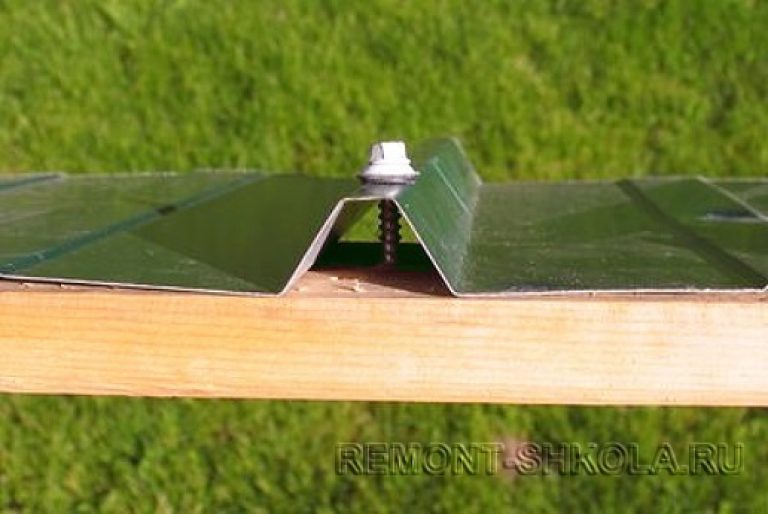
But on small, very small areas of the roof, you can slightly deviate from the rules - after all, in heavy rain, water flows down the lower parts of the roofing sheets, and over time, sealing gaskets on hardware tend to dry out in the sun and lose elasticity. And there is such information that when mounting self-tapping screws into the lower wave, sealing rubber washers begin to collapse after 4-6 years.
Therefore, in this case, hardware screwed into the upper wave of the corrugated sheet is quite enough. Important nuances that cannot be ignored when fastening corrugated board are the correct position of the self-tapping screw and the depth of screwing in the self-tapping screw.
Make sure that the hardware enters the crate at an angle of 90 degrees, and also that the sealing washer is tightly pressed against the profiled sheet, but no more than necessary: it is also impossible to overtighten.
The most elementary way to install roofing screws is to use a hammer. With a self-tapping screw, using a hammer, you pierce the metal, and then with a screwdriver with a nozzle for screwing in, you drive the self-tapping screw into the roof sheathing element. In order not to overtighten the screw, use a screwdriver only at low speeds. Although, to make a hole in the corrugated board, you can fix a metal drill of the required diameter in a screwdriver and make holes with it.
4. Rough lining of the barn
Next comes the rough sheathing of the walls of the barn - the next stage in the construction of a barn in the country. If you have unused plywood left after the repair, then it will fit just right. Its color and thickness do not play a decisive role. The main thing is that the plywood is not rotten or swollen from moisture. After all, we want build a barn, not but how, but cheap. If in the future you are not going to make the inner sheathing of the barn, when installing plywood, try to lay it inside the building with the best side.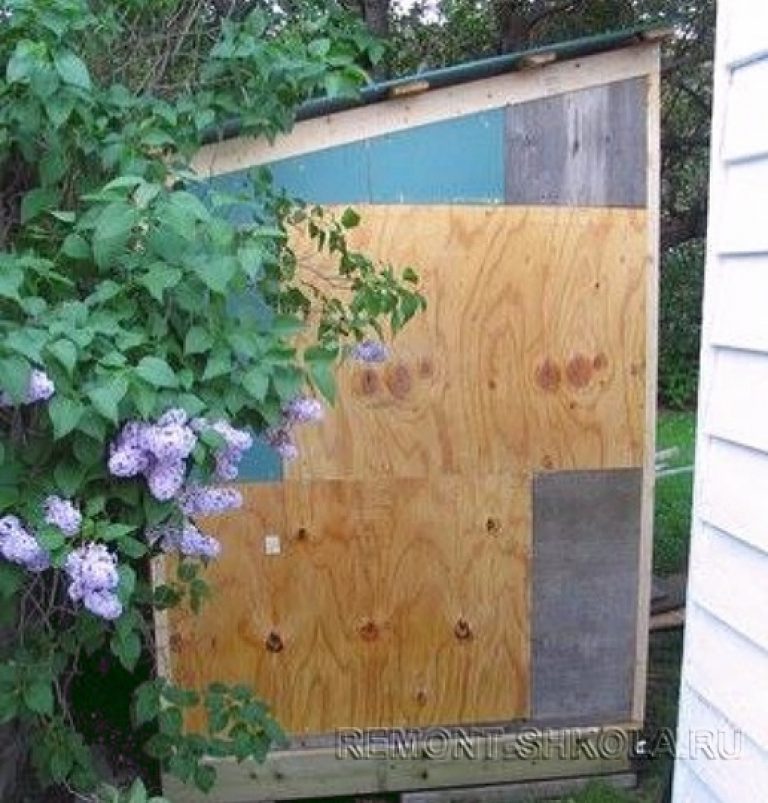
If the material with which you sheathe the shed from the outside is strong enough, then you can not install additional racks, but fix it from the inside with the help of additional rails. How convenient.
Plywood shed interior view
After installing plywood on the side planes of the barn, it was covered with roofing paper, also left over from the previous object. The use of roofing is not at all a mandatory step in the construction of a barn, but definitely not harmful.
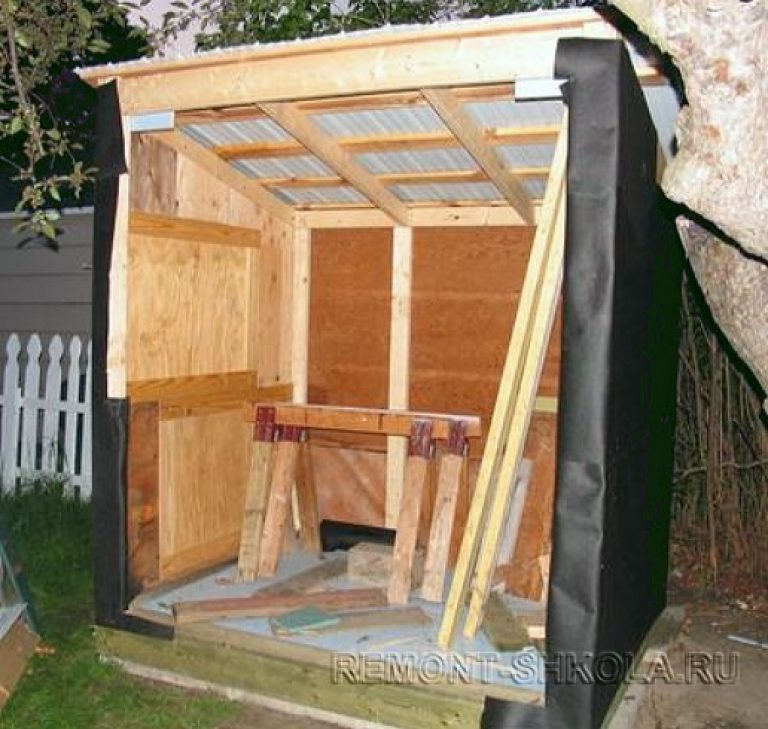
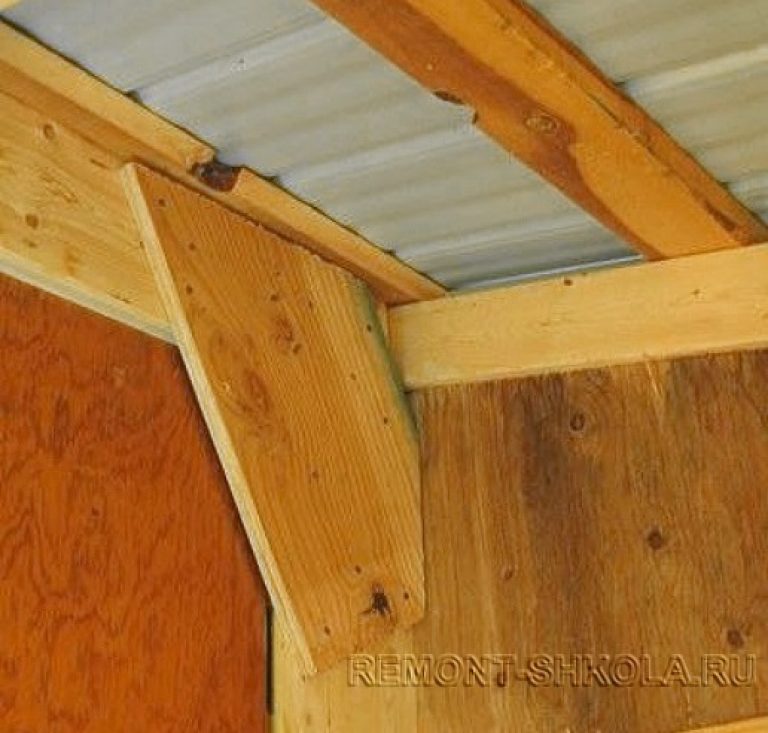
Also note the additional fasteners made from pieces of board, nailed diagonally in the upper corners of the barn. Their fastening significantly increases the overall rigidity of the barn frame.
The installation of additional racks in the front of the barn could certainly increase the overall stability and rigidity of the structure. But initially a double door was planned. The reason is simple: it was supposed to be possible to temporarily store large items in the barn that would definitely not pass through the opening of one standard door.
5. Installation of doors, vinyl siding
The case was nearing an end and it was time to install the siding. The process itself is simple and not laborious. The main thing is to know and follow a few rules when installing siding.
To cut the siding, use an electric jigsaw with a small-toothed saw or a simple hacksaw with a metal blade.
You can use scissors for cutting metal, but it all depends on the quality of the plastic. Often it cracks in the wrong direction.
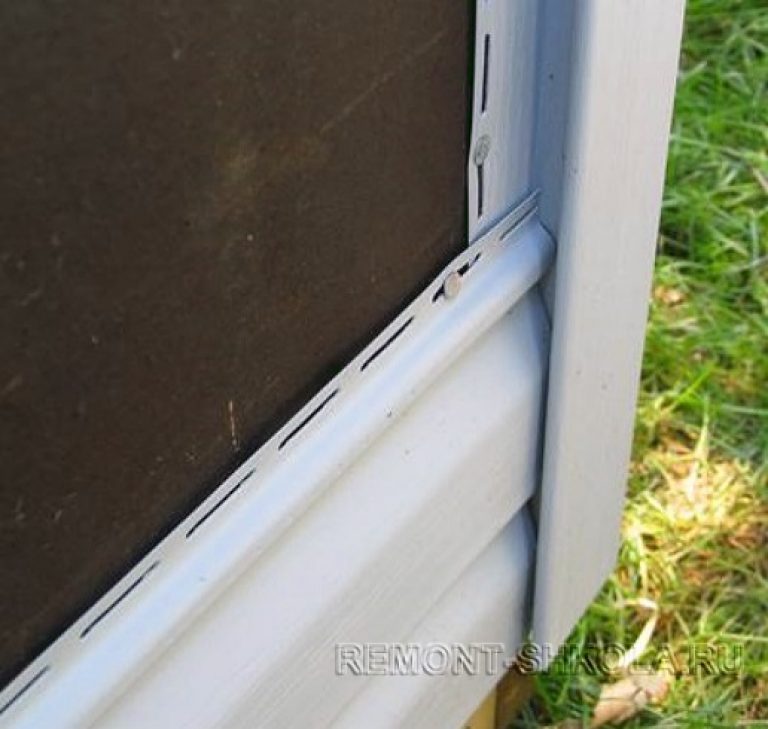
The siding should be fastened by hanging, leaving a minimum gap between the hardware and the siding itself of 1-2 mm, and not nailed to full contact. Vinyl siding tends to expand and contract slightly with temperature.
When installing the panels, be sure to ensure that there is a mounting gap between the edges of the panels (top and side) and the barn elements (2-3 cm). Read the specific manufacturer's recommendations.
When installing the panels, do not push too hard on them down or up. Deformation of the panel leads to a change in the natural radius of the lock, which leads to a distortion of the geometry of a certain part of the coating.
Do not drive hardware through into the siding panels - this can lead to the appearance of longitudinal or transverse cracks.
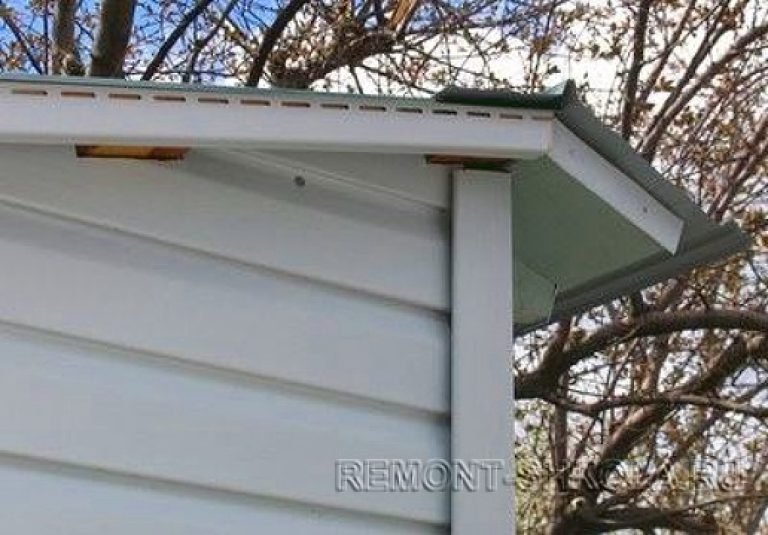
Initially, the barn did not have a small canopy in front of the entrance to it, and since there was still a whole sheet of corrugated board, a small visor was made. Although its only practical function is the ability to avoid water entering the inside of the barn with the doors open in the rain.
The doors installed in the barn are also old material left after repairs in a residential building. Outside, like everything else, the doors were sheathed in the same vinyl siding. Firstly, the doors themselves are far from new, secondly, they look quite attractive when sheathed with siding, and thirdly, siding is an excellent protection against sunlight and precipitation on wood.

The barn doors are also sheathed with siding.
It cannot be said unequivocally that building a barn in the country it's easy or simple. After all, a lot is determined by the specific nuances of your choice. If you build a building for inventory 3 m by 6 m, and on a monolithic foundation, it will be a completely different story.

Finished barn. General form.
If you compare the independent construction of a barn or, then the latter will undoubtedly be harder. However, now you know how build a barn with your own hands in the simplest form at the lowest cost. By the way, the barn for this building does not sound proud at all, the name of the household block (hozblok) is better.