Video how to make a hammock with your own hands
Alexey Shamborsky, 08.11.2016
In the country, I want to have my own cozy corner where you can relax in the shade of trees in the fresh air and listen to the chirping of birds. To do this, you can make a comfortable hammock with your own hands, which will also serve as an additional decoration for your own site.
The choice of material for a hammock in the country
The process of creating such a product does not require much knowledge and skills. A hammock can be made from a wide variety of materials, the main thing is to show ingenuity and all your creative abilities to make a unique product with your own design.
To make a hammock, you can use a variety of dense fabrics or weave it from thick ropes using the macrame technique. When choosing a material, it is important to pay attention to its strength and wear-resistant characteristics so that the product turns out to be reliable and durable.
In this article, we will look at the original master class on how to make a hammock with your own hands from non-standard materials. The base of the product will be made of multi-colored dense adhesive tape. Such a bright hammock will be a real work of art and will make an incredible impression on your guests.
Making a hammock
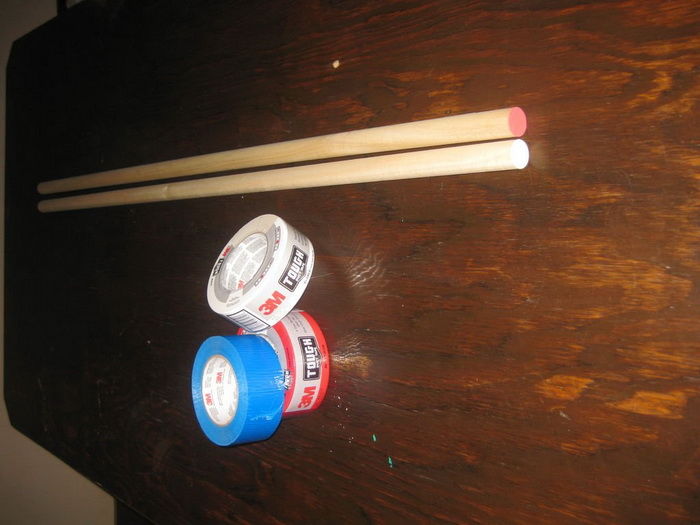
We start with the acquisition of materials. To make a hammock, we need two wooden dowels with a diameter of about 3 cm and a length of 120 cm and three rolls of thick adhesive tape, preferably in different colors. The greater the width of the adhesive tape, the easier and faster the process of creating our masterpiece will be.
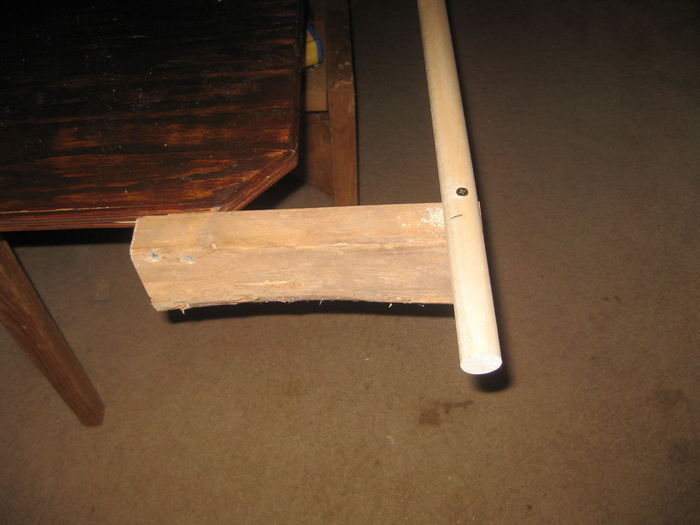
The product will be made using a technique similar to weaving fabric on a loom. Therefore, in order to facilitate our task, it is desirable to make a wooden base with dimensions that match the dimensions of the future hammock.
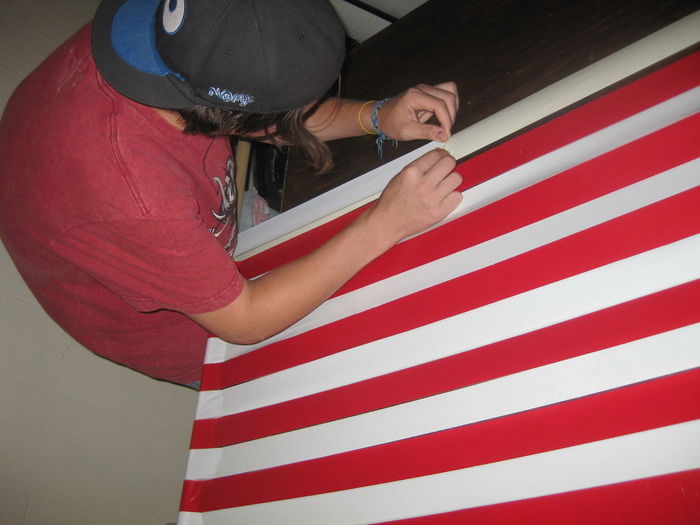
To do this, we select two wooden bars of the desired length and nail our prepared dowels to them. The resulting distance between the bars will correspond to the width of the product, and between the dowels - to its length.
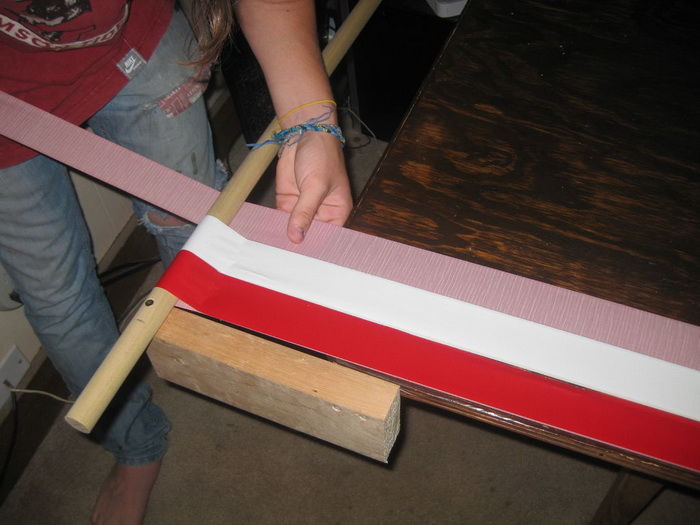
After preparing the frame, the weaving process begins. We start work from the upper left edge of the product. A loop is made of adhesive tape on the dowel, then the tape is pulled along the entire length of the product and fixed on the opposite side also with the help of a loop. The adhesive tape is lined in such a way that the sticky parts overlap each other and the product has a smooth surface on both sides.
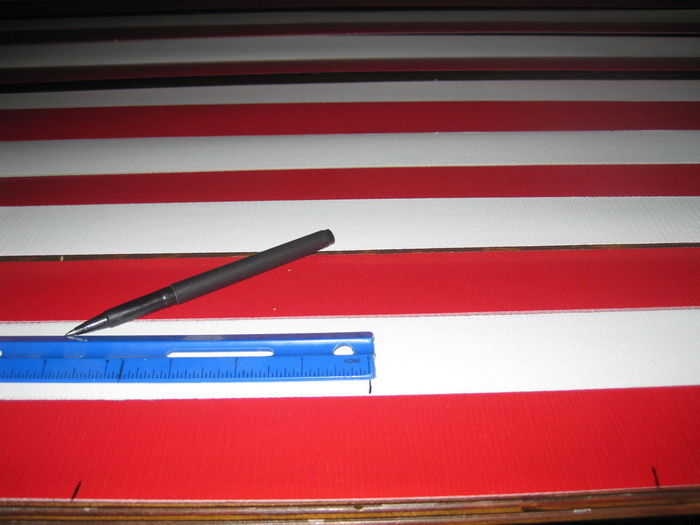
Thus, alternating different colors of the tape, we line the products across the entire width. At the same time, it is important to leave a small gap between the tapes so that the transverse parts of the structure can be threaded.
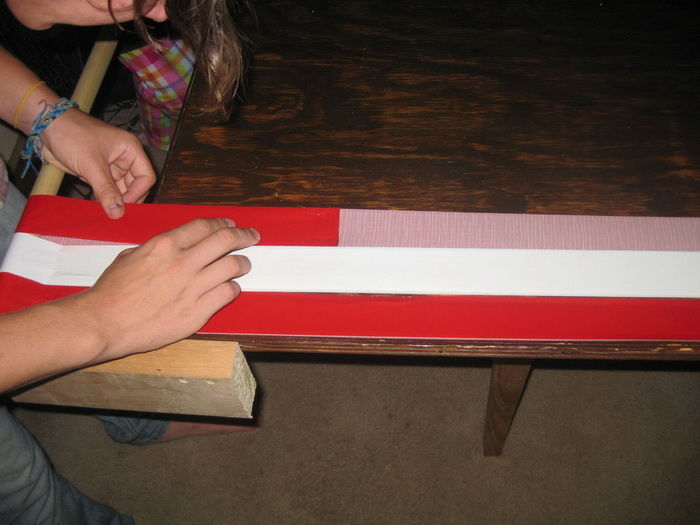
For the next step, we need a ruler and a pencil. In order for the transverse tapes to lie on our canvas at the same distance, it is necessary to mark the places for their location along the edges. The distance between the transverse tapes should approximately correspond to the width of the adhesive tape. Then the product will turn out with a more attractive appearance, consisting of the same multi-colored squares, and will be stronger and more reliable.
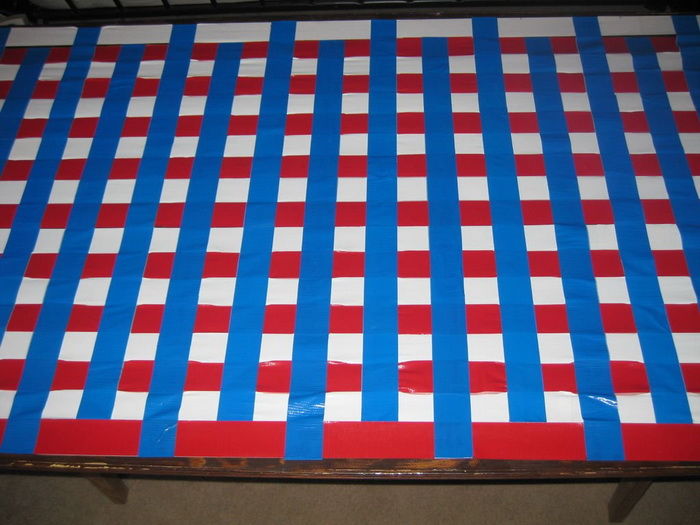
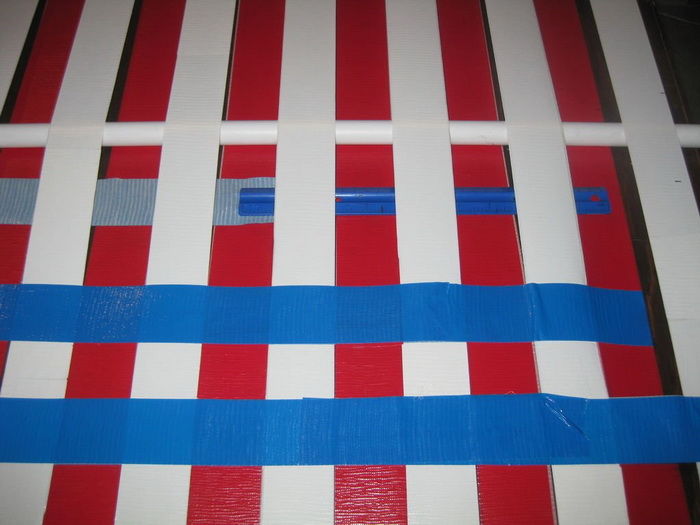
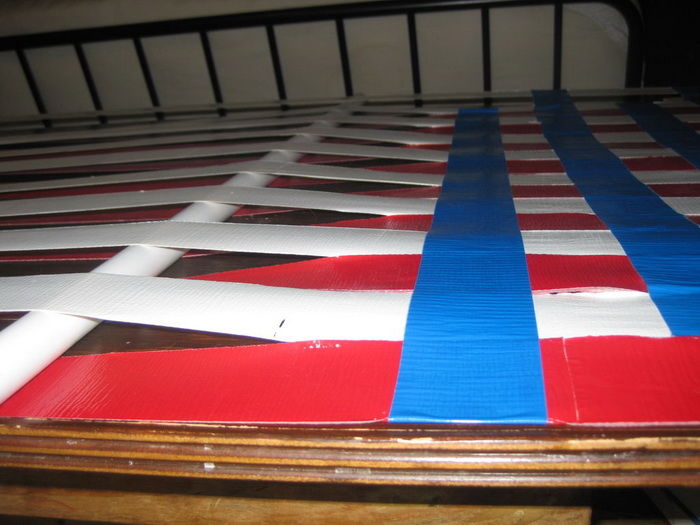
To make it easier to thread the transverse tapes, at the end of the tape you need to fix some solid object that will act as a shuttle. After that, the weaving process begins. Working with a shuttle up and down, we pass the tape across the entire width of the product and fix the transverse component from the front side.
Thus, we stretch the transverse ribbons at the same distance from each other along the entire length of the hammock to give. When the weaving work is completed, the wooden blocks are separated from our structure and the final stage begins.
Final stage
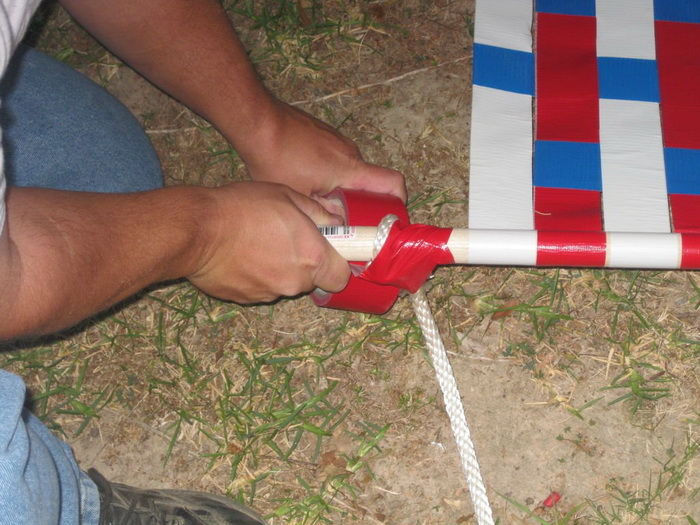
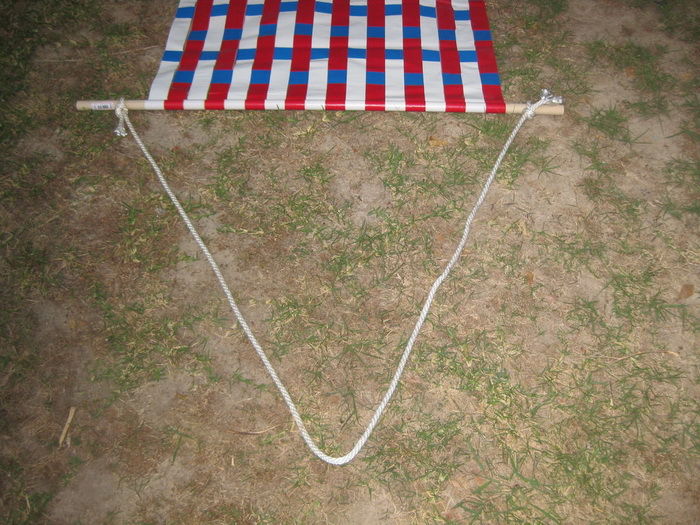
In order for our successful homemade product to be fixed between neighboring trees or racks made for this purpose, it is necessary to prepare two strong thick ropes of the same length. The ends of the rope are firmly tied around the edges of our wooden dowels. For greater reliability, it is desirable to wrap the remnants of our tape in several layers on top of each knot. The work is over.
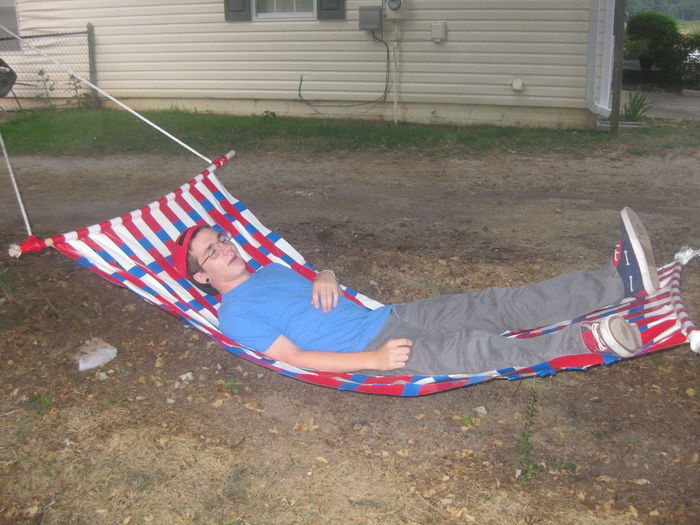
The time of independent production of a hammock will take no more than 3-4 hours. Detailed step-by-step instructions, as well as visual photos and videos will help you quickly and easily complete all the work. An interesting original hammock will become a favorite accessory for outdoor recreation.