What is made from old furniture. Competent and original alteration of old furniture. Only ideas. Updating an old nightstand
Alteration old furniture- the lesson is not only interesting, but also useful. So, we discover the hidden charm of discarded things with the help of our creativity and skillful hands.
Ideas for reworking old furniture. Let's set up the hallway.
This chest had a torn top and rusty wheels, but the seat and large storage space under the lid make it perfect for a hallway.

Primer, two coats of white paint, simple cushions, and new wheels complete the appearance this repaired chest. To make the same picture from above, paint old frame match the color of the chest, insert a piece of wallpaper inside and attach the branches with glue, which will serve you as a hat hanger.
Refurbishment of an old cart.

The used tea table was serviceable but nothing remarkable.

Sand, prime and paint your cart to make it look like new again. After drying, make a simple pattern on it with a pencil. Cut the scrapbook paper into small pieces and then attach them to your pattern with decoupage glue. Apply two more layers of decoupage glue to the finished pattern.
Cover for an ottoman for legs.

This used pouffe retains all the beauty of seventies furniture. Colorful fabric and accessories were presented to the ottoman new life.

Upgrade this boring ottoman with a fun case. Cut out a circle of fabric for the top and a strip of fabric for the sides (don't forget the seam allowance). Sew the piping along the top seam of the side fabric and the frill to the bottom. Add five ribbed top pockets made from contrasting fabric. Put the cover on the ottoman. Screw the painted legs to the bottom of the ottoman.
Salvation of a beaten chest of drawers.

Blind, used and damaged, this chest of drawers languished in the thrift store at a ridiculous price.

Give furniture originality and modern style with paint. Paint the countertop a bright contrasting color for the rest of the furniture and screw on the painted legs. Decorate the drawer fronts with a pattern using a stencil. Pull out the little drawers and replace them with bins with tags. Make from small boxes open shelves, put the design paper inside them and hang on the wall.
Chair update.

This once-excellent chair had worn parts and terrible upholstery.

New paint and fabric brought this one back to life old chair. Remove the fabric, cut off the top decorative trim, sand, prime and paint the chair. After it dries, add batting to make the chair even taller and upholster it with new fabric. Print the monogram on the back of the chair with fabric paint using a stencil.
Refresh bookshelf

The solid but boring bookcase was functional but hid its potential.

Your bookcase will become more useful if you attach a drop-down table and a door for the lower shelves to it. Cut out the MDF doors, then prime and paint the bookcase and doors. After the paint has dried, hang the lower door on the French hinges and install the horizontal opening door with hinges and chains. Screw new handles to the doors.
New old lamp

The used tea can was on its way to the landfill until it got a new life.

With the design of such a lamp, an ordinary gray pewter can turns into a bright decorative element of the room. Dip a paper towel into the paint and go over the entire surface of the can. Wipe excess paint dry paper towel so that you can see through it original finish. After it dries, drill one hole in the center of the lid and another in the back of the jar near the bottom. Follow the manufacturer's instructions to install all lamp parts available from your home improvement store. Put a beautiful lampshade on top.
Damaged TV stand

Ugly TV stands like this one are a regular item in cheap shops for the thrifty.

To turn this old, useless pedestal into a charming bedside table, start by replacing the casters with new wooden legs. Prime and paint the cabinet. Remove the doors and paste over their front parts decorative paper. Cut out the back of the plywood and cover it with paper suitable color. Screw the new handles onto the doors and hang them on the nightstand again.
Repurposing trays

Trays were a must-have for apartments in the 60s and 70s - a dime a dozen in chic stores. Boring drawings have little to offer a modern interior.

Turn old trays into works contemporary art. After priming and painting them in colors suitable for your interior, print patterns on magnetic paper using inkjet printer. Cut them out and glue them onto metal trays.
Makeover your bed

The discarded bed had a decorative silhouette, but the finishes were dull and damaged.
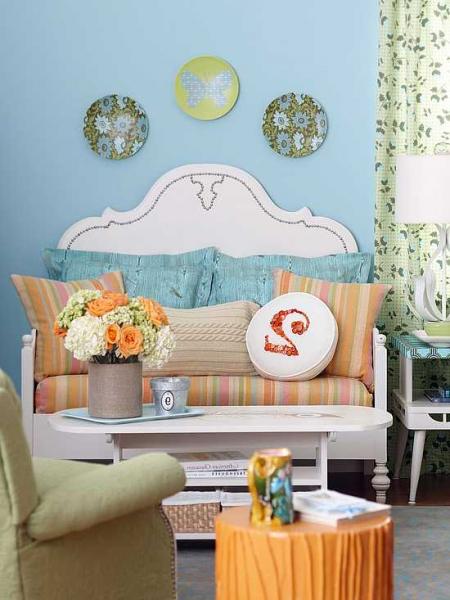
The bed turns into a charming sofa. Saw the bed base vertically in half to make sofa handles. Cut a piece of MDF for the seat and a piece for the front bar. Assemble all parts with screws and glue. Sand, prime and paint the sofa. After it dries, attach an ornamental decorative strip. In order to make a soft base, wrap the foam rubber with batting and a bedspread. Or sew a cover out of the bedspread for a finished look.
Converting an old mirror

Deep drawers and charming ornamentation distinguish this piece, but the finish and shape are too dark and shabby.

Color and patterns transform an old dressing table into a small table, ideal for small room. Remove the mirror, sand, prime and paint the table. After it dries, paste beautiful paper on the front of the drawers and on the handles with decoupage glue.
Chair conversion

Although this chair is sturdy and well made, the upholstery and wooden details worn out and tattered.

The paint and fabric give this comfy chair an absolutely the new kind. Remove the soft base first. Disassemble the chair in the following order: inner backrest, wooden base, internal handles, external handles, external backrest. Prime and paint all wood parts. Take the old pieces of fabric as templates and cut out the fabric for each piece of the chair. Attach the fabric to each part of the chair and reassemble it in reverse order. Attach an ornamental decorative strip.
Decorate the table

The retro side table had a good shape, but not a very attractive finish.

Thanks to a small amount of paint and fabric, a new original item furniture. Prime and paint the table white. After it dries, cut the fabric the size of your countertop plus a few inches so it can be folded up. Glue the fabric onto the countertop surface with decoupage glue, smoothing it with your fingers to remove air bubbles. After the glue has dried, wrap the fabric under the table and secure it with a furniture stapler.
Bring the coffee table to life

This table is not bad, but too provincial for a modern interior.

A simple redesign will give the country-style table more modern performance. Take out the table legs and make a paper template for the new plain legs. Cut the legs out of MDF and attach to the table top with screws. paint coffee table and when it dries, add a decal to the countertop for a flirty finish.
Dressing up a chair

An ugly cane chair, out of its kit, had little chance of being saved.

Bring out the inner beauty of the chair with bright colors. Sew a fun patterned pillow out of two napkins or towels. Decorate the back of the chair by attaching fabric flowers and leaves to it with yarn.
Reworking a rarity

The old cedar wardrobe saw and better times. The dark, unadorned façade was expressionless and featureless.

Become more emotional and sensual with your transformed furniture. Make stencils big size on contact copy paper by enlarging the words or patterns on a computer, or freehand print designs on contact copy paper and cut them out. Remove the back and glue your design onto the white painted furniture. Paint the closet Brown color and let it dry, then remove the contact copy paper. Attach a bow-shaped figure to the doors and complete the design with yarn and wool.
READ ALSO: HOW TO MAKE HANDLES FOR DOORS OR FURNITURE. TOP 17
1. Floral print
2. Add fabric to the sides of the drawers
Read detailed instructions.

3. Decorate drawers with wallpaper
You will also be interested - 45 Ways to Update Your Closet with Wallpaper.

4. Use lace
Read detailed instructions.

5. Applying paint to a lacquered chest of drawers
30+ Ways to Use Leftover Paint Wisely.

6. Memorable dates on the chest of drawers
Read detailed instructions.

7. Or your favorite songs
Read detailed instructions.

8. Or favorite cities (streets)
Read detailed instructions.

9. Trailer from a chest of drawers
Read detailed instructions.

10. Use file cabinet drawer handles
Read detailed instructions.

11. Striped accent
Read detailed instructions.

12. Use painted toys as pens.
Read detailed instructions. You will also be interested - How to make your own handles for doors or furniture. TOP 17.

13. Or their halves

14. Blue milk
Read detailed instructions.

15. Paint a chest of drawers with metallic paint
Read detailed instructions.

16. Bold Ombre Style
Read detailed instructions. You will also be interested - 33 Examples of Ombre Walls + Master Class.

17. Use a stencil to create an original pattern
Read detailed instructions.

18. Another option using stencils
Read detailed instructions.

19. Add a Geometric Pattern to the Top of the Dresser
Read detailed instructions.

20. Use wood planks to line drawers
Read detailed instructions.

21. Replace drawers with baskets

22. Cover the boxes with maps from around the world
Read detailed instructions.

23. Or Both

24. Dresser ombre style
Read detailed instructions.

25. Ombre...
Read detailed instructions.

26. Another ombre option...

27. Use magnetic paint
Read detailed instructions.

28. Use different shades of polish
Read detailed instructions.

29. Strictly and tastefully
Read detailed instructions.

30. Run multi-colored stripes along the entire chest of drawers
Read detailed instructions.

31. Solar accent
You will also be interested - how to make a simple plywood cabinet.

32. Paste the chest of drawers with newspapers. Why not?

33. Scallops

34. Charming patterns on drawers
Read detailed instructions.

35. Update your chest of drawers with gift wrapping
Read detailed instructions.

36. Use old rope for handles
Read detailed instructions.

37. Funny mustachioed dressers


38. Optical illusion
Read detailed instructions.

39. Bright circles on the dresser

40. Or triangles

41. Use Headed Nails
Read detailed instructions.

42. Cross stitch effect
Read detailed instructions.

43. Ombre...

44. For lovers of navigation
Read detailed instructions.

45. Stylized chest of drawers
Read detailed instructions.

46. Cover the chest of drawers with fabric
Read detailed instructions.

47. Cover with foil
Read detailed instructions.

48. Don't be afraid to use bright colors

49. Ombre...

50. That case when scribbles look organic

51. Add Brass Staples and Handles
Read detailed instructions.

52. Create a colorful texture on the drawers
Read detailed instructions.

53. Sea chest of drawers

54. Experimenting...

55. Use House Numbers as Pens
Read detailed instructions.

56. Add miniature wheels
Read detailed instructions.

57. Experimenting...

58. Add Vinyl Letters
Read detailed instructions.

59. Bright and colorful chest of drawers
Read detailed instructions.

60. Bright geometric patterns

61. Create whimsical shapes
Read detailed instructions.

62. Get rid of the drawers

63. Another version of geometric patterns

64. colorful chests of drawers
Read detailed instructions.

65. Leopard notes
Read detailed instructions.

66. Do not forget about the decor of the inner surface of the drawers

67. Color contrast

68. Mix prints

69. Experimenting...

70. Use colored pencils as liner
Read detailed instructions.

71. Marine shades

72. Use leather instead of banal pens
Read detailed instructions.

73. landscape chest of drawers

74. Mirror chest of drawers
Read detailed instructions.

75. For UK fans
Read detailed instructions.

76. Family photo
Read detailed instructions.

77. Contrasting stripes

78. New legs for an old chest of drawers
Read detailed instructions.

What can be done from an old closet? No need to rush to throw away or give away. Let's take a closer look at some of the options with ideas for using the closet.
Desktop
From the walls of the cabinet, you can design a desktop for children. And from the shelves to make closed drawers for the table. Then carefully connect everything and clean sandpaper. Next, apply several coats of wood varnish.
Important! Let the first coat of varnish dry well before applying the second.
Cabinet
Make a versatile nightstand out of an old closet. Such a new piece of furniture will always come in handy. After all, you can put any accessories that will always be at hand in it. The originality of the cabinet will give drawings with patterns. And to make the cabinet look more comfortable, put it on top flower plant in a pot.

Wrapping or painting a cabinet
Refresh old wardrobe and give it a second life, very simple. The main thing is to choose the right material for gluing. Self-adhesive wallpaper will do.

Reference! Before pasting, you need to unscrew the handles of the cabinet for a while, then you will get a striking effect.
If you have chosen to paint the part, then choose a varnish or special paint to match the color of your apartment interior. The assortment in hardware stores has a wide selection for every color and taste.

Important! The style is given by two types of painting. Recommended for example in black and white, etc.
Shelf in the garage
Depending on the size of the old cabinet, you can make a shelf of any size in the garage with your own hands. Since there are almost always a lot of different tools scattered in the corners in the garage, a shelf is required for them. Assembly of the shelf takes less than an hour.

Sideboard
The sideboard is done in several stages:
- Make an ordinary rectangular nightstand and fasten a light back half from the cabinet to the back on both sides. And for more beauty, add a mirror with holders along the edges of the contour.
- In cabinet with inside attach two slats for shelves.

Floor stand for flowers
The stand can be made in any shape. The ideological version in the form of a square pyramid. Much more can fit on this stand. flower pots. geometric shapes fashion trend of the 21st century. Originality without repetition. In the store, such a stand is unlikely to be found and purchased.

Important! The bottom square needs to be stronger and more stable because the main weight of the flower pots and pyramidal subsequent structures will push down.
Potato box
Most fast way to make such a box from an old cabinet is suitable for large volumes of potato storage. Just put the cabinet on back wall, open the door and pour in the potatoes. If you need a much smaller size, then disassemble the old cabinet and assemble a regular box from the walls. To add beauty, you can design a cover for a lock or a latch.

Soft ottomans for the hallway
Remove the shelves and connect them together to make a square. Put foam rubber in size on the top and sheathe it with a cloth. The walls of the ottoman can be painted in any suitable color.

Sometimes old furniture literally captivates with the quality of the wood from which it is made, as well as with its unusual appearance.
To take out such vintage interior items in the trash just does not raise a hand. But furnishing a modern home with their help is also not best idea. But there is a way out. It is necessary to update old furniture with your own hands, breathing new life into it. There is no doubt that after a small restoration the furniture will change!

1. Patchwork style

Renovation of old chairs.
Bright chairs will be a real highlight of the interior. To transform soft seat, it is necessary to drag it with a cover sewn from multi-colored shreds. And the solid legs and back are decorated using decoupage technique. On the primed surface, apply decoupage napkins or magazine clippings soaked in a mixture of PVA and water. After drying, cover them with a layer of acrylic varnish.
2. Travel Club

Decor of old furniture with geographical maps.
Surely in every house there are old geographic Maps left over from school days. They can completely paste over furniture using the decoupage technique described above. If such a solution seems too radical, then it is better to combine decoupage with coloring of individual areas. In order for the paint to lie evenly, it is necessary to clean the furniture from the old finish.
3. Delicate relief

Updating old furniture with wallpaper.
Wallpaper with convex patterns for painting is an excellent material for updating furniture, the purchase of which will not burden even the most modest budget. Check the distant drawers: perhaps the remnants of the wallpaper after the repair are waiting for their finest hour. Stick the pieces of wallpaper on the prepared and cleaned furniture surface. If white seems too boring, then paint the wallpaper and varnish it for protection.
4. The most interesting is inside

Reworking old furniture with your own hands.
The effect of surprise when looking at furniture, the back wall of which is decorated bright patterns, guaranteed. If the level of your own artistic skills allows, then the back wall can be painted. To do this, you will have to first disassemble the furniture. There is an easier solution: just glue it bright wallpaper. In order for the update to be holistic, paint the furniture itself in a harmonizing color.
5. Trendy ombre effect

Decor of old furniture in ombre technique.
Smooth color transitions are a coloristic technique that has not lost its relevance for the past few years. So why not repeat it on furniture? Use 4-5 shades of the same color on furniture vertically. It is not necessary to buy the number of cans of paint that matches the ombre colors. You can buy basic and white colors. The intensity of the base color is adjusted by adding different amounts of white to it.
6. Musical furniture

Furniture decor with old notes.
Long-read newspapers or old music books can be used to decorate vintage furniture. Paint part of the furniture in the chosen color, leaving empty areas where the paper will be pasted. Building tape will help to observe the boundaries of staining. Then stick paper soaked in tea or coffee and dried on the furniture. Soaking is necessary to give notes or newspapers a brown tint that creates an aged effect. After the glue dries, varnish the paper.
7. Spectacular color duo

Furniture decor using a screen pattern.
In order for the selected pattern to look neat, it is better to apply it with a stencil. It can be cut from thick cardboard or thin plastic. Color the selected object in light color. After the paint has dried, apply the stencil pattern. To make the updated furniture look spectacular, we recommend choosing contrasting paint colors.
8. Maximum color

Renovation of furniture by painting.
The easiest way to freshen up vintage furniture is to simply repaint it. But first you need to clean the surface of the remnants of varnish and paint applied many years ago. This can be done with a grinder or sandpaper. In some cases, simply prying off the layers of paint with a knife is sufficient, and they will easily come off. Then the tree must be covered with a primer, and after it dries, painted in bright color.
9. Instead of a photo album

Renovation of old furniture retro photo.
Vintage photos often gather dust in drawers until they are faded and frayed. But there is a smarter way to use them, which will allow them to see the white light, and you will constantly enjoy the sophisticated retro aesthetic. Use the photo to glue old furniture. If you don’t raise your hand to apply pictures in this quality, then make duplicates of them by scanning and printing on a color printer. The decoupage technique will help to fix the "twins" of the retro photo on the furniture. To preserve the images, do not forget to cover them with varnish.
10. Simple but cute pattern

Drawing on furniture in the spirit of primitivism.
Even in the absence of developed skills in the field of fine arts, it will be possible to decorate old furniture in a similar way. Choose a simple design in two or three colors and transfer it to the surface of the furniture, pre-painted in the selected base color.
11. In the spirit of impressionism

Contrasting decor of old furniture.
A lot of bright colors that don't even match with each other - that's all it takes to transform furniture into a piece of abstract art. Clean furniture from old varnish and paint, prime. Then start to cover it with small strokes. different color. For convenience, first apply the first color, then the second, and so on. To evaluate the compatibility of colors, we recommend that you first create a sketch on a piece of thick cardboard.
12. Impressive contrasts

Painting furniture in contrasting colors.
Furniture painted in two contrasting colors looks unforgettable. In order not to accidentally cross the boundaries of good taste, we recommend choosing one neutral color (gray, black, white, beige, and the second - bright (pink, light green, orange, azure). With this combination of tones, the furniture will be spectacular, but not too defiant.
13. Abstract Landscape

Effective drawing on furniture.
It's hard to believe, but you don't have to be an artist to draw an interesting landscape. The main thing is to choose the right colors and apply them in the form of uneven stripes on the surface of the selected furniture. In such an abstract drawing, anyone can easily recognize the mountain landscape.
14. Luxurious ceramics

Furniture decor with mosaics and tiles.
The remains of mosaics and tiles are an excellent material for decorating furniture. For cutting, use a manual tile cutter or special tongs. You can just break the tile or mosaic with a hammer, but in this case the pattern will be more chaotic. To bond ceramics to wood, use an acrylic or silicone construction adhesive. After drying, fill the seams between the ceramic fragments tiled grout and a little later remove its excess.
15. Forces of fittings

The furniture is being refurbished with new fittings.
Sometimes even such a simple technique as changing accessories can radically change the look of old furniture. And if you pre-paint it in a discreet color, then the result will be really impressive.


