Do-it-yourself stroller for transporting goods. How to make a garden wheelbarrow (trolley) for the transport of goods according to the drawings with your own hands. Working on the mounting frame
Owners garden plots there is no need to sit idle. It is required to dig in the ground, then fertilize the garden or remove garbage from it, then plant or transplant something. During these works, quite often there is a need to move any heavy or oversized cargo. A do-it-yourself garden cart will help solve this problem. Made from materials at hand or purchased in hardware stores, it will become an indispensable assistant for a summer resident.
- 2.1 Metal trolley assembly
- 2.2 Wooden garden cart
- 2.3 Making a cart from waste
Types of carts
Depending on the number of wheels trolleys can be of two types:
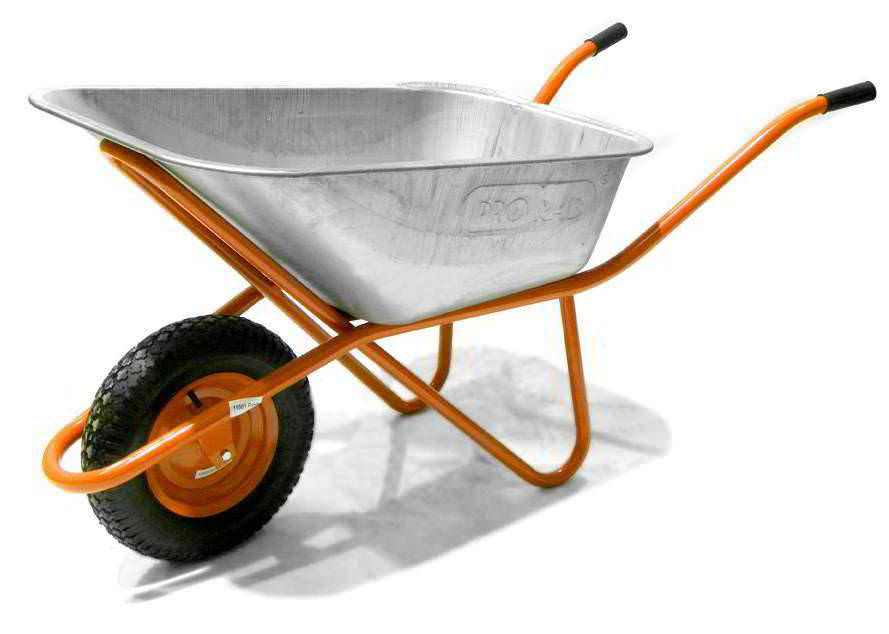
- A device for moving goods with one wheel is called a wheelbarrow. A narrow path is enough to move it, it is maneuverable and reliable. To release the wheelbarrow from the load, just press the two longitudinal handles and tilt it to the side. However, for moving heavy loads, using a cart with one wheel is not very convenient. It takes a lot of strength to keep your balance. It is also not very convenient to move it on the ground or sand, since the entire load falls on the wheel, which falls through and gets stuck in soft ground.
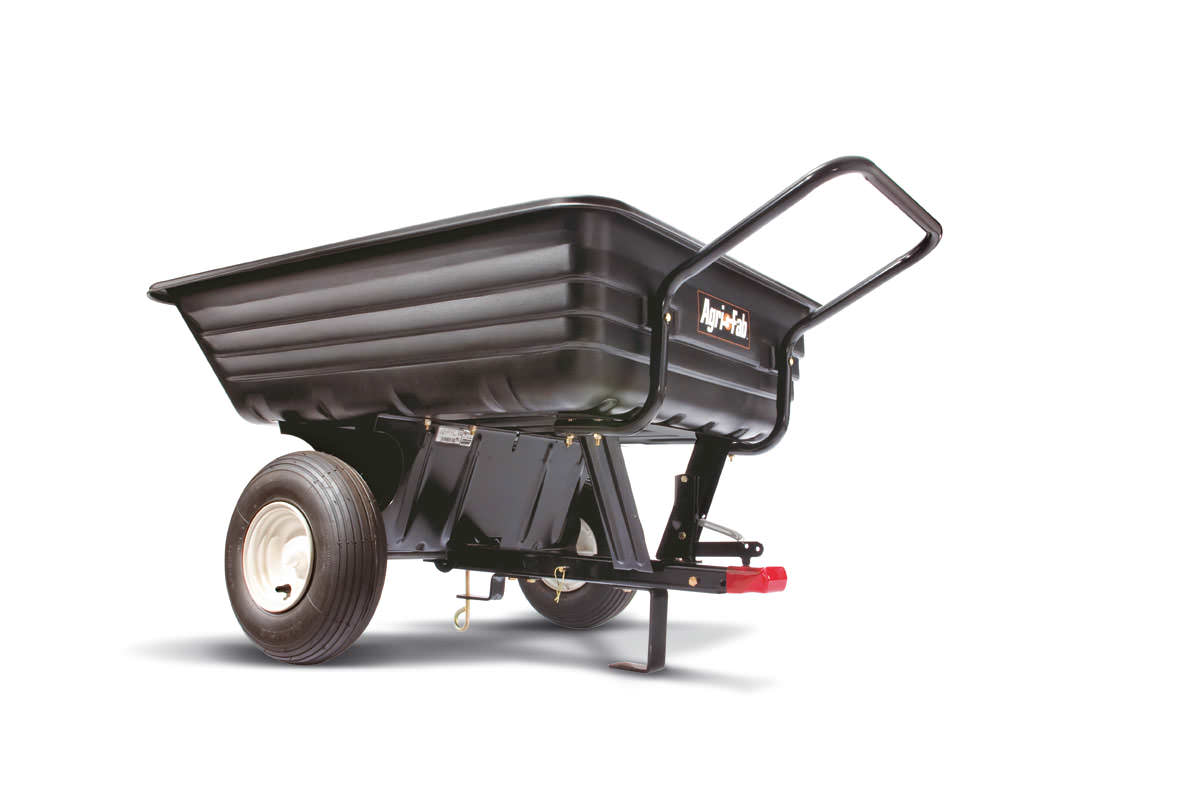
- A more solid device equipped with 2-4 wheels is called a trolley. It is stable, so you can carry various weights on it. Its only drawback is that wide paths are needed for its movement.
Cars can be made from various materials. For the transport of goods in the garden and garden use wooden fixtures with one wheel. For construction works best to use metal carts.
The design of the country cart can be different. With your own hands, it can be equipped with removable holders, drawers, fasteners. After such a transformation, it will be possible to transport on it not only bulky goods and objects, but also small parts, water in tanks, fasteners, hardware.
DIY garden cart

When choosing the size of the cart, it should be borne in mind that it is best to make it medium in size. Large equipment will not fit into a small wheelbarrow, and it will be difficult to move a large one, as it will sink into the ground under the weight of the load. In addition, the car overall dimensions may not pass through the door of garages or barns.
With dimensions of 60 cm wide, 100 cm long and 50 cm high, the trolley is stable, light and manoeuvrable. It will be convenient to carry almost any cargo.
Assembling a metal trolley
metal structure for the transport of goods will be hardy and will last for many years. To make it yourself you will need:
- sheet metal 1x2 m 1-2 mm thick;
- metal corner 25x25;
- wheels with bearings up to 40 cm in diameter;
- Bulgarian;
- welding machine;
- metal pipe of the desired diameter.
Before starting work, it is recommended to draw a sketch of the future trolley, indicate on it all the details and dimensions. The box is best made with a capacity of about 100 liters. For a wheelbarrow on which a large load is expected, you need to choose powerful wheels. They can be taken from an old bicycle, moped or motorcycle.
Having prepared everything you need, you can get started:
- According to the sketch, use a grinder to cut the sheet.
- Weld the box.
- From metal corner make stands for support.
- Build a handle from a pipe with thin walls. In this case, the wheelbarrow will not be too heavy.
The main part of the structure is ready, now it remains only to weld or screw the wheelbase to it. Do-it-yourself such a base for a trolley made from a profile pipe:

The wheelbase of the trolley follows set right in the middle. The do-it-yourself garden wheelbarrow is made and ready for use.
Wooden garden cart
To make such a wheelbarrow is quite simple. For its manufacture, drawings are not required, and the missing building materials can always be purchased at a hardware store.
Necessary materials:
- plywood;
- wooden blocks 4x4 cm and 1.2-1.5 m in length;
- two wheels;
- a piece of pipe or a threaded stud 0.6-0.7 m long.
First of all, it is necessary to construct a frame from the bars, the recommended dimensions of which are 1.5x0.7 m. Holes are drilled in its lower part for the axis. The axis, the role of which is played by a stud or a piece of pipe, is inserted into the prepared holes and tightly fastened with screws or self-tapping screws. It is necessary to ensure that the parts of the axle protruding on both sides of the frame are equal to twice the width of the wheel.
- soak the cut blank with drying oil or an antiseptic;
- put a tire on the wheel, beat it with a metal strip or thick rubber;
- insert bearings into the mounting holes;
- lubricate the axle and wheels with grease.
Wooden wheels treated in this way will last quite a long time.
The do-it-yourself trolley body is made of plywood. First of all, the bottom is cut out and rigidly attached to the frame. The boards can be installed motionless, or attached to the hinges, and then they will unfold. For this you need:
- attach one side board to the bottom;
- attach the second through an adapter, the role of which will be played by a bar, the thickness of which should be equal to the thickness of the side;
- the end board is fastened through a bar of double thickness.
The result is a trolley that, when folded, will be flat. In order to prevent the sides from falling during operation, it is necessary to install hooks or latches.
Making a cart out of waste

You can make a garden wheelbarrow with your own hands by collecting all the unnecessary things in the house. For its manufacture may be useful:
- scrap metal;
- motorcycle wheels;
- old metal bed
Manufacturing technology such a trolley is quite simple:
- The frame is made of two bed arches and legs.
- The bottom and walls of the body are cut out of steel sheet.
- The joints of all elements are welded by spot welding.
- The resulting container is installed on the frame, its walls are bent and connected to the base.
- The joints of the box are welded solid.
- From the legs of the bed, a wheel pair bridge, axle and hub are made.
- Axes are attached to the pipe on both sides.
- A bridge is welded to the inverted body.
- The design is strengthened with overlays in the form of brackets, made by hand.
- Wheels are fixed on axles.
- A handle is made from the backs and legs of the bed and welded in a position convenient for work.
The support leg in the trolley is best make rising. Otherwise, it will slow down the movement.
Having studied several options for homemade garden carts, making one of them with your own hands will not be difficult. Having built it for personal needs from the remnants of building material, you can get a cart that will be not only more convenient, but also cheaper than purchased.
Stay on garden plot always accompanied by a lot of things. Sometimes you have to move something heavy from one place to another, and it’s not always possible to get by on their own. To turn stay on suburban area in pleasure, you need to give up dragging weights in own hands. In this, as a rule, trolleys for transporting goods help. With their own hands, such designs are made by home craftsmen quite often. At the same time, you can get by with improvised materials, having received a product that will become an assistant for the period of harvesting, construction and other works. To carry out the manipulation, you will not need special skills or special materials, as well as tools.
Making a wooden wheelbarrow
Of course, you can buy carts for transporting goods in the store. With your own hands, however, it will be easy to make such structures, and you won’t need money for this at all. When making a wooden object, you must choose among them, you can select maple, birch or oak. Such material will last a long time, and also show reliability in operation. From conifers it is preferable to refuse.
Working on the mounting frame

In the suburban economy, trolleys for transporting goods are simply irreplaceable. With their own hands, such designs are often made by specialists and home craftsmen. Using planed boards, it will be possible to assemble a box that will form the basis of the product. Dimensions should be chosen taking into account the physical characteristics of who will use the wheelbarrow most often. It is important to keep proportions. In the example, the width of the box will be 46 cm, while the length is equivalent to 56 cm.
Such do-it-yourself trolleys for transporting goods are made according to a certain technology, which involves the implementation of several stages. The wheel and box are fixed on the mounting frame, which acts as the main supporting part. For its formation, it is necessary to prepare two bars, the thickness of which can vary from 3 to 5 cm. The length of each of them should be 120 cm. These bars should also be used for handles. It will be convenient to hold on to the ends to move the structure around the site.
Manufacturing features

When a do-it-yourself two-wheeled do-it-yourself trolley is made, then at the initial stage the bars should be laid on flat surface connecting the ends to each other. The opposite ends should be moved apart to a distance that will be equal to the width of the master's shoulders. On the connecting ends in the upper part, a bar of a less impressive diameter should be fixed. It must be drawn with a marker and a pencil so that parallel lines remain on the frame bars. Thus, it will be possible to mark the place where the wheel will be strengthened in the future. Along the marked lines of the bars, a saw cut should be made using circular saw or scissors.
Working on the wheel

When a do-it-yourself hand truck is made for transporting goods, the next step is to start making the wheel. It will have a diameter of 28 cm, and will also be made of wood. To do this, prepare well-planed boards, the number of which should be 6. Their size is equivalent to 30x1x2 cm. These blanks must be glued into a square using PVA glue. In this state, the elements are held under pressure for a day, this effect on the workpiece is necessary until the moment of complete drying. adhesive composition. A circle should be marked on the surface of the square. The future wheel should be additionally fixed with the help. Considering the outer part of the marking, it is necessary to drill out the wheel. The next step is to process the rough surface of the rim with a rasp.
Wheel and frame installation

Homemade trolley for transporting goods in this case will have one wheel. The next step is to return to the mounting frame. Two bars should be connected to each other with a spacer. It is installed in such a way that it is possible to place the wheel, which should be placed between the front ends of the bars. In this case we are talking about elements sawn from the inside. The wheel will have a width of 6 cm, and between the ends of the bars there should be a distance equivalent to 9 cm. Given these conditions, the dimensions of the spacer should be determined. Its ends should be cut down and attached to the bar with self-tapping screws. When a trolley is made for transporting small loads, the wheel must be fixed with metal studs which are threaded. The length of the latter can vary from 150 to 200 millimeters. You will need four washers and four nuts for this mounting assembly. At the ends of the bars, a hole should be drilled for installing the stud. In the central part of the wooden wheel, you need to make a hole, the diameter of which will be greater than the corresponding parameter inherent in the hairpin.
The nuances of the work

You can make a three-wheeled trolley for transportation of goods. In this case, it is necessary to be guided by the same technology, however, in this case, the structure should be deprived of supports. One end of the hairpin must be threaded into a hole located on one of the bars. Next, a washer is installed on the stud, and after that, a nut. Next comes the wheel, and then another nut and washer. The hairpin should be threaded through the second beam. The wheel should be fixed with outer side bars with nuts and washers. The stud is rigidly fixed on the bars, so the fastening should be tightened using two wrenches.
Assembly of the finished product

If you make a trolley for transporting goods with your own hands using this technology, you can see a photo of the design in the article. On the inverted box, install the mounting frame, which is equipped with a wheel. The latter should not touch the box. The position of the frame should be marked on the body with a pencil. Now the master makes two wedges in the entire length of the box. Their thickness should be equal to 5 centimeters, while the width is 10 cm. They are laid on a line and fixed to the base of the box with self-tapping screws. It is necessary to carry out this work with reverse side designs. With the help of all the same self-tapping screws, the frame with the wheel is strengthened, this approach will become the most constructive.
Final works
If a do-it-yourself do-it-yourself trolley is to be made, the drawings should be considered in advance. Supports-brackets are made in such a way that the wheelbarrow becomes comfortable during work. Their length must be selected so that the installation of the box assumes the parallel location of the latter with respect to the ground. A rigid connection of the racks will guarantee a bar-strut. It should be attached to the cart. A folding cart for transporting goods will turn out if the subcortex is made on ordinary furniture canopies.
How to extend the life of the structure?
In order for a household wheelbarrow to last as long as possible long time, after manufacturing or even before assembly, its elements must first be sanded, freed from burrs, and then covered with drying oil. You can use weatherproof paint, which will allow you to leave products on outdoors all year round. This is especially true if there is no room for storing inventory on the territory of the summer cottage.
One of the most useful things in the garden is a walk-behind tractor. In addition, it is useful in the garden. With its help, you can easily cultivate land, as well as transport some goods: straw, vegetables, fruits, equipment, and the like. However, without a trailer it will not be possible to do all of the above. In this case, it is appropriate to tell you how to make a trolley for a walk-behind tractor with your own hands. This is the most the best option save money. Also, for study, the topic "", with useful photos and video materials.
Drawings of homemade carts for walk-behind tractor
It is noteworthy that the made trolley will be able to carry a load weighing up to five hundred kilograms, as well as a driver. That's about seven full sacks of potatoes.
We present to your attention a drawing of the trolley:

1. Mounts for hanging devices walk-behind tractor (brackets).
2. cantilever beam
3. carrier
4. Footrest (from board 20)
5. Driver's seat
6. Main frame
7. body part
8. Support beam made of timber
9. M8- bolt
10. Thrust ring made of pipe
11. Stroller wheel.

The carrier is designed to hold only a few parts of the cart. They are fastened together by welding. Obviously, the most loaded part is the drawbar interface, as well as the turning part. Therefore, it is necessary to install stiffeners in this part of the structure.
Frame
The frame can be assembled from steel corners and pipes of round and rectangular cross section. At first glance, the design is very complex and has a large margin of safety. But it is worth noting that the transport will be used in difficult conditions. Therefore, all questions regarding strength disappear.
Drawing and dimensions of the trolley frame for walk-behind tractor

1. Slope from a metal corner.
2. Driver's seat frame
3. Riser made of pipe
4. Racks of the driver's seat, made of corner.
5,14. Pipe front braces
6,15. Longitudinal spars from the corner
7,8. Supports for wheel axles.
9,16. Rear struts made of pipes
10. Crossbar for reinforcement, made from a corner
11. Longitudinal joint housing
12. Wheel axle
13,17. Cross spars
18. Scarves.
However, if the loads are not so large-scale, then simpler structural solutions can be chosen (see).
trolley carrier

The wheel axle is made of a steel round billet with a diameter of 30 millimeters. If the axle length is one meter, then the wheels will be located under the body. The axle of the wheels with corner bearings, as well as a scarf, is welded together with the side members, as well as the body of the longitudinal hinge.
Body - dimensions and main parts
The bogie body is made of boards 20 mm thick. At the corners of the boards you need to fix the corners of steel. With the help of three beams, the body is attached to the bogie frame itself. Beams consist of a bar 50 by 50.

wheels
Wheels for the trolley can be used from a motorized stroller. The hub comes assembled. The ends of the axle must be sharpened so that they match the diameter of the bearings.
Spepka with a walk-behind tractor
With the help of a cantilever beam, the trolley is connected to the walk-behind tractor. The upper part of the console is similar to the contour of the holder. It is mounted in the bracket of attachments of the walk-behind tractor.
When the trolley is operated in difficult conditions, it is necessary that its connection to the walk-behind tractor be articulated.
The drawbar must be inserted into the tubular body of the hinge. The drawbar is fixed with a retaining ring. With the help of this design, it is possible to achieve independence of the wheels of the cart from the wheels of the walk-behind tractor. When driving with a loaded cart, this allows you to better control the walk-behind tractor.
Swivel assembly - diagram

1. Console;
2. Anthers;
3.6 Bearings (36206);
4. Housing;
5. Spacer sleeve;
7. Remote bushing;
9. Nut M20*2.5;
10. Oiler;
The driver will sit on a cushion that has medium hardness, because it is made of wood. The driver's seat is in front of the body. Management is carried out from the trolley. The operator's hands hold the handle of the walk-behind tractor.
Trolley design
A trolley of any design has the following parts:
Place for the driver;
Trolley with a body;

What material is suitable for the manufacture of the trolley frame?
It is best to prepare a frame for a cart from corners and a channel. They can be bought in almost any building hypermarket or at the base. It is important to cook the frame very carefully. The design must withstand movement with loads on difficult sections of roads.
Blank for wheel axle
For the wheel axle, you can use steel circles that have a diameter of 30 millimeters. The axis is connected to the longitudinal hinge by means of welding. It is important to choose such an axle so that the wheels are located under the body.
How to make a trolley body
You can independently make a body for a cart from boards that are 20 millimeters thick. Steel corners are attached to the corners of the boards. With their help, the body is bolted to the frame. The best option is folding sides. So it will be possible to easily remove loads, as well as stack them on a wagon.
Wheels - what will fit
In principle, wheels can be taken from any agricultural machinery. In addition, some craftsmen use wheels from motorcycle equipment, as well as from strollers. That's just the axis will have to be machined to the diameter of the bearings.
trailer hitch
The hitch can be made from any piece of metal. It is necessary to drill a hole in it, which will be used for the hitch. The swivel assembly must be used with a bearing. It is important to strengthen it as firmly as possible by welding.
Trolley bottom
The bottom of the trolley can even be made from edged board. However, it is best to use 2mm steel. The result is a trailer for a walk-behind tractor that can serve for several years without service. All materials for manufacturing can be easily found in any hardware store. The tool is sure to be found in every home. Is that electric welding can be rented.
When making a trailer for a walk-behind tractor with your own hands, it is important to consider that every detail must be made as accurately as possible. The quality and durability of the product depends on this. You can get the job done in just a few days.
Video examples of making homemade carts
Detailed video instructions for making a homemade cart, showing what and how to do.
Another example of high quality craftsmanship.
Earlier we talked about decorative and working carts that can be used in the country. But the first is unusual and original decoration V landscape design, and the second - carts for moving around the territory building materials, fertilizers, garbage. Therefore, they are not very suitable for us.
Today we decided to pay attention to another type of carts that are used to transport tools, inventory and everything else that is difficult to carry around. summer cottage manually. Such carts are easily designed for themselves and created by hand in a matter of hours.
Why do you need a trolley in the country
It is very easy to answer this question, especially if you are the owner of a working dacha, with a garden, big garden perhaps a workshop or even own business in the territory.
In fact, such a trolley is very necessary, because it greatly facilitates your work and saves time. Much less physical effort is required, and you get minimal fatigue if you transport all the heavy tools on the trolley at once. Moreover, you do not have to spend expensive free time to ply around the country. Just imagine that you are building a small landscape object. You need to run to the shed for a shovel, hammer, axe, bring some power tools, paints and brushes for decor, and everything else. How many times will you walk from the barn or garage to the construction site, what mileage will you wind up and how much time will you lose on this path? We think it's a lot. But you can simply load the trolley with everything you need and transport everything to the place of work at one time.

Moreover, a country cart for tools and equipment can be quite versatile. It can be equipped with fasteners, boxes, removable holders, so that after such a transformation it is possible to transport not only standard equipment, but also small parts, hardware and fasteners, and even water in tanks.
In short, such a cart will not hurt practical summer residents, and we invite everyone who really saw the need for it to the next section of the article, where we will tell you how to make a cart with your own hands.
Cart size and purpose
It is better to immediately make a cart not very small, but at least medium in size. A small one will not help you with heavy equipment and special tools, and a large cart will be difficult to move due to sinking into the ground if it is overloaded. The average option, which will fit everything you need for normal work tools and inventory - just right!
The size of the trolley is determined by your own requirements, but a trolley that measures approximately 100 cm long, 60 cm wide and 50 cm high works quite well. Thanks to these parameters, the trolley easily passes through the doors of sheds and garages, moves between the main beds, between trees in the garden and other objects of vegetation and landscape. Another plus is that such dimensions make it possible for the trolley to be stable and not very heavy.
What to make a cart for inventory
The easiest option is to work with steel. It would be possible to use wood, but it will only participate in the creation of certain accessories. But here is the frame, the base, as well as the frame for the wheels of the trolley - only from metal. The tree is well suited for the construction and production of a wide variety of country accessories. Unfortunately, it is less suitable for a country cart than metal.
According to the established dimensions, or according to those that you yourself determine for your own convenience, the frame is boiled out from a profile pipe. It is advisable to make several jumpers along the long part of the frame so that we have 1-2 more stiffeners across the cart.
Further, at the corners of the resulting frame, on each side, vertical racks are welded. There should be 8 of them. fixed size. On top of the racks, from the outside, walls are created from a metal sheet. It is undesirable to use corrugated board here, as it is quite thin and will wear out quickly. But a steel sheet 2-3 mm thick will do just fine.

The base is cut out of the same sheet - the bottom, which is laid inward and bolted to the frame. Here you can work with welding, but the bottom of the cart is the most wear-prone part, and therefore it will be easier to replace it by simply unscrewing the bolts and putting a new sheet in its place. Each time cutting metal and re-welding it is not very convenient.
The frame and frame are ready, the inner part and outer skin are made. Now you need to make a wheelbase, and connect it to the frame to get the finished cart.
Wheel base for trolley
The base for the trolley will also be welded, and all from the same profile pipe. To do this, it is necessary to cut two pieces of pipe that will be longer than the width of the base by the distance that is necessary to install the wheels. It is also worth considering the size of the clearance between the wheel and the trolley, so that even the dirt that will sometimes stick to the wheels does not interfere with their free movement. To do this, it is enough to make a gap of about 3 cm.

Now, the pieces of pipe are welded together with several short jumpers, 15-20 cm long, to get a narrow rectangle. And further, on its narrow edges, round pieces of pipe are welded strictly in the middle to install the wheels of the trolley. Here everything is already according to the usual scheme for installing wheels, which can be ready-made or assembled in stages, with the participation of the locking part and bearings, studs and fixing nuts.
The finished wheelbase is welded or screwed to the frame in the middle. After that, a handle for moving the trolley is installed on one side of the frame. It is also worth considering stops that will give the trolley the ability to be installed exactly in relation to the ground.

As for the wheels, we want to note that they are possible different size. The same applies to the entire wheelbase, because it can be done according to your own scheme ... we have given only a single example.
Do-it-yourself country cart from a barrel (video)
Modernization of the country cart
Essentially, on this stage we have a country cart, the simplest and even the most ordinary, in which you can transport bags, bulk products, building materials, etc. But we do not need this, namely a trolley for tools and inventory. Therefore, you will have to work a little more.
Inner part, By own will, can be left unchanged. Shovels, pitchforks, scythes, choppers, flat cutters and other equipment can easily fit here. Also, here you can install boxes with crops, fertilizer bags, tanks and special containers with water, liquid fertilizers. Very convenient, isn't it?

But it’s worth even better to work with the frame so that only large accessories and materials are transported inside, but all the tools are hung outside.
For this we will use a tree. On the one hand, we propose to make a whole shield, rectangular wooden base made of wood over the entire surface of the trolley. Hooks, clamps, clamps can be installed on the shield. Here it will now be very easy to fix or hang a hacksaw, hammer, spatula, trowel, level and other small and light accessories.
On the other hand, along the top of the trolley frame, we recommend welding two profile pipes. On the top we will install limiters, and on the bottom we will install several L-shaped clamps along the trolley.
Thus, we will get a design for transporting exactly the garden and garden tools. Here you can put a few shovels, pitchforks, and everything else that is necessary for work in the country.

How to work with a cart
Let's say it happens spring planting seedlings. You place a bag of fertilizer or substrate in the trolley, set it next to plastic tank with water for irrigation, on top - a box with young seedlings. Further, on one side of the trolley you hang a small hand tool, with which you will make holes, on the other hand, you lay shovels and choppers with which you will level the soil, hilling, forming rows and paths.
Another example in which we definitely need such a cart is working with landscape objects.
For example, we are building a small object in the garden, and we need loose, piece building materials and special tools for this. In the same way as in the previous example, we put everything voluminous and bulky in the main box, and fix the tool and inventory on the sides of the cart.
Country cart for tools and inventory - good helper, which can be independently folded from the remnants of building materials, or created from new pipes, steel sheet and fasteners. In any case, a home-made cart will cost you several times cheaper than a purchased one, but it will also be much more convenient, because you will make it only for your personal needs and requirements!


