Ways to level the floor in the apartment. Do-it-yourself floor leveling. Video. Mixture. Concrete. Wooden How to level the floors in different rooms
The largest load in any room takes on the floor surface. Preparation for laying a new or replacing a failed floor covering is an important step in carrying out repair work. It is from the strength and stability of the base that its durability and reliability will depend.
Each type of material has its own requirements for the state of the rough base, and if small irregularities in the base for laying tiles can be compensated for with a thick layer of tile adhesive, and it is enough for thick-based linoleum not to have serious damage under the canvas, then more stringent requirements are imposed on the base for parquet board and laminate. requirements.
In this case, the permissible deviation of the horizontal plane on two running meters should not exceed 2-3 mm. To identify such defects allows measurements using the building level. And if there is a need to level the base for installation decorative material for the floor, then this can be done in more than one way.
Regardless of the material that will serve as the new floor covering, the concrete base must be level and free from significant damage.
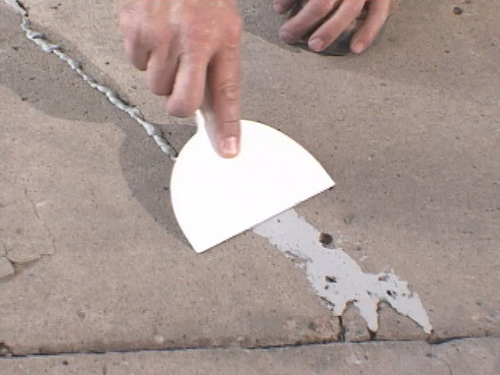
Preparing for work on leveling the rough base begins with a thorough inspection of the surface. If no serious deviations in the horizontal level are found, but pits, cracks and bumps are present, you will need a grinder to level the protruding places and cement-sand mortar and a trowel to repair damage.
The only option to correct major height differences found during the examination would be to apply a cement screed to the floor.
For the manufacture of cement screed, you must first prepare necessary material and tool. Tool List quite simple and usually most of it is available in the economy of each home master:
shovel;
· Master OK;
level (laser or conventional, building);
container for the solution;
· hammer;
rule.
You will also need to purchase material according to the following list:
cement not lower than grade 150;
Fine crushed stone;
· damper tape;
metal profile or rail for beacons;
· polyethylene film.
On sale there are several types of mixtures for screeding - gypsum, expanded clay or ready-made self-leveling compounds. But the simplest and in an economical way to level the floor, there is still a combination of sand and cement in a ratio of 1 to 3. High-quality high-grade cement allows you to create a reliable foundation, and you can further enhance its strength by adding plasticizers in the form of lime or tile adhesive.
The entire process of leveling the floor with a cement-sand screed consists of several stages.
The old floor covering is dismantled, and the surface is examined for defects. Align the protruding areas with a grinding or milling machine. Eliminate potholes and cracks, while Special attention is given to the joints of the floor with the walls. In these places, damage is especially serious due to the natural deformation of the structure.
The rough floor is thoroughly cleaned of debris and dust and must be covered with several layers of primer, using special compounds for porous surfaces. Each subsequent layer of soil is applied after the previous one has completely dried.
A damper tape is laid around the perimeter of the room. This material is designed to seal gaps at the joints of plates and walls, compensate for deformations due to changes in temperature and humidity, and protects the screed from damage during the drying process. The tape is laid along the bottom of the room so that it goes to the wall, and part captures the floor. If subsequently the plinth does not close the protruding edge of the tape, it is cut off with a sharp knife.
A prerequisite for the implementation of a cement screed is the waterproofing of the base. Carrying out these works prevents the penetration of excess moisture into the concrete, protects the lower floor from the leakage of liquid during construction works, and also provides the necessary level of humidity and the quality of the screed itself.
Waterproofing can be liquid, made from bitumen or a bitumen-polymer mixture, or made from ready-made diluted with water. plaster compositions. But the most affordable and reliable method is laying thick rolled polyethylene on the base. The canvases are distributed on the surface with an overlap of 8-10 cm and the joints are fixed with adhesive tape. A so-called “pillow” of fine-grained gravel or sand is laid on top of the waterproofing layer, which will not allow the screed monolith to sag and form cracks.
Determine the required layer thickness for the future screed. Its minimum height should not be less than 3 cm, a thinner layer will crack and begin to crumble. In this work, it will be more convenient to use a laser level, with which the position of the beam is marked on the walls with a pencil. The marks made are interconnected by a solid line, which will indicate the ideal horizontal level and serve as a guide for pouring concrete.
Before starting to pour the solution, it is necessary to install beacons, the upper edge of which must coincide with the level of the marks made in advance on the walls. For their manufacture, ordinary rails or metal profiles are suitable. Beacons are fixed to the base with concrete or gypsum mortar or not too thick plaster mixture, at a distance of about one and a half meters. It should be noted that this gap should be slightly less than the length of the rule that will be used to level the solution. This will allow you to freely manipulate the tool in the future.
When installing each new beacon, the correct installation of the next is checked against the position of the first, and then a strong twine is pulled between them.
The cement-sand mortar is prepared in such a way that by the beginning of the pouring it is infused for 1 hour. Work begins from the far corner of the room, opposite the door. The area from which the pouring will begin is abundantly moistened with water, using a wide brush for this. The solution is laid out on the base with a shovel and the layer is leveled with a construction trowel, referring to the level marked by the beacons. The final evenness of the concrete layer is given by the rule.
The screed is performed in successive strips, moving towards the door.
The finished surface of the screed is covered with plastic wrap. This will contribute to the most uniform evaporation of moisture from the solution. After 12 hours, the initial setting of the concrete will occur, the film is removed and the screed is sprayed with water to prevent the formation of cracks in the cement layer. These actions are repeated for 3 days, until the solution has completely hardened, after which it will be necessary to treat the surface irregularities with a spatula and a wooden grater until it is completely homogeneous. Then the floor is again covered with a film and an even layer of wet sand is distributed on top, which is left for 10-12 days, regularly moistened with water.
Leveling the floor with a log
The long and rather laborious process of cement screeding can be avoided by using the old and proven method of leveling the floor along the logs. This option is economical and additional benefits in the form of improved thermal and noise isolation, A free space between the joists not only allows for comfortable laying necessary communications, but also provides good ventilation, especially important when laying floor coverings containing wood.
This method is successfully used in rooms that do not allow creating a lot of pressure on the floors. This is characteristic of cement screed, the thickness of which can damage partitions in old houses.
Required material and tools
When preparing the floor device on the logs, special attention should be paid to the material. The wooden beam for the manufacture of logs must be well dried and must be treated with preparations to prevent the appearance of microorganisms. For this purpose, an antiseptic is usually used, but the usual processing of engine oil also gives good effect protection against fungus and mold. The cross section of the beam is usually chosen from 50x100 to 100x50 mm, but in rooms with low ceilings material with a section of 50x50 can also be used so as not to reduce the already small vertical space.
The device of the floor along the logs can be made using plywood, chipboard or cement particle boards. The first two options are weak sides due to insufficient strength and low resistance to moisture. Recently, DSP boards have been more often used to level the floor.
In addition to the ability to completely resist moisture, which makes them suitable for use in the bathroom and in the kitchen, they have a number of other advantages. At a fairly reasonable price, this material is very durable, non-flammable, not affected by microorganisms, and during processing it is easy to cut, drill and install, without breaking or crumbling.
In general, to level the floor with a log, you will need:
a wooden bar;
antiseptic or waste oil;
Plywood, chipboard or DSP;
grinder or hacksaw with a small tooth;
a heater;
Nylon cord or fishing line;
ruler, pencil
dowel-nails;
· self-tapping screws;
· grinder;
Leveling putty.
Before starting work, it is necessary to prepare and clean the concrete base from debris, and lay a waterproofing layer on the surface. When installing the lag, you should very strictly adhere to the horizontal level. The first supports from the beam are attached to two opposite walls and in between they pull a nylon cord or fishing line.
For cement particle boards optimal distance between the lags should be kept within 45-50 cm. Then, with the same interval, using self-tapping screws or dowel-nails, a transverse crate is mounted. Then a heater is laid, which can be used as foam or mineral wool.
DSP sheets are easily cut with a conventional hacksaw, but it will be more convenient to separate the parts with a grinder. Fastening to a wooden beam is carried out with self-tapping screws, and the flooring is made with a mandatory run-up at the seams. The gaps between the sheets are closed with a leveling putty, which is sanded after drying. Additional moisture insulation of the surface can be given by processing with a special primer composition.
The task of how to level the floor in the apartment arises not only when deciding to lay a new coating, but also if necessary overhaul old, worn surfaces. Floor irregularities (slope, differences), ultimately, create problems in leveling when arranging furniture sets, installing doors, create a feeling of discomfort for the owners and guests.
Planning and preparation

Dismantle the old coating
First you need to decide which floor in the apartment will be laid / repaired with your own hands. The number of required operations, materials, and the amount of financial investments will depend on the design and technology of the flooring device.
First you need to raise your old floor and get acquainted with the base with which you will have to work. It usually comes in 3 types:
- floor slabs;
- old cement screed;
- wooden floor.
IN last case you can level the wooden floor by applying additional layers on top, if its boards still retain their performance.
The choice of how to level the floor in the apartment is significantly influenced by the time allotted for repairs. Construction mixtures dry for a long time, but in a dry way, work is done in 1 - 2 days.
Definition of scope of work

In order to find out the existing unevenness of the existing base, in addition to inspection, some measurements must be taken.
Optimal and fast way for this is the definition of irregularities using laser level. A directed stream of polarized light will take into account all the peaks that protrude above the selected point. This is how the highest part of the surface is found, from which the upper boundary of the new coating is measured with a marker along the walls.
The mark is chosen so that there is a gap of 4 - 5 cm to the radiator fins, each door to the neighboring rooms or to the balcony opens freely.

Take measurements with a laser level
A little longer, but also accurate, they reveal the top point using a water level from an elastic tube.
If the upper mark is already set according to the conditions, then in order to obtain floors in an apartment of a certain thickness, the protrusions are removed and the old screed is removed.
Floor slabs not covered before cement mortar, may have chips, cracks, steps at the joints. This will increase the amount of preparation, since you need to close all problem areas with lean concrete mortar.
Regardless of how the surface will be leveled, it is necessary to lay waterproofing layer. The film material will protect both the tree and the bulk monolith.
To improve the adhesive properties of the surfaces of the contacting layers and antiseptic protection, various primers are used.
Various leveling technology

It is necessary to plan how best to level the floor, taking into account the load (weight of materials) that will fall on the supporting structures.
Various tools and equipment will be required for cooking mortars for pouring a monolithic belt and wooden decks made of plywood under a laminate or linoleum.
Wet screed
Perform floor leveling liquid solutions need for exposed beacons. Such indicators can be screws screwed into the floor at one level of caps, or special strips from a U-shaped profile.
If the layer thickness exceeds 50 mm, then a reinforcing mesh with a cell of 5–10 mm is additionally laid.

As a heater, a bedding of a layer of 30 - 40 mm expanded clay can be used, including leveling the unevenness of the ceiling.
The surface, cleared of crumbs and dust, is poured with a solution of cement and sand, prepared in the established proportions.


Concrete must dry slowly
Concrete is poured for 1 time in 1 layer over the entire area. Filling by sectors leads to the formation of heterogeneous areas and violation of the integrity of the monolith.
The gradual drying of the liquid mass is the key to a uniform set of screed strength. The first 1-2 days it must be moistened to prevent cracking.
Before leveling the floor, a damper tape is spread along the perimeter of the room with a vertical overlap. It makes it possible to reduce the effect of thermal expansion of a solid screed on the walls, while at the same time being a soundproof protection.
Dry screed
It is much faster to level the floor (with simultaneous insulation) using dry screed technology. Master class on dry floor screed, see this video:
From comparison table it can be seen that such a solution has a good advantage over the wet version, but it is important to take into account that in the situation high humidity should not be used:

They start leveling the floor in the apartment with the flooring of the film under the dry mix being poured. After that, bulk material is laid in a layer up to 6 cm.
Lay on top drywall sheets, plywood, chipboard, fiberboard, laying out a horizontal plane. The seams are sealed with glue.
The flat floor is a convenient base for any floor materials from parquet to ceramic tiles and does not require great professional skills to perform installation operations.
Self-leveling compounds

The most common way to level an uneven floor is to use special solutions.
They are poured into cement screeds(old and new) finishing, cover wooden flooring in order to hide bumps, joints, texture of the old base.
For work, the following conditions must be taken into account:
- The room temperature must be above +10°C.
- The thickness of the applied layer should not exceed 3 cm.
- The high drying rate makes the mortar susceptible to drafts.
- The polymeric additives included in the composition decompose under the influence of ultraviolet radiation.
- Preparation is carried out exactly according to the attached instructions, observing the time intervals for mixing and water temperature.
The required consistency is achieved by kneading with an electric drill with a special nozzle. leveled ready solution spiked roller while removing air bubbles.
The characteristic indicators of the grades of the mixture, which will have to level the floors, can be seen in the example of the following table.

For more information about the algorithms for filling the floor, see this video:
wooden flooring

You can not bind yourself by waiting for the solutions to dry and increasing the load on the base plates, using another way to level the wavy surface.
Alignment is achieved by creating a raised floor. Finishing flooring materials will rest on a flat horizontal plane, which is formed by a system of laid lags ( wooden beams).

Most often, this design is used in private houses and apartments on the first floor. This is due to the possibility (and necessity) of high-quality thermal insulation from non-residential premises, underground. Another reason to arrange such a flooring is the wiring of communications.
The upper edge of the beam is set to the level at a given level, the unevenness of the supporting surface is compensated by linings made of special plastic, wooden dies, plywood scraps. Logs are rigidly fixed with self-tapping screws to the base.
Over the lags, an already impeccable plane of GVP, chipboard, OSB is laid.
Just an old floor
A plank old floor with well-preserved wood material can simply be planed with a hand planer or scraper. For information on how to restore an old floor, see this video:
If there is a need to get away from the plank - slit floor pattern in the room, then the top of the old flooring can be covered with plywood sheets and the desired floor covering can be laid.
Any self-respecting owner will make every effort to have a laminate floor in his house, moreover, he will try to do it with his own hands. This flooring is an excellent material, and the ease of installation does not affect the quality in any way. Such a floor correct installation on a perfectly flat rough surface will last as long as possible.
Preparing floors for laminate
It's no secret that even in new homes there are bumps. And if repairs in the house were carried out repeatedly, then the mistakes of previous builders will definitely affect when the laminate is installed. Of course, you can pay builders to agree to level the screed concrete pavement and they laid the laminate themselves, but it’s better to understand the technology yourself and perform alignment in your home without any problems.
The easiest way to get a beautiful front lawn
Of course, you have seen the perfect lawn in the movies, on the alley, and perhaps on the neighbor's lawn. Those who have ever tried to grow a green area in their area will no doubt say that this is a huge job. The lawn requires careful planting, care, fertilization, watering. However, only inexperienced gardeners think so, professionals have long known about innovative tool - liquid turf AquaGrazz.
Why you need a flat floor when installing laminate
Any irregularities will nullify all the work done, and also lead to additional costs. With height differences of more than 2 millimeters per square meter panels move relative to each other. Lock connections will begin to burst in places of differences, the laminate will disperse into separate pieces and deform. It is better to immediately carry out a high-quality screed and level the coating, otherwise you will have to re-buy the material and do all the work again. Therefore, absolutely any surface can and should be leveled before installing the floor covering. Try to take the choice of laminate seriously enough, because its service life depends on the quality and class. But you should not immediately acquire the most expensive material, because the presence of an expensive price tag does not guarantee that the laminate will be the most High Quality. Leveling the floor in the process of renovating a house for beginners always becomes a problem.

In fact, the procedure is quite simple and fast, although for people far from construction and repair, the technology may seem unrealistically difficult to do on their own. For alignment uneven surfaces several types of technologies are used. And if everything is done correctly, the result will be a flat surface, perfectly suitable for further laying the laminate.
Surface preparation for leveling
Any finishing work should always start with clearing debris. Also here. It is necessary to remove all construction waste and any other dirt, for which a vacuum cleaner is best suited. All deep cracks, as well as irregularities, are covered with putty. Next, you need to measure the unevenness of the floor. The highest point and pits are revealed. Useful here laser level. If there is only one unevenness in the form of an elevation, then it is much easier to remove it with a grinding tool. With multiple irregularities, beacons are set. Screws or cement mortar are suitable for their installation. "Zero" is determined by the laser level, the next ones are installed and installed at a distance of 50-90 centimeters (depending on the length of the rule) from each other and 20-30 centimeters from the walls. Alignment is a rather complicated procedure if you do the work yourself. It is advisable to take a couple of people at hand to carry out filling work.

Floor screed for laminate
We make a screed with cement mortar
In this way, it is customary to remove large irregularities. First, rails are set at the desired level. For lighthouses, both a metal profile and an ordinary wooden even bar are used. Lighthouses are placed at a distance of about a meter from each other. Here it is necessary to take into account the length of the rule. If the length of the instrument is one meter, then the distance between the beacons should be 80 centimeters, 20 centimeters less than the length of the rule. If the distance is large, then when leveling, the tool will often jump off the rail and leave furrows in the solution. Further ready-made solution concrete material poured onto the surface, and the beacons are usually leveled. After a couple of days, when the solution sets, you can take out the beacons, and cover the resulting recesses. Unfortunately, a concrete mortar screed takes a long time to gain strength: it will be possible to lay a laminate only after a month. You will also have to lay waterproofing before pouring, especially if the living space is not on the ground floor. Otherwise, excess moisture will appear on the ceiling on the floor below.

Using the mass level
This technology is similar to the one described above, but it will cost several times more. The composition is a specially balanced and selected mixture. It is diluted to a liquid state and, under the influence of gravity, spreads over the entire floor area, forming an ideal flat surface. If you decide to do the work yourself, remember: this solution must be used within 15 minutes, otherwise it will seize and become unusable. This method is used to level the surface, the height difference of which is not more than 3 centimeters. This mixture can be used to create underfloor heating. Due to its high strength, the material retains its properties well at high humidity in the room. Before starting work, you need to prepare the room, remove debris and unnecessary items. It is advisable to try to level the old surface as much as possible by any possible means at hand. Indeed, with large differences, more material will be required, and, as you know, it is quite expensive. The solution is mixed in a sufficiently large container using a conventional construction mixer.
The mixture must be poured in strips, moving from the far wall to the exit. Spilled solution should be immediately leveled with a spatula or doctor blade, and then roll the surface with a spiked roller. It is desirable, although difficult, to do all the work in one go. For this, a team of three people is suitable, among whom responsibilities are distributed. In too large a room, the area is divided by partitions and filled in parts. The minimum thickness of the fill is from 5 to 20 millimeters, with a thickness of 10 millimeters or more, reinforcement is carried out with a special mesh. The composition will harden in a couple of hours, but for a greater guarantee, it is better to let the mixture stand for 6 hours until it completely sets. The result will be an absolutely flat surface, and it will be possible to lay the laminate without any problems.
This method is the fastest leveling method, since dry material is used, and there is no need to wait for drying and setting. You can level the surface and mount the laminate floor with your own hands in one day. The main component of the screed is a dry mix, on top of which, to ensure smooth surface special sheets are placed.

Dry floor screed
This method of repair has many advantages, among which it is worth noting strength, low cost, heat and sound insulation, quick installation and ease of installation. There is also no need to work with wet materials. If electrical wiring is stretched across the floor, or repairs are carried out in the winter as soon as possible, then a dry screed is a must. The materials used for backfilling are varied. Artificial or natural sand, expanded clay or silicate slag are used. These substances have sufficiently high strength, fire resistance, flowability and water resistance. The filled layer is about 5 centimeters, after which it is covered with sheets. Sheets are made from GVL, chipboard, chipboard and other materials. The most popular boards are gypsum boards, they have sound-proofing and fire-fighting properties, do not deform, are not afraid of water. The rough surface before backfilling must be clean and dry, free from dirt and dust, all cracks must be removed. To begin with, the old floor is isolated from moisture using a film or other material. Along the perimeter of the walls, the film should protrude 15-20 centimeters.

Leveling the floor with cement chipboards
Around with help double sided tape edge tape is glued on top of the insulation. Its height must not be less than the level of bulk material. The tape is designed to prevent deformation from exposure to high or low temperatures. The next step is backfilling of dry material, and if necessary, thermal insulation is installed. Using the rule, the embankment is equal to the entire area of \u200b\u200bthe room. For this, two levels are installed metal profiles and as a rule, as if on rails, the embankment stretches towards itself, thus removing the excess.

Floor leveling options for laying laminate flooring
The beacons are rearranged and the operation is repeated until the entire room is level. Gypsum slabs are laid in 2-3 layers. They have locks, so they fit quickly, easily and securely. For greater strength, the joints are glued and fixed with screws. Before laying the second layer, the first must be thoroughly covered with glue. The second and subsequent layers are installed similarly to the first. Excess insulation or tape sticking out at the edges is cut off with a knife, and the remaining gaps are covered with putty. You can continue the rest of the work the next day.

Gypsum boards for leveling floors
This technology is ideal for leveling old wood flooring, however, this leveling is also used in other cases. If the unevenness of the old floor is no more than 2 centimeters, then the use of wooden beams is not necessary for leveling. Plywood sheets are immediately installed on the old base. When leveling in this way, plywood boards are placed in two layers, so it is better to immediately stock up on a sufficient amount of material. Logs are made from larch or coniferous forest of 2 or 3 grades. In width, they reach 80-100 millimeters, in thickness at least 40 millimeters. On a concrete or other base, the logs are fixed with special screws every 40-50 centimeters.

Plywood floor leveling
In living rooms they are laid across the light falling from the windows. This is how the level of the subfloor is formed, and the height is determined. A significant plus of this method is that between the lags it is possible to install thermal and sound insulation. Along the entire length, lags are installed in several places small size wooden bars, under which pieces of linoleum or roofing material are placed. This creates a fairly flat surface. Plywood sheets are stacked in two layers on logs adjusted in height. The plywood itself is attached to the bars with the help of self-tapping screws in increments of 5-10 centimeters, all joints are glued with PVA glue. With an offset or perpendicular to the first, the second layer is mounted. In any case, small gaps will remain between the sheets after installation, and they need to be puttied. Before installing such a screed, the entire wooden material must be treated with an antiseptic solution.
A flat floor in any room is necessary not only for aesthetic reasons, but also prevents injury to the owner of the property. The unpleasant appearance of a rickety cabinet cannot be compared with the overturning of a rocking TV or a broken limb as a result of a fall on "almost level ground." Whatever the cause: initial errors during construction or the appearance of potholes and cracks during operation, the question “How to level the floor?” sooner or later it gets up before new settlers, and during repairs.
In modern housing construction, the basis of the floor in a house, apartment, garage, office is concrete or concrete slabs. Depending on the purpose of the room, linoleum, ceramic or PVC tiles, parquet, laminate, carpet are laid on top, and the durability of the external, often expensive coating, depends on the evenness of the concrete floor base.
To obtain an even solid base for the floor finish, to achieve thermal, hydro and sound insulation, leveling is carried out either by screeding or by applying solutions of special mixtures for leveling the floor.

The choice of leveling method depends on the size of the floor height difference and the finished floor material: with a floor level difference of 3-4 cm, a leveling screed of the concrete floor is performed; if the floor is generally even, but a large number of cracks are found, then leveling is performed with self-spreading mixtures or tile adhesive.
Experts distinguish between several types of screed, based on two main laying methods: dry screed and screed with the addition of various liquids.
Dry screed is easily performed even by a novice builder, it is cheaper and significantly insulates the room. Expanded clay, dry quartz sand, expanded polystyrene are used as a filler. Plywood, gypsum-fiber moisture-resistant sheets (GVL) or wood boards (chipboard, fiberboard) are laid on top, so a dry screed is made more often in living rooms.

The cleaned floor is impregnated with a primer solution that strengthens the concrete and increases its waterproofing properties. You can use "Betonkontakt". After drying, a layer of polyethylene (more than 50 microns) film is laid, joining the panels with an overlap of 18-20 cm and gluing them with adhesive tape. An overlap of 12-15 cm is left along the walls and glued with a damper tape.

With absence necessary experience, as beacons, it is desirable to lay U-shaped profiles turned upside down on the floor, setting them in level. Having filled a part of the filler into the formed cells, level it with a rule and lay sheets of the future floor, gluing the joints of the GVL with PVA glue and tightening it with self-tapping screws after 18-20 cm.
At the walls, the edge of the gypsum fiber sheets is cut off. You should not pay attention to the apparent instability of the first sheets; when they are spliced into a single monolith, they get a solid warm floor.
Thinking about the best way to level the floor, the majority tends to classic version cement-sand screed, giving a solid, even base for the finishing layer of the floor. The thickness of the future screed must be at least 3 cm, otherwise the strength is reduced significantly.

The concrete base is also cleaned, primed and dried. With the help of a conventional, water or laser level, beacons are installed, using a laser level, you can install beacons without assistants. Lighthouses are mainly installed with durable metal slats or T-profiles, but you can use pipes, edged board or bar.
The slats are installed on a thick solution, at a distance of no more than a meter from each other. The solution must be allowed to harden, otherwise, when leveling the screed, you can move the beacons and all the work will go down the drain.

Subsequent work does not require experience, but patience: pouring out the solution sequentially from the far corner, the floor is carefully leveled with a rule, moving it not only along the rails, but also making hand movements in a circle. In this case, the solution moves to the right and left, compacting and filling the voids.

To prepare the solution, cement of the M500 brand is most often used, adding three parts of sifted sand and water to one part of it (about 1 liter per 1 kg of cement). You can also use ready-made leveling compounds for the floor, commercially available: M150, M200, M400. The higher the number in the name of the mixture, the stronger the resulting coating. Prepare solutions in accordance with the instructions on the bag.
On the next day after laying, the screed must be lightly moistened with a roller, on the second day it is re-moistened and the strength of the solution is checked. If it is already possible to walk on it, the beacons are carefully pulled out and all the voids formed are rubbed with a fresh solution.
The screed is covered polyethylene film and, periodically moisturizing over the next week, they are kept until hardened for at least 2 weeks, and preferably a month.
Along with strength and relative cheapness, the leveling floor screed takes a lot of time, which modern self-leveling mixtures, more often called self-leveling floors or equalizing mixtures. The top coating can be installed after 10-12 hours, and the fully self-leveling floor acquires its characteristics within 12-14 days.

Such mixtures can be used with a height difference of not more than 3 cm, guided by the instructions attached to the bags with mixtures, since the further strength of the coating is more dependent on the chemical filler of the mixture. Deep (more than 6 mm) cracks and depressions must first be repaired with mortar and dried.
A leveling mixture diluted according to the instructions is poured onto the cleaned and primed concrete and leveled with a metal spatula. After that, the self-leveling floor is rolled with a spiked roller, removing the smallest air bubbles that reduce the strength of the floor.

It is necessary to do the work together, as the mixture sets in about 10 minutes. If necessary, slow down the curing rate, the floor is slightly moistened beforehand. cold water, which also avoids cracking of self-leveling floors.
The small thickness of the finished floor allows it to be widely used in rooms with low ceilings. Along with high cost, the negative characteristics of self-leveling mixtures include brittleness and poor resistance to low temperatures epoxy mixtures; mixtures based on polyurethanes are not resistant to chemical attack; methyl methacrylic are slightly resistant to abrasives.
Sometimes small cracks or irregularities are found in the floor, in this case it is possible to level the floor with tile adhesive, given that, for example, Ceresit can crack already at a thickness of 3 mm. It is undesirable to use full leveling of the floor with tile adhesive, replacing the self-leveling floor with it, despite the cheapness of the glue.

When deciding for yourself how or with what mixture to level the floor, it is necessary to take into account the temperature and humidity of the room, the level difference and the slope of the concrete base, the expected loads during the operation of the floor, labor and financial costs.
In most cases, apartment renovation is not complete without leveling surfaces, but in order to quickly and inexpensively produce rough preparation or make repairs to floors, you can use self-leveling compounds. Exists a large assortment dry mixes, they are on gypsum and cement base.
Ties are performed quickly and efficiently, provided that they are performed by a qualified master, because. it's not easy to make them yourself. In order not to make mistakes when self potting, order the services of a repairman from us - then you are guaranteed to get an even and beautiful screed
Often, the need for leveling the floor appears after the dismantling of old floors, which are no longer practical to repair.
Floor differences and how to level them
Leveling with a self-leveling mixture is possible when the floor level difference is not more than 20 mm. In some cases, with a difference, say, from 30 mm, you can also use a self-leveling floor, but only with the placement of beacons for the floor. If the difference reaches more than 50 mm, it is advisable to use a Knauf screed, so as not to load the floor slab and not wait for drying if there is no time for this.
Sometimes a dry screed is abandoned, and it remains only to use a wet floor screed with expanded clay. By adding coarse expanded clay to such a screed, you can save on dry mixes and also not load the floor slab (but this method is more often used in bathrooms or when there is time to wait for the floor to dry).
Before pouring, it is important to carefully process the surface.
 The base is cleaned of debris, gaps are sealed, primed. After the soil is finally absorbed into the surface, the master pours out the solution and distributes it, getting rid of air bubbles with special tools. If the area is large, the delimitation is set and the filling takes place in two stages.
The technology of self-leveling floors will ensure that the surface dries to a solid state after 3, 4 hours, and complete drying takes up to 3 days, after which you can start laying laminate or any other floor covering.
Dry mixes for leveling
Used to level the floor various materials depending on the complexity of the repair. For pouring in an apartment, mixtures are usually used for internal works manufacturers such as: Ivsil, Prospectors, Osnovit, Eunice. To level large differences, it is preferable to use sand concrete M300 or use a dry Knauf prefabricated floor.


You need to be able to work with each mixture, because. each material has its own specific technology for preparing the solution. Mixtures for the floor are fast drying and durable. The surface is smooth, even and after complete drying, it can be laid on it. different kinds floor coverings.
If the thickness of the screed is more than 2 cm, cement-based mixtures are used. Here the most common mixtures for leveling the floor are: self-leveling floor Prospectors "thick", sand concrete m 300 various brands, Etalon Stroy, Fort.
Cement-sand mixture and sand concrete differ in price, quality and strength. Under laminate, parquet board, linoleum and carpet, you can use sand concrete or dry mixes for the floor cheaper, and with screeds for plywood, parquet, solid wood and tiles, it is better to choose a more expensive mixture, because. given material glued to the screed, so it should be more durable in its structure. If the surface has already been leveled, then before laying the laminate or parquet, it is better to check the base for evenness and level it if necessary. Such alignment can be partial, if the screed does not coil, of course.
Floor leveling in Moscow price per m2 of work
The cost of alignment depends on the complex and complexity of the work performed.
The most affordable way is to level the floor with a self-leveling mixture, the price per square meter of work m2 of which is 250 rubles. With minor unevenness of the floor, a minimum amount of materials is used.
In the event of significant floor unevenness or if electric wires and heating pipes, it is necessary to make a cement-sand screed along the lighthouses. Prices for leveling the floor with a screed for lighthouses are higher than for leveling with a self-leveling mixture, because. the work process is more laborious and is used large quantity materials (screed for lighthouses 500 rubles per m 2). Also, with a large thickness of the screed (above 5cm), to reduce the price of Construction Materials you can use expanded clay as a filler. Such a floor gains strength and dries completely in 3-4 weeks and is more suitable if other types of work are done in an apartment or room.
But it also happens that there is no other construction work in the apartment or room, but the floor needs to be leveled in short time. In such cases, dry screed technology is in demand (the price for the work is 400 rubles per m 2). Prices for materials for dry screed may vary, because. a large assortment of expanded clay backfill appeared and, accordingly, the price for it is also different.
But this leveling method definitely has an advantage over other ways to level the floor, because. dry screed is ready for laying floor coverings after installation.
|
Dry screed device |
400 rub/m2 |
|
Self-leveling floors |
250 rub/m2 |
|
Screed on lighthouses |
450 rub/m2 |
|
Plywood flooring, lag installation |
500 rub/m2 |
|
Mounting plywood on a screed |
250 rub/m2 |
|
Linoleum/carpet flooring |
200 rub/m2 |
|
Laying laminate |
200 rub/m2 |
|
Laying parquet board |
300 rub/m2 |
|
Laying tiles on the floor |
from 900 rub/m2 |
| Applying a primer to the floor | 50 rub/m2 |
How to level the floor for floor coverings
If you decide to put a laminate or parquet board on your floor, you must first check the base for strength and evenness. The permissible deviation in level should not exceed 2-5 mm per two meters, and if the difference is greater, then floor leveling will be required.
You can level the floor for laying in the following ways:
- Filling the self-leveling floor;
- Cement sand floor screed;
- Dry floor screed Knauf;
- Installation of plywood on logs.


