We make an arched door with our own hands - step by step instructions and photos. Arched door: do-it-yourself device How to make an arched door out of wood
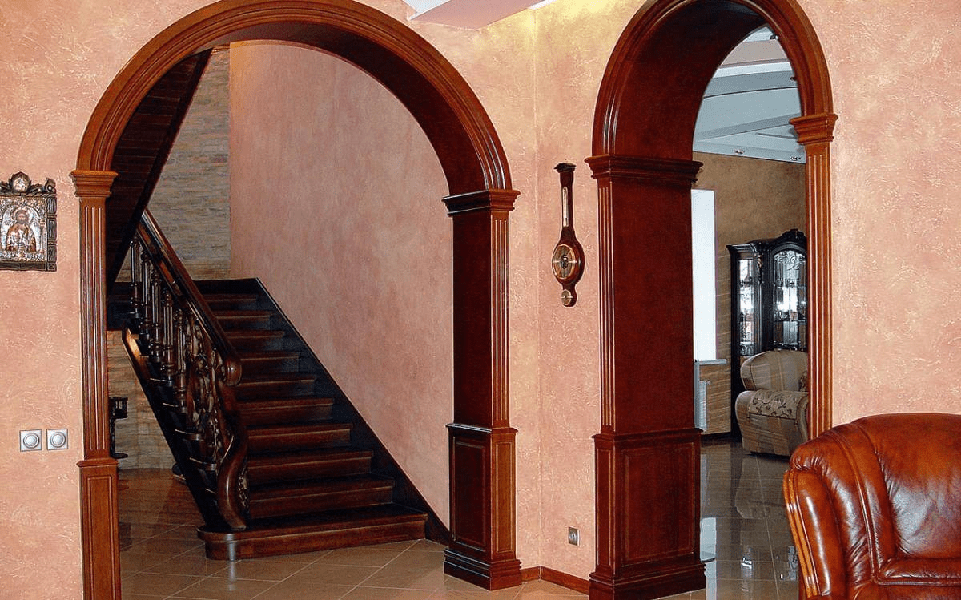
Arched doors are a decorative element that has long been used in interior design and is characterized by wave-like popularity. If in the ΧVΙΙ-ΧVΙΙΙ centuries they were used to decorate the royal courts and princely chambers, as well as the houses of other noble people, then subsequently their popularity declined somewhat and reached its maximum development only in the 50s in Britain and the USA, where for some time they were an integral element of the interior. Over the past 50 years, their popularity has subsided again and has begun to rise today, when modern designers have proposed replacing the standard rectangular doorways with arched structures that give any space grandeur and sophistication. However, the relevance of this topic is due not only to the recently increased popularity of arched structures, which instantly create a subtle hint of classics and antiquity in the room and reflect the quality factor and sophistication of the room, but also because the choice interior doors is one of the important stages in the creation of a design project and interior design. Design trends tend to change, but some decorative elements remain unchanged. These elements include interior doors, which are not only decorative element interior, but also perform a protective function. Due to the fact that angular hi-tech and sophisticated classicism harmoniously coexist in modern design, one of the representatives of which are interior arched doors, it is necessary to talk in more detail about the features of choosing and installing these structures.
Arched doors: main features
Considering arched doors standard design in terms of functionality, they practically do not differ from the common swing doors of the traditional form. Based on the name, it can be understood that the main distinctive feature arched design is the shape door leaf and top rail door frame, which are curved in an arc, which is their main advantage. First of all, it is necessary to note an attractive appearance. Concerning technical advantages, then arched doors by by and large they can't boast. The only benefits to look out for are:
- If the ceilings have a light shade, arched doors help to increase the height of the room. Otherwise, they only emphasize their low level. The meaning lies in the play of light and shadow, intensifying or weakening depending on the shape of the arched opening;
- Installation of interior arched doors - good decision for those who are tall. If the height of a traditional door leaf does not exceed 2 m, then the height of arched doors increases due to the upper arc, which allows you not to bend down in the opening.

As mentioned earlier, arched doors were used to decorate the royal chambers in Rus'. The manufacture of this design was trusted only by experienced carpenters, and its design - by the most talented artisans. Despite the fact that in the ΧΧ century arched structures were finally replaced by rectangular ones, which are the most common today, they have not been completely forgotten by modern designers and architects. Due to the presence of a discreet and concise design, modern arched doorways are noticeably different from their ancient counterparts, but the technology for their production, as before, has remained more complex and lengthy. Due to the fact that the arch is characterized by a rounded shape of the upper part, this entails a lower location of the upper door hinges, which, as a result, must be distinguished by impressive reliability and power. These features of arched structures entail an increase in the cost of their installation, which is one of the disadvantages of arched doors.

Varieties of arched doorways and arched doors
First of all, consider the classification of arched doorways which includes the following varieties:
semicircular arches are the most popular designs and include the following subspecies:
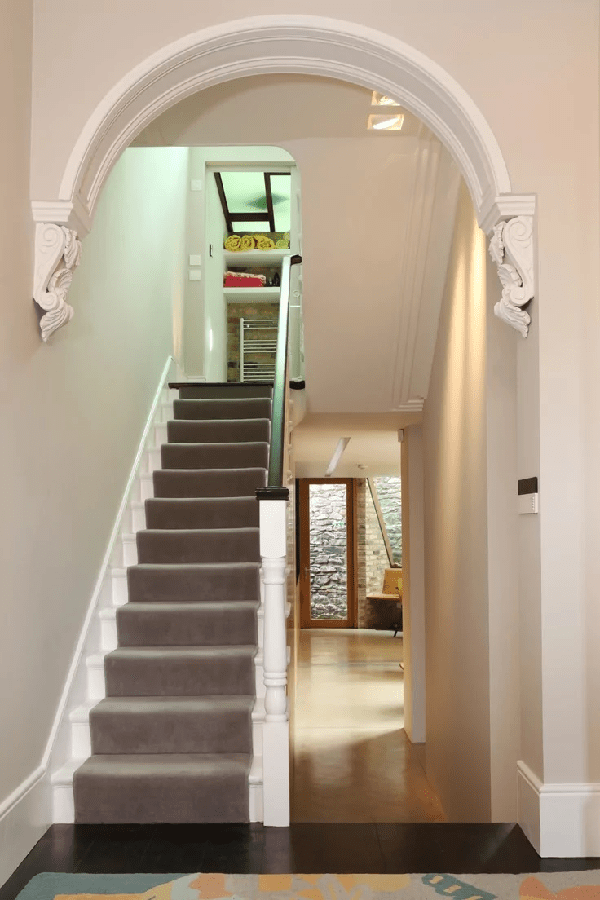
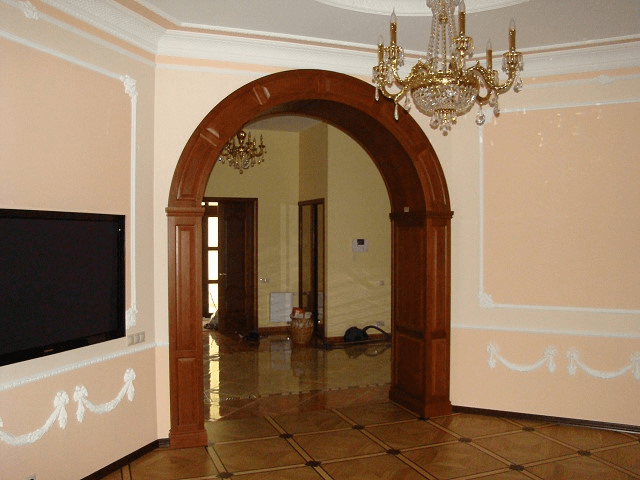
- semicircular or classic archways characterized by a perfectly even radial shape;
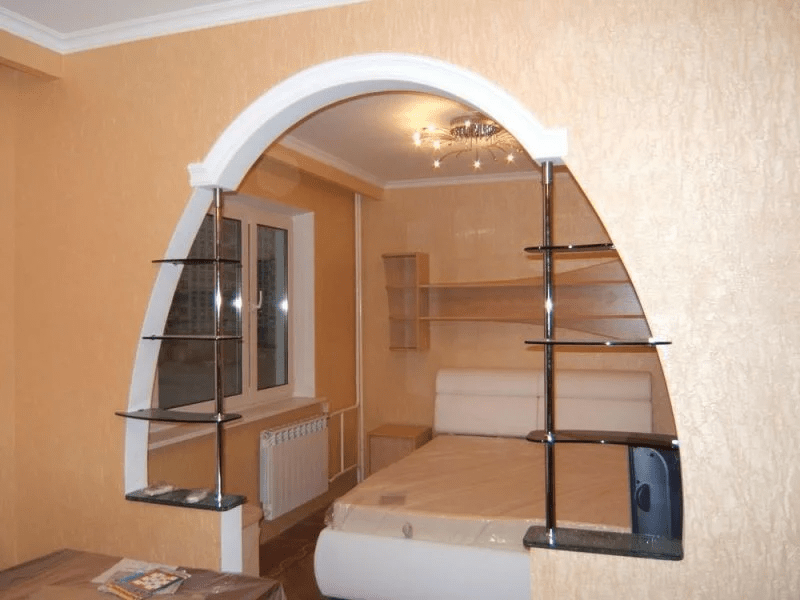
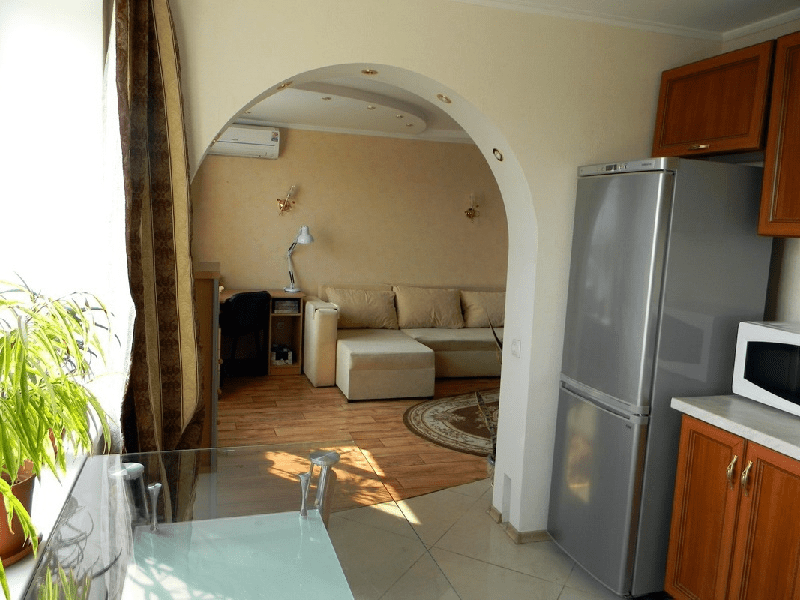
- Ellipsoidal archways , made in the form of a semicircular oval;
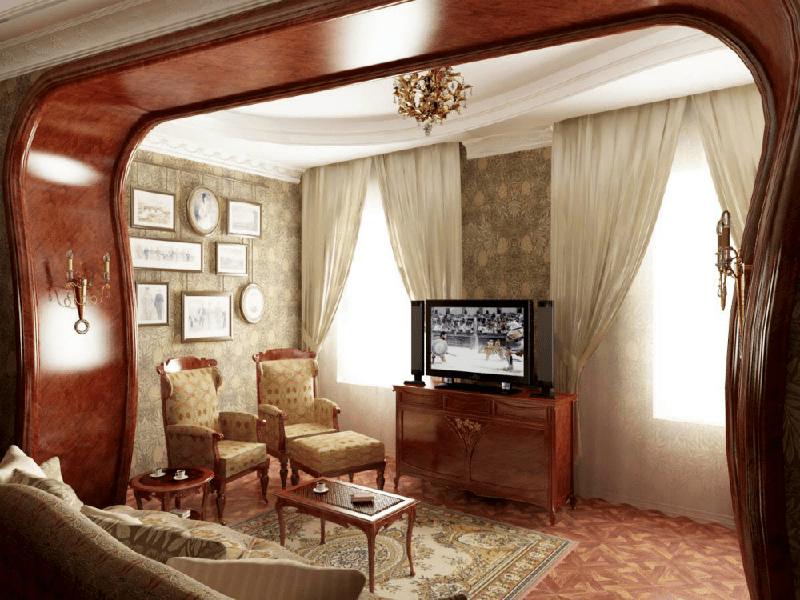
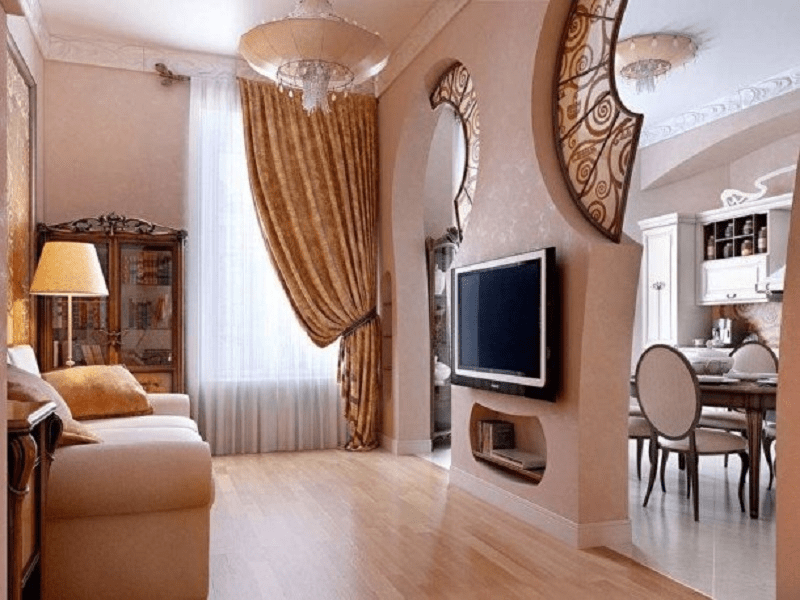
- Arched openings in Art Nouveau style characterized by intricate shapes and many decorative ledges;
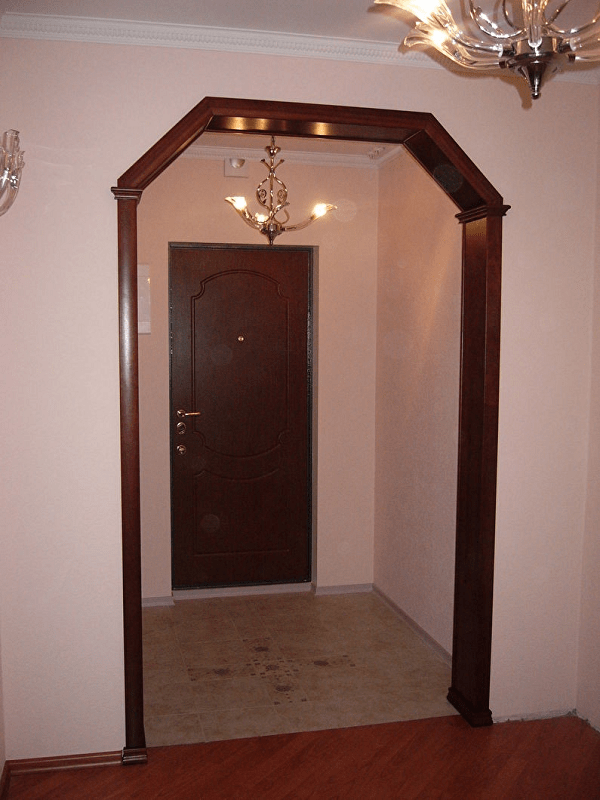
- Arched openings in the style of romanticism in shape most of all resemble a rectangle with rounded edges;

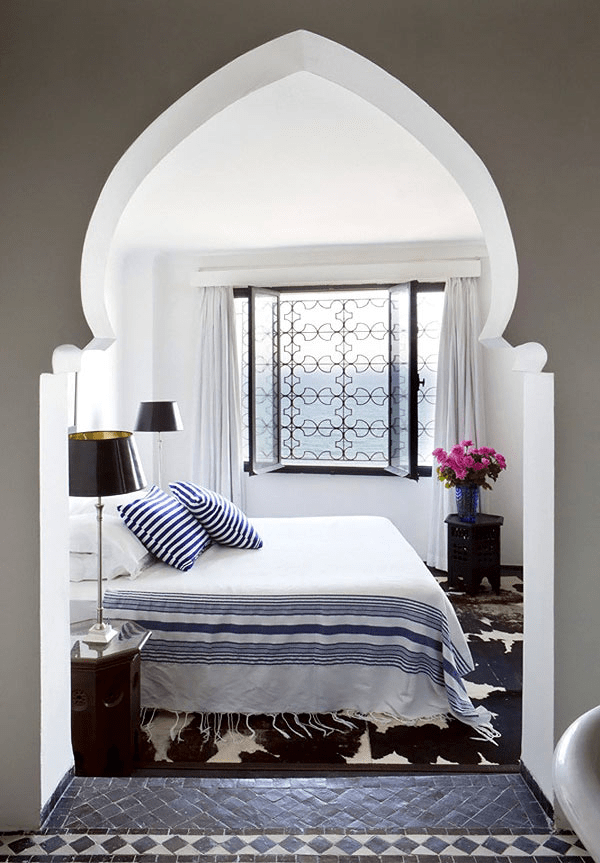
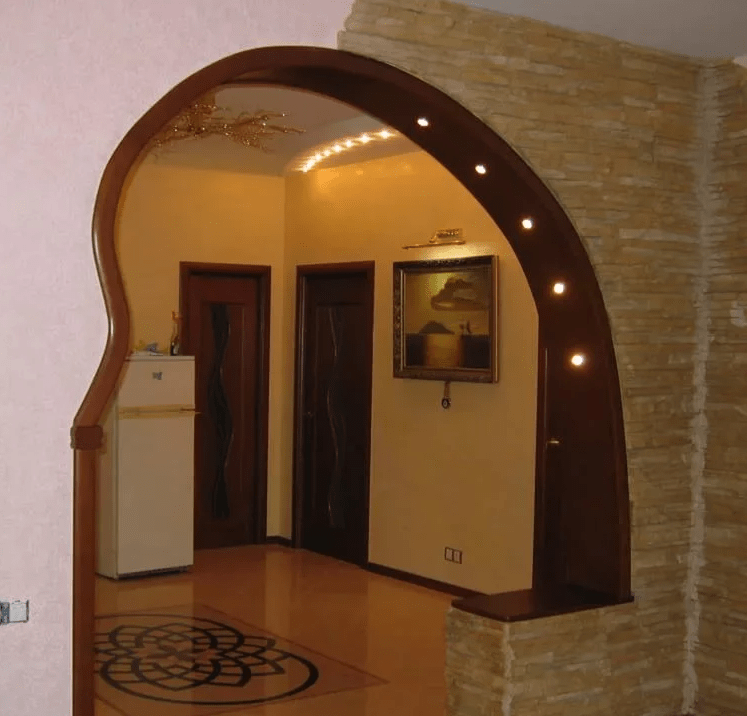
Horseshoe-shaped archways in most cases they have the shape of a horseshoe, however, they can be not only in the form of a smooth semicircle, but also a rounded figure, smoothly elongated upwards and somewhat pointed. The use of such arched openings is advisable in the case of interior design in national styles;
Gothic or the so-called lancet arches, characterized by an elongated pointed shape, devoid of smooth transitions.

Varieties of arched doors
Arched doors, like arched openings, are also classified according to many features, including the material of manufacture, the installation location, and design features. Let's consider these classifications in more detail.
Varieties of arched doors in accordance with the installation site are divided into two main categories:
- Arched interior doors located inside residential or public buildings. For their manufacture, wood is more often used, and they are characterized by the presence of glazing, for which stained glass compositions are often used;
- Entrance arched doors, which are installed at the entrance to shopping and entertainment centers, shops and other organizations. For their manufacture, a plastic profile is used.

Taking into account the design features, the complexity of installation and the cost of the finished product, the following types of arched structures are distinguished:
- Door leafs following the contour of the arched opening . Their production takes much longer than standard door leaves, and therefore, their cost is still quite high. Wood is used for their manufacture, since plastic arched structures are made using a different technology;
- Standard rectangular blades , over which is fixed arched part . Due to the fact that the arched part for such doors is mounted separately, they are much cheaper. By choosing door leafs of this type, you get the opportunity to use not only hinged, but also sliding structures;
Important! Due to the design features, the height of the opening for such canvases should be quite high, and is calculated by the formula: In pr. = 210 cm + ½ the width of the opening.

In addition, in accordance with the design features, the following types of arched doors are distinguished:
- Single leaf doors in most cases they are used as interior structures, as well as entrance doors for public buildings;
- Double doors , the use of which is most appropriate for wide doorways. At the same time, in most cases, one sash is fixed in the opening with the help of latches, and the second, the width of which is twice the fixed sash, remains operational.
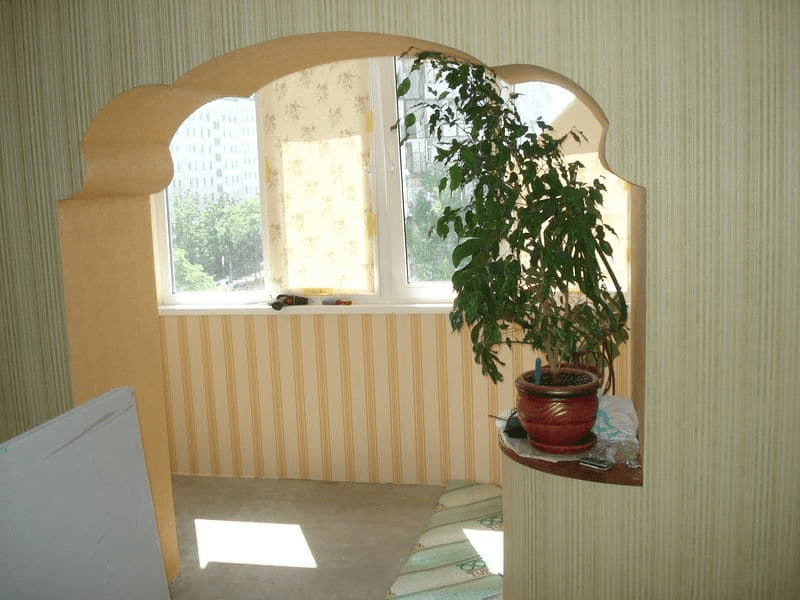
Arched doors photo


Materials for the manufacture of arched structures
Due to the fact that arched doors can be made from a large number of materials, lovers non-standard interiors they will always be able to choose an interior arched door that will correspond not only to their stylistic preferences, but also to the budget. Since the manufacture of arched interior doors takes more materials than for the manufacture of standard door structures, this cannot but affect the cost of door panels.
Chic, but one of the most expensive designs is arched doors made from solid oak.
This type of wood is characterized not only by external splendor, which cannot go unnoticed, but also by durable wear-resistant material. Due to the fact that arched doors made of solid oak are elite products, most often they are made only to order. On the one hand, thanks to this, you can show maximum imagination when choosing a decorative design for an arched structure, and on the other hand, this cannot but affect the cost.
Important! If you still prefer doors made of oak, you must be sure of the strength of the material used to mount the walls in which the arched opening is made, in some cases in need of reinforcement. In addition, it is important to carefully select door hinges, which should be characterized by high strength and wear resistance. As for the installation of arched oak doors, despite the fact that you have to overpay, it is better to entrust it to specialists. Otherwise, if you prefer self-installation, this can lead not only to inconvenience in subsequent operation, but also to damage to the door leaf.

No less elegant, however, are cheaper arched doors made of pine, beech or ash.
They are environmentally friendly, and in addition to aesthetic appearance, bring to the house a favorable atmosphere created by natural wood. decorative design similar structures are represented by figured carving or forging, and to give an even greater decorative effect, manufacturers decorate wooden arched structures with multi-colored stained glass inserts. When light hits them, the room is filled with multi-colored highlights, which creates a truly magical atmosphere.
Arched plastic doors aluminum profile
However, arched structures are made not only from natural wood. Recently, due to their low cost, arched structures made of plastic based on an aluminum profile are common. One of the main advantages of this design is lightness, which not only eliminates the need to strengthen doorways and use massive hinges, but also creates an atmosphere of airiness, making the room more spacious. Taking into account the fact that manufacturers have recently paid attention not only to functional, but also decorative characteristics plastic doors, paying attention not only to color, but also to texture, often giving them a resemblance to natural wood, stone or metal, it is not difficult to imagine how diverse such arched structures can be.

Styles to match arched doors
Due to the variety of stylistic incarnations, arched doors are rightfully considered a universal decorative tool, successfully used by designers in a variety of stylistic directions. Let's consider the main ones.
- Classic style. The specified interior concept can be successfully supplemented with arched structures, the distinctive feature of which is the conciseness of stylistic solutions. For their manufacture can be used solid wood, MDF or chipboard;
- East style with its luxury, exoticism and sophistication, it can be successfully emphasized by lancet arched structures made of dark woods;
- Shabby chic- an interior concept, the highlight of which is a barely noticeable touch of time, which is artificially created by designers, thanks to special decorative techniques. And in order to create a full-fledged atmosphere of comfort and peace, you can supplement the room with arched structures, stylized antique;
- Country- stylistic decision, which is most advantageously combined with horseshoe-shaped arched structures made of light woods and devoid of even the slightest hint of cladding and varnishing. The atmosphere of security and peace, characteristic of the country style, will be complemented by the heaviness and proud simplicity of door structures.

Installation of arched doors: preparation of materials and tools
Do-it-yourself door installation is an event that, one way or another, every master carried out. Despite the fact that the installation of arched doors is a more time-consuming task, if you follow the sequence of actions recommended by experts, you can install the arched structure yourself.
Important! To make your task easier, use the advice of experts who recommend making a custom-made door frame, entrusting this matter to specialists, and making the door leaf yourself. By following this advice, you will both make it easier for yourself and save a significant amount of money.
First of all, prepare all the necessary materials and tools. To properly install an arched door, you will need:
- Electric jigsaw equipped with wood files;
- Electric milling cutter with cutters of two types: cylindrical and disk (intended for grooves);
- Grinding machine with a sandpaper of various grain sizes. IN this case it is better to use tape;
- Boards, the thickness of which is 5 cm;
- Wooden wedges;
- Two small bars and 4 wood screws, the length of which should be 30 mm more than the thickness of the bars;
- Waterproof wood glue that can be replaced with PVA glue.

How to make a blank for the arched part of the door leaf?
In order to make the arched part of the door leaf, it is necessary to measure the final width of the opening. To do this, subtract the thickness of the boxed part and the thickness of the gap between the door and the opening, equal to 2 mm, from the width of the doorway.
To ensure the beauty of the arched structure, it is necessary to mount it so that its radius is equal to half the width of the doorway. Given the width of the prepared boards, you need to calculate their number. The arrangement of the boards is horizontal.
Important! For the manufacture of the arch, it is necessary to use carefully dried boards, otherwise, failure to comply with these requirements may lead to arch curvature.

Using an electric mill and a disk-groove cutter, it is necessary to make grooves that will ensure a tight connection of the structure. The grooves must be made in such a way that the protruding part is about half the thickness of the board, which is 2.5 mm. We do the same with the inner groove.
The surface of the grooves is cleaned of dust and carpentry glue is applied, after which the boards are connected and left to dry completely;
Important! To ensure stronger bonding, take a board and, using self-tapping screws, attach bars to it so that the distance between the bars is 10-20 mm wider than the glued workpiece. The workpiece must be placed between the bars and spread out with wedges.

How to cut a semicircle from a workpiece?
To do this, you can go two ways:
- If the arch has an even semicircular shape, the middle should be marked at the bottom of the workpiece. Then you need to take a pencil, tie a thread to it, the length of which is equal to the radius of the arch. One end of the thread is applied to the mark on the workpiece and a semicircle is drawn with a pencil;
- If the future arch is characterized by an elongated semicircular or pointed shape, it is necessary to use another method. To outline the boundaries of the bend contour, experts recommend using a long metal ruler. Similarly, make a mark of the middle, from where a vertical line is drawn to the length of the radius of the arch. Next, the ruler is turned over on edge, bending it so that one of its edges touches the radius mark, and the other coincides with the edge of the workpiece. Next, draw a line with a pencil. WITH opposite side act in a similar way.
Next, using a jigsaw, you need to cut the workpiece in accordance with the markup. Having done this, take grinder with the largest skin and treat the surface of the arched part door structure at both sides. Subsequently, using a finer abrasive, repeat the sanding.

Door leaf manufacturing
Important! To extend the life of the door leaf, it is necessary to provide for the presence of horizontally oriented boards in its lower part.
Upon completion of all work, a door leaf should be obtained, consisting of 3 parts:
- Horizontal cross member located at the bottom of the door leaf;
- Door shield made of vertically arranged boards;
- Upper arched part.
Having made the three main parts, connect them using the tenon method. To do this, you will need a milling cutter with which you can carry out all the necessary operations, and then put them on glue. Don't forget to support the canvas with wedges.

Finally, process the finished canvas protective agent and topcoat. If the door is located on sunny side, experts do not recommend finishing it with a laminated coating, replacing it with a traditional colorless varnish for outdoor use.
The topic of this article is the manufacture of arched doors, their installation and the subtleties of these processes. We will talk about the types of doors with arches, note their varieties and features of each type. We will also provide advice on self-manufacturing front door in the form of an arch made of solid wood.
To date, arched openings various forms and styles are used in the construction and decoration of most premises. They are used as entrance and interior doors.
Types of arched openings
From the whole variety of doorways in the form of arches, the following classification can be made:
- semicircular arches. They are the most common and are also divided into subspecies:
- Classic (semicircular) - they have an even radial shape.
- Ellipsoidal - performed in the form of an elongated oval.
- Modern - have intricate shapes with various protrusions.
- Romantic - in shape they are more like a rectangle, in which the upper edges are slightly rounded.
- Horseshoe arches. They are horseshoe shaped. They can have not only a smooth semicircle, but also an elongated pointed top. Most often, openings of this type are used to decorate rooms in national styles.
- Gothic (lancet) arches. These structures have an elongated pointed shape, without smooth transitions.
What are arched doors
Arched doors have many varieties and are classified according to various factors: installation site, material of manufacture, design features
Types of arched doors at the installation site
There are two main categories here:
- Interroom doors arched - are located inside residential and other types of premises. Most often they are made of wood and have glazing. Stained glass compositions are often used for glazing such structures.
- Entrance doors in the form of arches - are used mainly in entrance groups ah establishments: shops, organizations, shopping and entertainment centers. Made from plastic profile.
What are arched doors made of?
In view of the complexity of manufacturing this type of door leaf, the variety of material for their production is not very plentiful:
- Plastic. This material serves for the production of a profile from which not only entrance doors are made, but also windows.
- An array of wood. Wooden door leafs in the form of arches are used for entrance groups in the private sector, as well as inside any type of premises.
Structural features of arched doors
Based on the characteristics of operation, the complexity of installation and the cost of the finished product, the following arched door structures can be distinguished:
- Cloths that repeat one to one the contours of the opening. A feature of such doors is that their production takes a lot of time. They stand high enough. Such models are made of wood, as arched plastic doors made with a different technology.
- Standard canvases with an arched part fixed above them. Such doors are somewhat cheaper, since the arcuate part of them is mounted separately and does not open together with the leaf. It also becomes possible to use not only hinged, but also sliding options for canvases.
Important! The height of the opening for such doors should be large enough. It is calculated by the formula: Vpr \u003d 210 cm + half the width of the opening.
- Single leaf doors. They are usually used as interroom, as well as input options for private houses and public buildings.
- Double doors. For wide openings, it is advisable to use two doors. One of them can be fixed in the opening with a latch. Actual for entrance groups. In this case, more often the “working” part of the door is 2 times wider than the fixed one.
We make an arched door ourselves
Despite the complexity of manufacturing such canvases, it is possible to do this. Now you will see for yourself. We will learn how to make wooden arched entrance doors.
It is better to order the box part according to your size, and we will make the canvas with our own hands.
We prepare everything you need

First you need to prepare a tool, boards and improvised materials. We will need:
- Electric jigsaw with wood saws.
- Electric milling cutter with two types of cutters: disk (for grooves) and cylindrical.
- Sander with sandpaper of different grain sizes. Best of all - tape.
- Boards, 5 centimeters thick.
- Wedges made of wood.
- Two small bars and 4 wood screws. The length of the screws should be 30mm more than the thickness of the bars.
- Joiner's waterproof glue. Possibly PVA.
We make a blank for the arched part of the canvas
To make the arched part of the door leaf, we first need to measure the final width of the opening. That is, from the total width we subtract the thickness of the “box” part and the gap of 2 mm between the door and the opening (box).
After that, we perform the following work:

Important! Before you make an arched door, you need to choose well-dried boards. Since if they are raw, then the canvas will warp over time.
- Now, using an electric mill, we make grooves for a tighter connection. To do this, we take a disk-groove cutter. We make grooves in such a way that the protruding part is about half the thickness of the board. That is - 2.5 millimeters. Likewise with the internal groove.
- Next, we clean the entire surface of the grooves from dust and apply carpentry glue to them. After that, we connect all the boards and leave them to dry.
Important! In order for gluing to happen better, you need to take a board and attach pre-prepared bars to it with screws. The distance between the bars should be 10–20 mm greater than the width of the glued workpiece. Place the workpiece between the bars and open it with wedges.
Cut out a semicircle

For this operation, we recall the experience of installing plasterboard arches. We use one of two options to outline the arched shape:
- If the arch has an even semicircle. We mark the middle of the blank at the bottom. Then we take a pencil and tie a non-sticky thread to it. Cut the thread exactly to the length of the radius of the arch. We attach one end of the thread to the mark and draw a semicircle with a pencil.
- If the shape of the arch (as in the photo) has an elongated semicircular or pointed shape, then we use a different method. It is very convenient to use a long metal ruler to delineate the boundaries of the bend contour. We also make a mark of the middle and draw a line from it strictly vertically to the length of the radius of the arch. Next, we put the ruler on the edge and bend it so that with one edge it touches the radius mark, and the other coincides with the edge of the workpiece. After that, draw a line with a pencil. On the other side, we do the same steps.
Important! Make sure that you get a symmetrical shape of the arched cutout.

Next, take a jigsaw and carefully cut the workpiece according to the markup. After that, we take a grinder with the largest sandpaper and process the surface of our arched part of the door on both sides. After that, we repeat the grinding with a finer abrasive.
Now the most beautiful part of our door is ready. Arched-type interior doors can be decorated with the same elements. However, it is worth considering that glazed arches will be more elegant for interior spaces. And their manufacture requires carpentry skills.
Finishing the door panel
Now we have to make the rest of the door. It will be assembled according to the same principle as the previous part. The only difference will be that the boards will not be located horizontally, but vertically.

You should also provide a horizontal part at the very bottom of the canvas. This will help extend the life of the door.
As a result, our door leaf will consist of 3 parts:
- Horizontal bottom bar.
- Shield from vertical boards.
- Upper crossbar. She is the arched part.
After all 3 parts of the door are ready, we connect them using the spike method. To do this, we perform the appropriate operations with a milling cutter and put all 3 parts on glue. Do not forget to support the canvas with wedges.
The final stage is the treatment of the entire surface of the door with a protective agent and a finishing coating. For this, "Pinotex" or any other protection for the tree is suitable.
If the door is constantly on the sunny side, then it is not recommended to cover it with laminating coatings. In this case, it is better to use an ordinary colorless varnish for outdoor use.
 Such a door as in the photo is great for its installation in basements and basements. It is beautiful and adds variety to the appearance of the cottage. This door was also originally conceived for its installation in the basement of a house built on a hill. In combination with the “savage” stone facing, it looks very aesthetically pleasing.
For such a door, it is necessary to provide in advance dome-arched doorways so that it can be installed with the least effort and nerves. If the house is being built with your own hands, then this is not difficult to do, as well as to foresee the installation of semicircular, arched door jambs in the openings.
The prehistory of the appearance of this door is simple, and most home craftsmen and just homeowners have probably come across it - only in very rare workshops you can order semicircular, arched structures - be it doors or windows, etc.
So in our case - doors non-standard shape we could not order near the dacha, and because of this we did not want to go to the city. The plastic door in no way fit into the design of the house in which the plinth is lined with wild stone. So I had to make a door with my own hands.
As in any business, at first "everything was measured seven times." Then we faced the question of the materials from which we will make the door. At first they decided to make from a floorboard (groove). But its thickness of 3.5 centimeters did not suit us - the jambs for the door were originally made much more massive - 4.5 centimeters. Especially after trimming final finishing and sanding the floorboard door would have made it even thinner.
After thinking about it and examining the remnants of the material (remaining after the main construction of the house), they began to make a door from 50 mm edged board. Boards for a long time were kept heated on time and therefore managed to dry perfectly and were ideal for making doors (they were already used to make doors in the same year).
To begin with, we installed cross-beams on the shield-blank of the future door, with their help it was easier to keep the vertical boards of the main door leaf from warping and deformation.
In the upper half, the cross-beam was immediately made in the form of an arched arc, and at the bottom they simply let the board.
Then they chose better boards and cut them with an electric planer, after which they carefully polished them from all sides.
The main door leaf was made as follows: they assembled the shield by gluing the selected boards with waterproof PVA glue. The shield was pulled together with wedges (pictured), having previously made sure once again that the boards fit tightly together - after all, the door is street, external. After all these procedures, the entire structure with wedges was left to dry.
At this time, while the shield was drying, they began to make cross-beams.
After the PVA dried, the spacer wedges were removed and everything was sanded well again, removing glue streaks and attaching the crossbar blank to the already finished door shield to make sure that there were no plane distortions, deformations, etc.
After that, we switched to milling grooves and studs at the joints - such a mortise and stud door design is always more durable, especially in our case, when the door is outside.
In order to make grooves and spikes on the door, cutters were used: disk-groove and cylindrical.
They took measurements from the door jamb and prepared the door dome according to the template by sawing it out.
The door leaf was previously glued once again after airing the future doors for tightness and flatness.
Small gaps between the joints of the boards of the door leaf were sealed with a mixture of fine wood dust remaining under the workbench after grinding the plane and the same PVA.
We started installing the door, as it fit snugly into the opening - between the jamb and the door, the distance was even along the entire perimeter and was 2 millimeters recommended in these cases. During installation, plastic two-millimeter adjusting pads were used.
The hinges for the arched door were black. Despite its decorative effect, the hinges are quite strong - the door is still made of fairly heavy boards.
Installed door lock, after which the door was painted with “tikkurilla” under oak and varnished.
That's all - now the entrance to the house through the basement is securely closed, albeit with a home-made but strong and beautiful door.
Do-it-yourself arched door - step by step instructions for the photo
1. The boards intended for the door leaf were glued into a shield and pulled together with wedges while the glue was drying.
2. Ready shield carefully ground, achieving good flatness, successively changing sandpaper from coarse grained to fine grained.
3. Before milling the grooves on the edges, the crossbars were adjusted in thickness to the shield.
4. The crossbars were fixed to the shield using spiked joints and waterproof PVA glue.
5. The door leaf is almost ready.
6. It remains only to fit it in place and finally polish it, and a mortise lock on the front door will not hurt. The massive door was hung on decorative but strong enough hinges.
 100 pcs assorted auto fasteners Car Bumper Clips Snap Fastener Rivets...
49.92 rub.
Free shipping★★ ★★ ★★ ★★ ★★ (4.60) | Orders (946)
Most interior designers consider interior arches to be a well-established classic of the genre, the arched vaults of doorways have long and seriously pressed the slightly angular rectangle of a classic door. Passages and openings between rooms remain a kind of bridges, uniting islands of living quarters, different in meaning and content, with no less important cuisine, bathroom and toilet. If possible, why not make interior openings no less beautiful and comfortable.
How practical are interior arches
Often, everyone who wants to build interior arches has a doubt about how practical and convenient such designs are in everyday use. The idea of building arcuate arched openings has existed for several hundred years, back in the 50s of the last century, many interior and corridor openings with arches of various configurations were built, until the fashion for savings and a utilitarian approach to interior design finally buried a wonderful idea.
The manufacture of interior arches will require certain financial and time costs in connection with the alteration of part of the doorway. But most often, the owners decide to remake, since the end result fully justifies the costs:
The appearance is significantly improved, even the simplest interior arch looks much more attractive and interesting than the official version of a rectangular door hatch;
The space of an apartment or house visually becomes more spacious, even in small apartments with miniature kitchens and tiny corridors, the room becomes brighter;
An order of magnitude improves heat transfer and air movement between rooms. Fresh air does not seep through ventilation ducts, moves without interference and restrictions along the shortest path.
In most cases, the owners decide to change the shape and size of the interior opening, the equipment of the arch above the doorway in order to improve the appearance inner space living rooms. Only a few years later it is discovered that the installation of an arch and the modification of an interior opening can improve the conditions for distributing heat throughout the house in winter and coolness in summer heat. And most importantly - without laying additional complex system pipes.
Types of arches
One of the most valuable qualities of the interior arch is the good adaptability of the updated doorway to any interior of rooms and corridors. Door arches are made in the form of steel profile frames and wooden slats, bricks and gypsum blocks. For external finishing of the surface of the walls and ceiling adjacent to the arch and the box of the interior opening, plasterboard sheets, panels, mounting foam, plywood and fiberboard sheets are used.
For doorways and interior passages standard width, up to 90 cm inclusive, an arch with a support frame can be bought in a specialized salon. Such standard arched vaults are most often cast from polypropylene or hand-assembled from wooden blanks.
round arches
Most often, the arched vault above the interior doorway is associated with the classic round arch, the most common in the architecture of stone buildings and structures. It is the round arch that is most often chosen for the doorway.
Artists-designers and interior designers of residential premises use about a dozen basic configurations of round interior arches with supports on the frame of the doorway.

To get the perfect arc of the interior arch, the galvanized profile is divided into sectors, the side shelf is cut and the metal bar is bent according to a pre-planned pattern.
For your information! The round arch is very popular, primarily because of the simple installation technology.

IN classic version a round interior arch is made in the form of a sector in ¾ of a circle or ½ of a circle, often the shape and curvature of its arc can be supplemented with side elements of arbitrary shape and configuration, but always symmetrical.
If it is necessary to add oriental motifs to the design of the interior arch, then the profile of the arched ceiling of the span is made in the form of two intersecting arcs. In this design, the interior arch acquires an almond-shaped profile.
Interior arch may be combined with supporting columns, most often with elements of stucco or imitation of the style of the Victorian era.
If necessary, for example, if the size of the doorway is relatively small, the arch can be decorated without any columns and unnecessary decor. It is enough to emphasize the line of the arched arc and close the transition plane to the walls with decorative overlays.
In the event that the dimensions of the corridor allow, the design of the interior doorway can be arranged in the form of one round arch. Instead of a standard rectangular door frame, only a small rounded outline remains, marking the border between the kitchen, living rooms and corridor.
Round arches are used in cases where the apartment or living space of a private house is built in the form of several small rooms. Full-sized rounded arches very successfully visually combine the rooms into one studio apartment. In order to keep a private character behind the bedroom, kitchen or personal office, the interior opening with an arch is closed with double doors or a light sliding canvas.
Enough interesting solution shown in the photo below.

In one design of the interior opening, a round or annular arch and a rectangular box are used. A stylish doorway makes it possible to add a few very the right details and open an adjacent room or corridor to light and air.
If the ceiling height is more than 2.5 m, and the dimensions of the interior passage are more than two meters, you can use the widespread technique of dividing the space into several sectors.
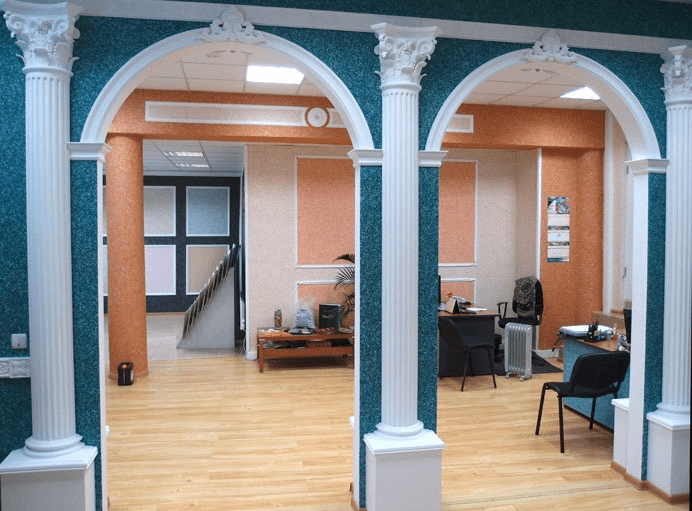
In this case, the design of the interior opening in the form of two small-sized arches of a classical shape with an intermediate column provides the best quality of ventilation and light filling.
For low ceilings, a round arch is broken into several elements or replaced with a rectangular doorway.
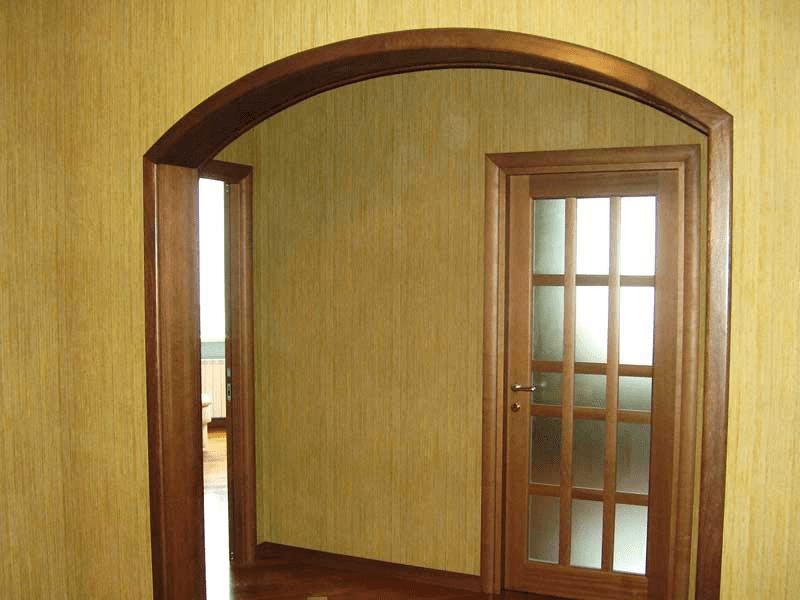
Rectangular arches
Arched structures of a rectangular or square shape in their characteristics and functions are no different from the classic round arch. A rectangular shape is resorted to if the interior of the apartment contains a significant number of objects and details with straight lines.
In the vast majority of cases, a rectangular shape for an interior arch is chosen in a situation where precious woods, plastic and a monotonous rectilinear design are actively used in interior decoration.

For example, an interior doorway between the corridor and the living room can be designed in the form of wooden panels assembled into one arched structure. On the one hand, there is enough air and light, on the other hand, the boundary between two rooms that are completely different in meaning and functions is clearly marked.

arches rectangular shape easier and more technologically advanced to manufacture, installation does not require the use of special marking devices, as in the case of building semicircular and round arched structures.
Ellipse arches
It is not always possible to build a doorway with an arch in the form of an ideal semicircle or circle segment. There are certain restrictions on the distance from the ceiling to the top point of the arched arc; for the premises of the apartment, this distance should be at least 40 cm.
In such cases, the arch arch is made in the form of a horizontal semi-ellipse. The excess of the arched arc turns out to be less, and the entire design of the fashionable interior opening fits freely in the dimensions of the rooms and the height of the ceilings of a standard-plan apartment.
According to the scheme with a horizontal ellipse, you can build a fairly wide passage between adjoining rooms according to the scheme shown in the photo.
The ellipse is ideal as a profile for building an interior passage. For example, you can form an opening in the form of a vertical ellipse with truncated edges.

The passage itself turns out to be wide enough to use it, but due to the narrowing of the sidewalls to the top and bottom, the section is smaller than that of a standard rectangular profile or arch of a classical shape. Therefore, in order to increase the amount of air and light through the interior opening, the passage contour is supplemented with side windows.
Trapezoidal arches
The device of the arch in the form of a trapezoid can be considered a natural continuation of the rectangular scheme. Traditionally, door and interior openings with a trapezoidal top are used in attic rooms, especially if the ceiling of the room is made with side bevels.
The shape of the trapezoid provides increased stability of the upper transverse beam of the opening, so such structures are widely used in houses made of timber and logs.
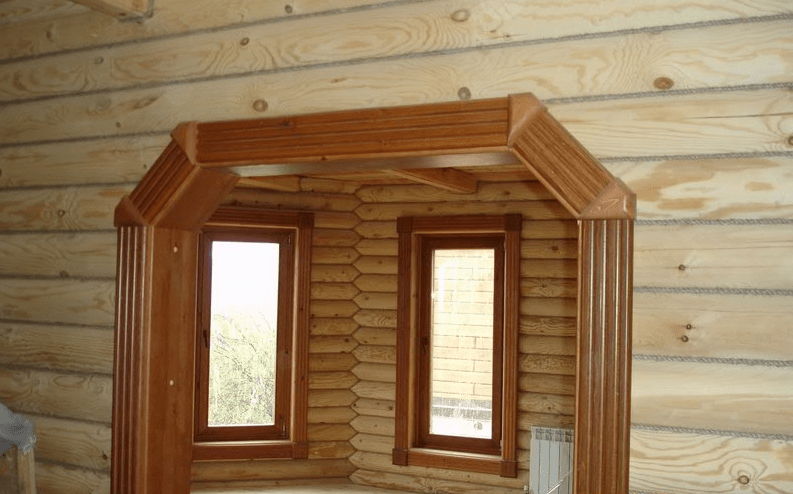
The decorative qualities of the trapezoid are lower than those of interior openings with an arch in the form of an ellipse or a rectangle. However, there is a demand for a trapezoid arch passage, especially in panel projects for suburban and country houses. In any case, an interior doorway with a trapezoid-shaped arch looks much more interesting than a boring rectangular design.
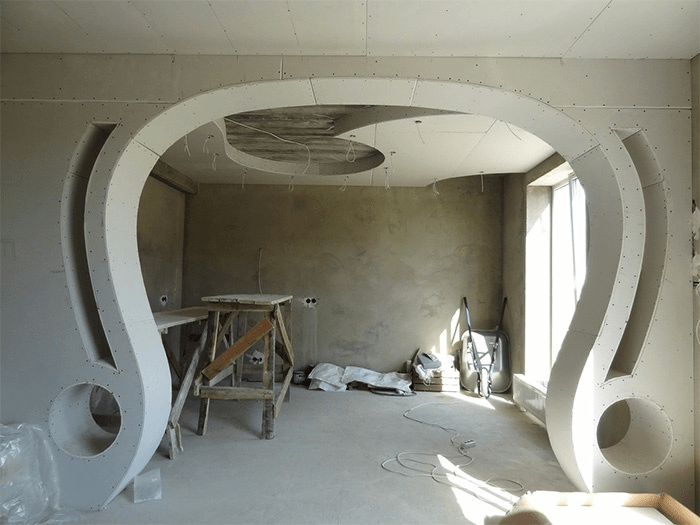
curly arches
The manufacture of an arched vault of complex shape is in a good way show the talents of an interior designer, imagination and fiction. by the most in a simple way to build an original arch of a non-standard shape, it remains to attach several curved lines and surfaces to the classic arched arch.
For example, if you add a couple of side arches to a simple symmetrical arch, you can get a fairly expressive line of the arched vault for an interior wall.
A small addition to the standard arc or semi-ellipse of several asymmetric elements turns the arch into a stylish interior opening.
Figured arches, as a rule, are made according to complex curvilinear patterns, for example:


The process of designing and manufacturing a figured interior arch is quite complicated for an amateur level, so even the simplest multi-level openings, as a rule, require the knowledge and skills of a professional artist-designer.

Drywall interior arches
In the process of planning a curly arch, you always have to look for suitable way assemblies and material from which it is easiest to assemble a rather complex arched structure.
Most of the home arched interior openings are built of wood and drywall. Sheets of pressed gypsum are perfectly processed, cut, drilled, painted and puttied.
The basis of the plasterboard arch is assembled in the form of a galvanized profile frame. A strong corner and a U-shaped profile made of thin sheet metal can be used as a supporting element of a strong frame or bent into an arc of any curvature.
The manufacturing process of the interior arch is as follows:
- The frame is assembled with rivets and attached to the walls and ceiling of the interior opening;
- The base is sewn up with sheets of drywall;
- Seams and cracks are rubbed with gypsum putty;
- Curved surfaces are sanded, painted and finished.
The arched interior opening turns out to be light, durable and of arbitrarily complex construction and design.

Interior arches made of wood
Arched interior openings made of wood and its imitations firmly occupy the second place in popularity of the design. It is very difficult to technologically bend a beam and a lath of precious wood with the desired radius, therefore almost all interior arched openings made of wood are built in a rectangular shape.
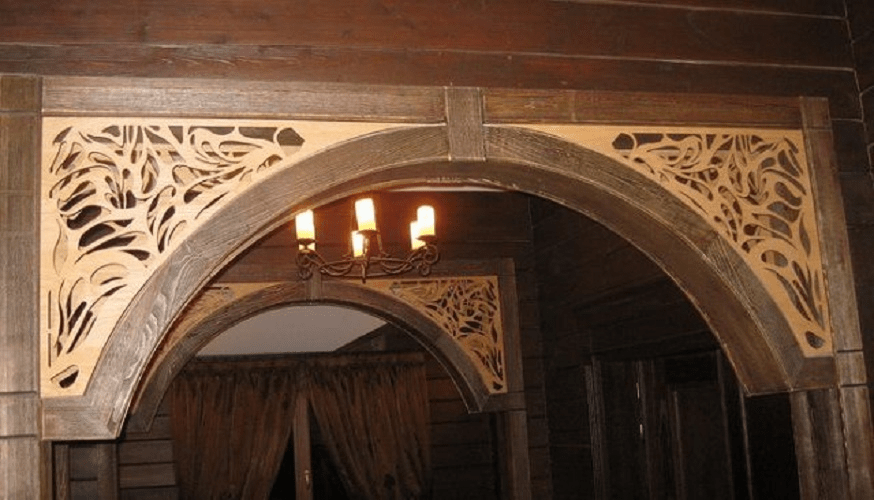
The exception is wooden arches. self made, very beautiful, with carvings and elements of furniture decor. Often, the arc is cut from a solid array of wood and veneered with fine wood veneer.

For your information! A handmade arch is easy to distinguish by surface microdefects and a characteristic veneer texture, while cheap interior arches made of polypropylene look perfectly smooth and one-color.
Arches
Depending on the materials used to build the frame of the interior opening, choose the most suitable type finishing. Drywall constructions must be primed and puttied, after which the surface of the arch can be pasted over with PVC film with a texture like wood, red brick or natural stone.

An easier way to finish involved the use decorative plaster or wall graphics. Corner joints of interior arches can be pasted over with polyurethane tiles under an artificial stone.
Wooden arches are finished using furniture technology:
- The surface of the wood is primed, tinted and varnished;
- The final coating is applied to match the colors of the walls and ceiling of the rooms adjacent to the interior opening;
- Veneered surfaces of doorways with arches are always varnished with subsequent polishing of the decorative layer of wood.
If finishing operations are performed in accordance with polishing standards, decorative layer wood can last at least 20 years, while drywall finishing will last a maximum of 10-15 years.
Illuminated arch
Installing flashlights and backlighting remains one of the most popular ways to amplify decorative effect from the arch.
Lanterns can be installed along the contour of the arch, or placed at the top of the arched arc and covered with translucent polycarbonate.
Instead of spotlights can be used led strip, monochrome or color.
Interior of interior arches
The most difficult stage in planning an interior arch is the development general style, because the doorway must correspond to at least two rooms at the same time. For example, the passage from the living room to the kitchen is best done in light colors. White color, cream and beige shades are considered universal, able to be combined with almost any style of the interior of the hall and kitchen.
Arch in the living room
All other interior arches leading from the living room to other rooms are designed in the style of the interior of the main space of the apartment.

Before planning the shape and dimensions of the arched structure, you will need to take into account the color and texture of the furniture in the living room, the pattern of the flooring.

The concept of designing an arch in the living room is extremely simple - interior openings should visually expand the size of the room, even if this requires removing half of the internal adjacent wall.
Arch in the hallway and corridor
A similar technique is used when planning arched openings in the hallway. The corridor room experiences the greatest load from dust and dirt brought into the apartment from the street or entrance.

Therefore, the entrance part of the apartment is planned in more muted colors, respectively, arched structures are made with minimal space absorption.

An exception may be interiors with extensive use of wood paneling, parquet and fine wood finishes. In this case, a massive interior arch, decorated in mahogany, can serve as a kind of bridge from a more utilitarian and stuffed hallway to the central part of an apartment or house.
Arch to the kitchen instead of a door
To date, interior openings between the kitchen and the living room firmly occupy the first place in the list of the most popular solutions for redevelopment of old apartments. It so happened that in the vast majority of apartments of the old building, the hall is connected to the kitchen by a long and narrow corridor.
It is very inconvenient, so the hall is connected to the kitchen by a wide and spacious opening with a round arch. IN budget option interior arch can be made from drywall sheets with decorative plaster finish.
A more complex and at the same time non-standard option for arranging an interior opening is shown in the photo below.
Instead of one passage in the adjacent wall, two symmetrical figured passages with round arches and an asymmetric shape of the opening were built. High ceilings allow you to make the arched part with a certain degree of broadening. As a result, the central part of the wall remains used for the installation of a TV and furniture, while the side sectors are “donated” for arranging the arch.
Arch in the children's room
In apartments with a small living area, with the help of an interior arch, the problem of dividing and delimiting space into the territory of adults and children is solved.

If the room is allocated for several children, then with the help of the arch it is possible to resolve most of the disputes related to the division of the territory. For arranging a doorway, arched structures are used quite rarely.
Arch in the bedroom
For the rest room and bedroom, the color of the walls, the shape and style of the arch are chosen in strict adherence to the interior decoration and interior of the room.

As a rule, double doors with an arched vault or small-sized interior arches with a monotonous decoration of the walls and the ceiling space are used for the bedroom.
Conclusion
Arched structures have long won the hearts of apartment and house owners seeking to improve and improve the layout and interior of their home. The interior arch remains one of the most affordable, simple and at the same time very effective ways make the interior of the rooms brighter and fresher. Moreover, the manufacturing process is not so complicated and intricate, and most of the work can be done with minimal cost. Only a small skill of an artist-designer is required, the rest must be entrusted to design professionals.
I don't think it makes sense to build carpenter's workbench for the manufacture of 2-3 doors. Therefore, we will make a wyma from four boards intersected at an angle of 90 °. Wooden lugs are sewn onto the ends of the boards. The door frame is wedged to them. The wedges provide sufficient clamping force when gluing.
We will make the preparation, marking, trimming of bars for doors on the same door that was used for glazing.
Standard dimensions of a box bar: 80 mm - width, 50-40 mm - thickness. It is necessary to prepare bars of the required length, and the transverse dimensions of the bar should be slightly larger than necessary. Having cut off the bars, you will achieve right size. Now you need to remove a quarter from the bar to provide a door porch.
A quarter of even bars is removed using a hand saw (Fig. 32).

First, a quarter is marked with a pencil. Then adjust the saw to the desired depth of cut and cut along the lines, not reaching it 1-2 mm with inside.
After making both cuts, a quarter is removed. And the resulting groove is planed with a zenzubel planer to the line.
At worst, a quarter can be completely cut with a piece of iron taken out of a planer, or simply with an ax. The ax is a universal tool. You just need to know how to use it, as our ancestors knew how.
Well, everything is clear with straight bars, but what about the arched part? The arch is made of two or three elements, depending on the curvature. The easiest way to cook it is this: on any flat sheet(chipboard, fiberboard, plywood) draw the required curve. Then, along this curve, lay out three bars (or two) with an overlap of 4-5 cm each (per spike). And repeat the curve already along the bars. And now process with an ax and jointer. A quarter is chosen with a chisel.
All connections in the box are made on a simple single spike (Fig. 33).

When cutting a spiked joint, you need to remember that the hacksaw also has its own thickness. If you cut exactly along the line, the connection will turn out with a gap. Therefore, when making a spike, you need to cut along the dashes from the outside. And when cutting a groove for a spike - along the dashes on the inside. The sawn groove is chosen with a chisel.
When making a spike, do not chip off excess wood. Only a very experienced carpenter can chip, who sees in the direction of the wood fibers how the chip will occur.
mark up tenon connection you need with the help of a meter and a square. A spiked joint is assembled by lightly tapping with a mallet on wood glue. Then a hole is drilled and a wooden dowel is also hammered in with glue. When making a box made of soft wood (spruce, pine), the dowel must be made of hard wood (birch, oak, etc.). And vice versa.
Joiner's glue is prepared as follows: glue tiles are poured cold water(so that the water covers the glue) and left to soak for a day. Then the glue is boiled in a water bath. On an open fire it is impossible - it burns.
If it is difficult to draw a curve - put a sheet of cardboard or fiberboard to the finished opening (for which you are preparing the door) and draw on it.
When the box is ready, you need to place it in the rim, measure the diagonals (and, if necessary, correct) and wedge.
For interior doors, the lower bar is not placed. In this case, the frame from top to bottom is simply temporarily stitched with anything.
Now let's prepare the canvas. It is easier to make it the way it is done at woodworking plants. We prepare the second exactly the same frame only without quarters and smaller in size. Such that it enters the box with a gap of 2 mm. The gap is needed XI so that the door does not catch on the box when opening. On this frame we make two shields from fiberboard or thin plywood and stick it on the frame on both sides. The middle can be filled with anything: rolled up newspapers, cardboard or wooden blocks of the required thickness. You can place the bars as you like: along, across, at least obliquely. If a lock crashes into the door, then one of the extreme bars of the frame must be of the appropriate width. You also need to put a bar in the place of the future fastening of the door handle.
At woodworking factories, the door leaf after sticking the fiberboard is placed under a press. At home, the press can be replaced with clamps (Fig. 34) or simply, in addition to gluing, nail the sheets to the frame with nails. Drown the hats, and subsequently putty. The thickness of 3 mm plywood is enough to slightly drown the nail.

If you want, you can imitate a paneled door by sewing or sticking on the appropriate strips, or create your own unique pattern.
What is good about a smooth door? It can be painted. There was a girl who studied with me at the institute. She painted all the doors in the apartment with biblical themes. And how well she did it. You can't draw? I will help you. Take the picture you like (preferably not very complicated), draw a grid on it with a pencil and a ruler, for example, with 1x1 cm cells. Now the same grid, but on a scale (for example, 1:10, i.e. a grid of 10x10 cm), on the door or wherever you want. And gradually transfer the drawing square by square. First in pencil, then, erasing the excess, in paint.
If you decide to draw, then try to maintain the style. So that some original witch of your choice is combined with the rest of the interior.
When used as plywood sheathing, the frame of the door leaf does not have to be knitted into a spike, it can be in half a tree. Plywood is a pretty tough material.


