Finishing MDF is an easy way to transform a room at minimal cost. Wall cladding with MDF panels - a new word in wall decoration Wall cladding with MDF panels installation technology
It is more common to hear about such material as MDF in the furniture industry. Now you can often find this material in construction, and as a decoration. If the issue of finishing remains unresolved, MDF wall panels should be taken into consideration.

Peculiarities
MDF (fine fraction) is made from the smallest wood particles, which are formed into a board by pressing. The strength of such a connection is provided by lignin, which is released from the wood fibers as a result of high-temperature heating.

These wall panels have valuable features that make them so popular.
- Safety. Since the particles that make up the panel are derived from wood, and toxic chemicals are not used to bond them, such material does not pose a threat to human health.
- Practicality. If all the rules of operation are observed, the panels serve for a very long time. They perform a protective function, and also improve sound insulation.
- Aesthetics. Different variants decor can be chosen in accordance with the design of the room.
- Ease of installation and maintenance. Installation does not require a radical change in the walls and is quite fast.
- Environmental friendliness. Do not require special procedures for disposal, biodegradable.


- Profitability. More affordable compared to solid wood products. Do not require costs throughout the entire service life.
- Masking construction defects of walls, wires and pipes.
- Variability. A wide range of models will allow you to find suitable option depending on preferences, purpose and budget.


However, if a frame is used as a base, the area of \u200b\u200bthe room decreases. Water, and sometimes even high humidity, can delaminate the internal structure of the plate. A blow to such a surface can cause serious damage up to the appearance of a dent or destruction. Of course, such a mechanical effect on the walls is a rarity, but in order to hang a shelf or cabinet on it, you will need to purchase special fasteners.
Therefore, it is so important to weigh all the pros and cons well before choosing, to foresee the problem situations that you will have to face.

Panel types
The main difference between the panels can be the features of their manufacture. They can be divided into several types.
Ordinary (they are also called all-pressed) - are sheets of wood fiber made by dry hot pressing. The surface of the sheets is untreated, but very smooth due to the fact that the fibers are very small and tightly pressed against each other. But they are completely heterogeneous in color, inclusions of fibers of different colors are visible, since all kinds of residues after wood processing are used for their manufacture. Yes, and the shade of plates from different batches may vary slightly. This type of panels can be processed or used as is for finishing non-residential premises.

Special - differ from the usual ones in that more than high grade wood, and they are pressed longer and at a higher temperature.
These include several types of panels.
- Moisture resistant - comparable in properties to plastic, since it is in no way affected by a humid environment.
- Heat-resistant (that is, resistant to fire). Unlike other fire-resistant materials, instead of phenols and resins, they contain paraffin and lignin, which are not toxic. These include products marked KM1 and KM2.
- Flexible - have greater plasticity for creating curved and arched structures. They can be single layer or double layer.
- Increased density (like kronshpan) - withstand heavy loads.


Any MDF panel for wall cladding can have a coating that not only gives it a certain aesthetic appearance, but also in varying degrees serves as protection against environmental factors.
Various materials can serve as a decorative coating.
- Film or plastic (melamine, PVC). In fact, plastic is a film of greater thickness. The material laminated in this way can look almost anything: imitate any natural material (stone, wood), be glossy or matte, smooth or textured, plain, colored or with a pattern (pattern). The laminated coating can have a holographic or 3D effect.
- Veneer– a thin layer of wood, specially processed – a high-quality product made of veneer based chipboard practically does not differ from the panel from the array. However, it is this coating that provides the least protection against moisture or scratches. The veneer is painted in almost any wood shade and has the appropriate texture.
- Enamel or any other suitable look paints- less durable than plastic, but in case of damage, it can be restored locally or the painted layer can be replaced with a new one completely. The coating is monophonic, but the choice of shades is huge.


Scope of application
From MDF boards make furniture, doors, interior partitions. Thanks to different mounting methods, they can be fixed to almost any base - that is, the wall can be concrete, brick, and the like. Panels of different properties can be sheathed on walls, floors and even ceilings.
Whole-pressed raw panels are used for wall decoration in non-residential, household and business premises. It is important that the room maintains a constant air temperature and is dry. In conditions of high humidity, you need to use a special type of product. The bathroom or toilet can be finished in the same way, laminated sheets can be an alternative to them.


Of course, for the design of an apartment or house, it is important that the walls complement the decoration of the room. In the living room, you can show all the variety of decor of such panels. Veneer or film coating under the tree will perfectly complement classic interior. Here, by the way, matte neutral shades. For modern trends you can choose more bold decisions. Bright painted surfaces or a glossy film with a pattern will allow you to put accents in right places. Practical embossed colorful coatings are conveniently placed in the kitchen, in the corridor, hallway and other places. common use where most dust and dirt accumulates. They are very easy to clean, and small scratches will simply be invisible.


MDF panels can be safely mounted in a nursery or bedroom, since this material fully complies with sanitary and building codes. And with the help of well-chosen colors, you can calm the child or, conversely, create a mood for active educational games.


IN in public places: educational institutions, hospitals, railway stations, theaters, as well as corridors for the evacuation of people, in addition to ensuring environmental safety and a pleasant appearance, panels
MDF should have properties such as low flammability, flammability and flame propagation and low levels of smoke and toxic products.
Fire-resistant chipboard panels can be fixed directly next to stoves, fireplaces, heating boilers. However, from simple room heating elements (pipes or batteries), there will be no harm even from the usual variety.


How to cut?
During the installation process, there are situations when building materials need to be adjusted to fit right size. Yes, and to install the first panel, you need to cut off part of it (comb). According to experts, cutting MDF products is practically no different from cutting wood products.
Some difficulties may still arise during this process.
- The edge along the cut line may crumble.
- The film coating under the action of tools can peel off or wrinkle. Especially if the quality of adhesion to the panel itself leaves much to be desired.
- The glossy surface scratches very easily, so special care is required.

If you are afraid of not coping and spoiling the products, you can purchase products of the desired format or contact a specialized organization (for example, a furniture workshop), where they can help you for a fee.
For cutting with my own hands markup needs to be done. For the calculation to be correct, you will need: ruler, square, tape measure, level or laser level. We draw the cut line so that it can be easily erased. In this case, the decorated side should not be at the bottom so that there are no scratches on it. We lay it on the workbench, securely fix it and proceed to cutting. To make the cut more even, it can be glued with adhesive tape, or the tool can be led immediately along the pressed bar.

The main controversy concerns tools. You can use any tool used for this purpose in the woodworking industry.
Suitable for this:
- hand saw (for both wood and metal);
- jigsaw (regular or electric);
- a circular saw;
- milling cutter
A large constant amount of work in order to save time and effort is best done with power tools. One-time work can be done manually. The main thing is that the teeth of the nozzles are small. We start from any side, we saw smoothly, without jerks. Small chips and bumps on the film can be cleaned with sandpaper.


How to install?
There are two main ways to mount wall panels from MDF:
- glue;
- put on a metal or wooden frame.
In the first case, you need an adhesive suitable for working with wood products. They can not only glue, but also align the recesses in the places where self-tapping screws are screwed. Glue can be colored or transparent.


In the second case, the wall is applied wooden crate or metal structure. The advantage of wood is ease of installation, environmental friendliness and the use of fewer hardware and connecting parts. But wood will cost more than metal, so this method is less affordable. Installation metal frame has its own difficulties - it requires a certain skill and the acquisition of special tools.


Let's take a look at the pinning process wall panels from MDF to the frame base in more detail.
- The work wall needs to be prepared. Remove baseboards and boxes of switches and sockets. Take care of the output of wires for sockets, which will be located on the panels. Damaged wall trim must be cleaned to the ground.
- The wood slats or slats you will be using need to be pre-treated to make them resistant to fungus, mold, or pests.
- Additionally, you need to take care of the fasteners of the slats to the wall. For wood, you can use self-tapping screws or dowel-nails.
- We start with the corner vertical rails. They are placed in pairs to form an angle. Having made the markup, we drill holes in the wall for hardware (in increments of an average of about 7 cm) and lay plastic sockets from self-tapping screws in them.


- We apply the rail to the wall, transfer the markings to it and drill, connect it to the wall.
- Horizontal parts are attached in the same way.
- Door and window openings deserve special attention. Reiki are fixed around their perimeter, regardless of whether they have a step mark or not.
- The evenness of the arrangement of vertical rails and crossbars is checked using a level or plumb line. Irregularities at the joints of the rails must be ground with a planer.


The technology of mounting a metal frame has its own characteristics.
- The process itself is similar to the installation of wood. However, for a metal structure, you will need CD profiles and UD guides.
- CD profiles are inserted into the uprights (UD) and pushed to the desired location.
- Then we drill holes in the wall by analogy with wooden lags. For fastening to the wall surface, long self-tapping screws are used. And between themselves, the profiles are connected short. For the CD profile, connectors are needed (they are also called ears).


After installing the frame, the laying of the panels begins.
- You should start from the corner. A panel with a sawn off comb is placed first, and the next one is attached to it with the help of a lock in which the comb of one workpiece is combined with the groove of the other.
- The panels are fixed with small nails (if the frame is wooden) or clamps (if the frame is metal).
- To attach the last two panels correctly, the last one needs to make the comb less wide. Then connect both at an angle and press them, straightening the connection.
- The last blanks should be tightly pushed to each other and fixed with self-tapping screws to the frame.
- The gaps in the corner, as well as between the wall and the floor (ceiling) are closed with the help of corners and decorative skirting boards(they can be glued).


To install MDF panels correctly, use the advice of professionals.
- For reliability, the panels along their length must be fixed along vertical rails or profiles.
- Additionally, when installing panels on a frame, you can insulate the walls with mounting foam or sheet foam materials, and increase the level of sound insulation. They can be fixed in the cells between the slats. Such sizing reduces heat exchange with external environment and reduces the cost of maintaining heat in the room and its air conditioning.
- If pipes are hidden behind the panels. The height of the profile must be calculated based on the thickness plus the margin. It is better to place the wiring in special protective pipes, since ordinary MDF does not protect against water ingress.


- Since laminated panels are vapor-tight, fungus or mold often develops behind them. The material of the walls also affects this. The brick passes moisture, so it is necessary to apply a primer on it. And the gaps between the wall and the panel in the bathroom or kitchen are best treated with a sealant.
- At adhesive method installation, the surface of the wall must be perfectly flat. If this is not the case, the wall panel will, of course, hide them, but there will be gaps between it and the wall.
- When distributing panels, the pattern must be taken into account. For example, the direction of the wood fiber. Perhaps the alternation of vertical and horizontal pattern looks creative, but in most cases it is better to select the details more carefully.
If the issue of environmental friendliness is not an empty phrase for you, then you have probably paid attention to mdf panels for walls for a long time. With their help, you can seriously decorate your interior, make it more expressive and modern, while not completely emptying the precious in the current economic conditions family budget. In addition, the installation process does not differ in any transcendental level of complexity and is quite accessible for mastering by a "mere mortal". Therefore, feel free to arm yourself with a tool and hurry to buy material - today we will talk about how to fix MDF panels to the wall in such a way that you will experience well-deserved satisfaction at the sight of the result.
Pros and cons of using in the interior

It is quite logical before the direct installation of one or another finishing material deal with what he has positive and negative sides. Moreover, from the point of view of the appropriateness of using MDF panels, they are far from such an unambiguous solution as plastic or drywall. Similar instructions, but already on fixing drywall, you can read in the article: "How to fix drywall to the wall: 2 installation methods".
+
- environmental friendliness already mentioned above;
- the simplest installation;
- good soundproofing performance;
- a wide selection of textures and colors;
- elementary care;
- low cost.


-
- combustibility of the material;
- irregularities are possible at the joints of the fragments;
- not suitable for outdoor decoration;
- poor moisture resistance;
- possible deformation under mechanical action;
- inconvenient installation of hanging furniture.


As you can see, it is possible to fasten MDF panels to the wall surface only in relatively dry rooms with favorable thermal conditions. Be sure to get rid of mold on the walls, if any. At the same time, one must take into account the fact that this material is very afraid of any force impact and will inevitably crack in case of any active contact with it. Otherwise, all the negative aspects of using it are safely leveled by its pluses. One of them is a wide selection of a variety of textures and colors, allowing you to decorate the interior in full accordance with your aesthetic needs. 

Tools and Consumables

In order to fix the panels, you do not need any specific tools. You need to keep on hand all the same standard set that is used to mount any other finishing material.
- plumb;
- level or corner;
- hammer;
- screwdriver;
- electric jigsaw or wood saw;
- construction stapler;
- roulette;
- pencil.
Prepare and consumables:
- nails;
- dowel;
- self-tapping screws;
- wooden slats or metal profiles for the frame (subject to this method of installation);
- liquid nails or other adhesive composition.


It remains only to add the MDF panels themselves - and then there will already be a complete set of everything necessary for high-quality and successful installation. In order to calculate their exact number, you need to make the correct markup. 

Foundation preparation and marking

Probably the most tedious and tedious stage, which many masters (both beginners and already professionals) do not take quite seriously. It's a pity, because a lot depends on the quality of the preparation of the base surface. Especially if you mount the mdf panels directly to the base without creating a leveling frame. Therefore, it is better to think soberly and perform the necessary manipulations with the utmost quality and care:
- as carefully as possible, but without excessive fanaticism, delete old finish(read about how to remove liquid wallpaper from the wall);
- if the paint stubbornly does not want to get off its "familiar" place, then leave it - it will not interfere with you during further installation;
- eliminate all possible cracks with a primer and repair compound;
- if the cracks are minor, then first make them wider with a hammer and chisel, and then treat them with a primer deep penetration- this will help protect your base surface from mold and mildew;
- after all the processing, decide where and how you will attach the panels to the wall - in order to make accurate markings;
- lean the level against the wall and determine the upper and lower mounting points;
- draw a horizontal line along the perimeter of the room in which the repair will take place, and then directly under the ceiling;
- we determine the location of the guides based on the optimal step of 50 cm.


All your further actions depend on how you decide to fix the panels on the wall - directly on the glue or through the auxiliary frame device. Consider both types of installation, noting the features of their use, the pros and cons, as well as the specifics of the various stages. 


Method one. Installation using the crate

- recommended in cases where the base surface is characterized by severe irregularities that cannot be corrected manually;
- for rooms with high humidity it is best to use not wooden slats as a base for the frame, but metal profiles;
- the method using the crate is indispensable in cases where additional wall insulation is planned.

The main disadvantage of this option is the need to mount the frame, which slightly lengthens the duration of the work. In addition, the frame takes a few centimeters free space. Are you ready to put up with such "arbitrariness"? Very often, you simply don’t have options, because achieving the perfect surface is far from possible every time you need it. 
Lathing device
Very important point- know how to fix mdf panels to the wall: vertical or horizontal. The nature of the device of the auxiliary frame directly depends on this.
- horizontal arrangement of MDF panels - vertical lathing scheme;
- vertical arrangement of MDF panels - horizontal lathing scheme.


As you can see, everything is quite simple - it is unlikely to be confused! 


Some points to pay attention to:
- before installation, the rails should be treated with an antiseptic - this way you protect the wood from the appearance of microorganisms;
- the length of the rail must be at least a few millimeters less than the actual distance from the top to the bottom of the structure.


Subsequence
- no matter what type of frame you are going to design - metal or wooden, in any case, first of all, you need to fix the corner posts, and then the transverse ones and those that will be located in the openings;
- a step of 50 centimeters is optimal for all types of crates;
- for fixing narrow and wide metal profiles, it is best to use self-tapping screws, since the so-called dowel-nails are less reliable for this kind of fastening.


The whole process of mounting the frame is in the next video.
Fixing panels
- we cut off the comb at the first panel and with the same side we clamp it to the crate of the adjoining wall;
- we fix it to the horizontal bars with the help of self-tapping screws, do not forget to retreat 1 centimeter from the very bottom;
- each subsequent panel is inserted in the same way into the groove of the previous one and secured with nails or clamps;
- the most difficult element is the last one: it is cut to the desired size, inserted and fixed on the vertical rack of the frame with self-tapping screws.
A video detailing the key points of the operation is below.
Method two. Mounting with glue

- used only in cases where the base surface of the wall is close to ideal;
- not recommended in rooms with high humidity;
- saves usable space.

Surface preparation and marking with this method are practically no different from the previous method we have considered. The only difference is that you need to work hard primer in order to exclude the appearance of fungus or other destructive processes.
For the rest myself action algorithm
looks like that:
- prepare the MDF panels, cut the necessary fragments with a hacksaw or jigsaw;
- apply the adhesive around the perimeter of the sheet, and draw a line exactly in the middle of it;
- apply glue not with a continuous line, but with dots - this way you will save the composition;
- press the panel against the wall and fix;
- First of all, fix whole sheets, all corner elements and fragments - last.

As great option adhesive composition for MDF panels, we recommend using liquid nails- fast, reliable and very inexpensive. 


How to fix MDF panels to the wall surface with glue, the following video will tell.
Conclusion
Information on how to properly attach MDF panels to walls of any type will definitely not be superfluous. In some cases, this material appears almost ideal solution for wall decoration. In addition, it is quite light and easy to install, so it is quite possible to cope with it even alone. The main thing is to clearly follow the time-tested algorithm for fixing MDF panels and not be lazy to work hard on the base base so that you don’t reproach yourself for the fungus and other troubles that have appeared. 


Photo: vk.com
Wall or ceiling cladding different rooms, including loggias are often performed using MDF panels. This material does not require a large number of components, its installation technology is quite simple. The range is represented by different types of panels, which differ in size, shade and texture.
Learn more about MDF material
In order to make the final decision for yourself which wall cladding is best for do-it-yourself installation under certain conditions, you need to study information about the material: structure, properties, scope.
Dimensions, characteristics
MDF is a material that is made from carefully chopped wood (sawdust, shavings and other woodworking waste). Wood dust is exposed to high temperatures and pressed. binder in this case paraffin and lignin appear.
Surface cladding is carried out with sheets and panels of different dimensions: the length varies from 900 to 3660 mm; width from 150 to 2070 mm; thickness from 1.8 to 60 mm. Most formats are non-standard, which allows you to choose the right option.
The standard dimensions in length are 2.6 m. Less common material is 2.4 m long, as well as 2.7 m. The value of the parameter in width varies greatly: from 0.15 to 2.07 m.
Main characteristics:
- Environmental friendliness;
- Excellent strength properties;
- Long-term operation;
- High-quality surface of the panels;
- Soundproof properties.
Where is it applied?
MDF is used in construction (cladding walls, ceilings, doors), furniture production, automotive industry. For laying on the loggia, a material is required that is characterized by resistance to temperature extremes, moisture and ultraviolet radiation. These criteria are met by MDF, in particular, moisture-resistant sheet panels.
Preparation for work
Facing the surfaces of the walls and ceiling of the loggia is carried out in several stages, the first of which is the preparation of the material. Sheet panels are transferred to the balcony so that they acquire the desired level of humidity. This will avoid deformation of the MDF.
Tool
- Hammer;
- Screwdriver;
- Roulette
- Hacksaw for woodworking, scissors for metal;
- Level.
 Of the consumables, you will need wood screws, kleimers and galvanized corners. And, polyurethane foam, sealant.
 Auxiliary materials
Finishing the balcony with MDF panels is carried out using components and materials:
- Any insulation from a number of existing ones (mineral wool, penofol, penoplex, etc.);
- Fasteners (nails, self-tapping screws, kleimers);
- Priming compositions for different materials(concrete, wood);
- Accessories for MDF;
- Wooden beam or special profiles for gypsum boards for lathing.
Room measurements and calculation of MDF
Do-it-yourself wall and flow decoration requires accurate measurements of the room. First of all, you need to determine the length and height of the walls. The number of panels can be determined by drawing up a diagram of their best location on the wall.
In this case, you need to form a pattern, and the seams should be as small as possible. The number of bars / profiles for the crate is determined based on the dimensions of the wall and the sketch, which takes into account the distance between the guides (50 cm). The dimensions of the bars are selected taking into account surface irregularities (25x40 mm, 40x40 mm, 30-50 mm).
Step-by-step panel mounting technology
The crate allows you to create a more durable structure. The advantage of this solution is that it is not necessary to specially level the surface of the walls. But the crumbling base (concrete, plaster) must be treated with a special compound that will strengthen it. For a tree, other means are used - antiseptics.
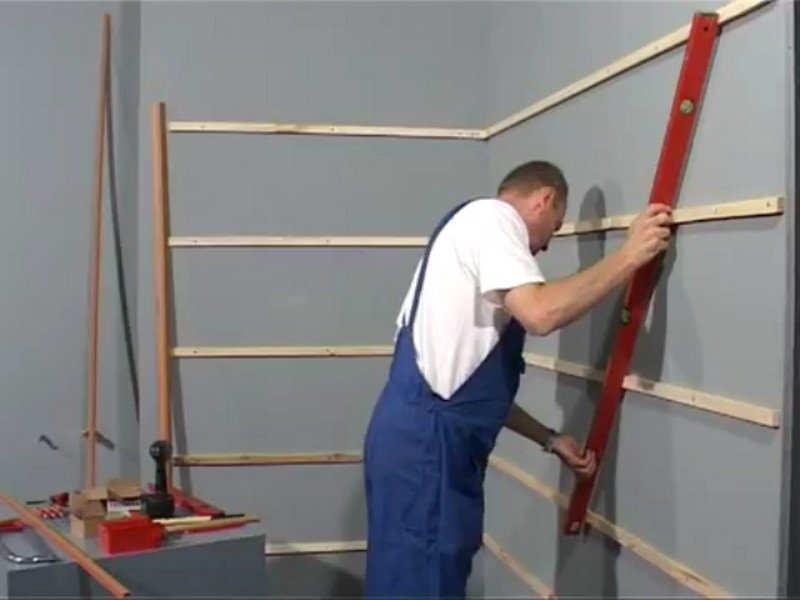
Step 1: The choice of the type of frame and its installation
There are two types of crates: from wooden planks and metal profile for GKL. The first option is cheaper, but it is exposed to a humid environment. For this reason, it is better to install such a frame on a loggia that is well insulated. The metal counterpart is stronger and can withstand any operating conditions.
 The distance between the two rails should be 40-50 centimeters. The lower rail is fixed at a distance of about 3-5 cm from the floor.
 The procedure for installing the crate:
- The highest point of unevenness is determined, it is here that the first bar must be fixed;
- Edged material will have to be laid on the rest of the wall surface;
- If the wall is flat, the installation of horizontal guides is carried out from below, after which the top bar is installed, and then the crossbars;
- The distance from the floor and ceiling is 3-5 cm.
The fastening of the wooden frame is carried out by means of dowel-nails, self-tapping screws. For metal, anchors, metal screws are used.
Step 2: Installation of thermal insulation
Insulation is placed between the laths of the crate. Its thickness must correspond to the height of the frame, otherwise the sheet panels will be deformed. For installation between the rails of the battens, almost any insulation is used: mineral wool, foam plastic, polystyrene.
 The insulation should be located over the entire surface of the wall, including under the belts of the crate. Otherwise, heat loss on the balcony can be up to 40%.
 The insulation is simply laid in the cells of the frame. If sheet panels are glued to the surface of the walls, thermal insulation with increased strength is used.
Step 3: Fixing the MDF
Finishing the balcony with MDF panels is carried out using fasteners of various types: self-tapping screws, kleimers, installation on glue. If an adhesive is used, it is recommended to use moisture-resistant materials that are versatile and suitable for attaching the material to different types surfaces (concrete, plaster).
 Detailed step-by-step instruction
 The sequence of actions in this case is as follows:
- Alignment of the walls of the loggia;
- Thorough cleaning and degreasing;
- Primer;
- Applying glue.
For MDF fasteners wood screws are used for the wooden frame. They are installed at a distance of 10-15 mm from the edge of the panel. This will hide the caps of the screws under the corners and baseboards.
Step 4: Connection and fastening on clamps
From the side of the spike, the MDF is fixed with self-tapping screws. If the panel rests against a corner of the wall, the connecting element must be cut off. The next panel is attached not only by snapping into the groove, but also using glue. Connecting element glued. Kleimers also securely fix sheet panels.
 On the other side of the MDF panel, where the groove is located, the clamp is fixed. Then it is fixed with screws on the rail.
 When moving to another wall, the material is cut at 45 degrees (from the groove side), the next panel is cut at 45 degrees from the tenon side. The last panel is rounded at the end.
slope finishing
MDF is allowed to be installed along and across the slope. The preferred option is determined by its width. For a narrow slope, it is better to choose a transverse installation of the material. Special corners, profiles, plinths have been created for the purpose of finishing corner sections and crevices. With their help, you can hide any leaks. Components are cut and installed with adhesive.
Thus, finishing the ceiling with MDF panels or other surfaces (walls, slopes, parapets) is made different ways: on glue, self-tapping screws, nails and on the crate. The first option is the least reliable and requires maximum effort: leveling the walls of the loggia, cleaning, degreasing, priming
Choice facing materials for walls may cause headache due to the huge range that offers modern market. Now the consumer prefers safe materials, but not everyone can afford them. MDF panels are an environmentally friendly material and at the same time relatively inexpensive, so they are chosen quite often. How the walls are finished with MDF panels and what are the features of the material, we will consider in the article.
Planks are suitable for facing any room: kitchen, bedroom, corridor, living room. The panels are used for cladding in the presence of curved walls, since the design hides flaws and does not require careful preparation which allows you to save on the purchase of additional materials.  Planks are made by pressing under the influence of high temperature. This is how small particles stick to each other. If you install the strips on the frame, you can lay an additional layer of thermal insulation of the room. This is especially true for apartments with poor heating and private houses.
Another point of savings is the ease of installation. For installation, it is not necessary to call specialists, the work can be done on your own. After installation, the panels do not need to be further processed - they are completely ready. Where there are advantages, there are also disadvantages. MDF panels are no exception. Their surface can be scratched if not handled carefully. They also can't take heavy hits.  In the event of a fire, the planks will support combustion. Therefore, the wiring must be insulated very well. In order to prevent them from burning, they are treated with special compounds, but these are additional costs and work.
But, despite this, the panels will last for many years.
Most importantly, do not use brushes or detergents with abrasive ingredients. Finishing the slats of the cooking area in the kitchen is also not allowed.
Panel types
Like any material, MDF panels are classified into groups according to certain criteria: texture, size, shape, manufacturing technology.
There are several ways to make planks:
- Whole-faced;
- Laminated;
- Moisture resistant.
Whole-pressed, as the name implies, are made by pressing small particles of wood. Such planks will last a long time, they are durable and smooth. The decorative properties of such panels are immediately evident.  Laminated panels are also made by pressing, but after manufacturing, the bar is covered with a special film. That is why this type has a rich selection of colors. Only the finest wood fibers are used to make waterproof planks. You can install them in rooms with high humidity: kitchen or bathroom.
According to their form, they are distinguished into:
- Rack;
- Tiled;
- Sheet.
Rack strips are very easy to install, so they are purchased most often. For installation, a frame is required, which is simply filled with panels. The length and width of the slats is different, you can choose required size for a room with any area.  Tiled planks are similar to ordinary tiles, only more larger area. Tiles are installed in the same way as slats - on the frame. It's kind of cassette ceiling. Leaves can be large. More often they are decorated with drawings.
According to the texture, the strips are divided into:
- Veneered;
- glossy;
- Painted;
- 3D panels.
Veneered planks imitate natural wooden surface. MDF sheet is covered with veneer, which is made from different varieties tree. This type has a high cost.
Glossy panels are covered with a film to achieve the desired effect. As you know, glossy smooth surfaces are much easier to clean. However, any damage to such a surface will be visible to the naked eye.
Painted planks are not used as often for cladding, although paint adds variety, more often furniture is made from painted planks.
The surface of the slats can be glossy or matte. Drawings are applied on 3D panels that imitate various materials. They also apply volumetric drawings or photos. Such panels can be made to order, it all depends on your imagination. 
How to choose panels
Before work, you need to calculate the amount of material. However, you should not buy the material back to back, buy a few panels in reserve in case they are damaged during operation or during transportation.
Calculating the amount of material is simple. Measure total area walls and divide by the size of the panels. This is how you get the correct number. The cost of the slats depends on the pattern and characteristics. Waterproof glossy panels with a 3D pattern will cost the most. Do not buy thin panels, their thickness should be at least 1 cm. 
Preparing walls for paneling
Careful preparation for frame structure not required. The main thing is to treat the wall with an antifungal compound. Everything else depends on your personal desire. But still, if you spend anyway repair work, then it is better to put the wall in order. Moreover, over time, it will be much more difficult to do this. This is especially true for stains, the longer they remain on the surface, the more difficult it is to remove them.
The preparation process consists of several stages:

Necessary tool for the job
During the installation process, you will need plumb lines, which can be made from a rope and a weight. For marking you need a level and a tape measure. Screwdriver and electric drill for installation. If you need to cut the panels, then use a jigsaw. It is also suitable for cutting metal parts. 
Mounting methods
You can install the strips on a metal or wooden frame, as well as with glue. The choice of frame material depends on the room. So in a room with high humidity it is better to use metal, and in a private house wooden.
Glue installation means flat surface, That's why preliminary work The preparation of the wall must be carried out completely and with due diligence.
Glue
Installation on glue does not take much time. But later, if a separate bar is damaged, you will not be able to get one panel without damaging the others.
The glue is applied to the panel in thin lines in three or four rows and glued to the wall. It is not necessary to press hard, a little pressure is enough. So the whole wall is filled. Excess glue must be removed immediately before it dries.
frame
First decide on the method of installing the panels: horizontal or vertical installation. The frame profile is set perpendicular to the direction of the panels.
For a horizontal arrangement of the frame, marking lines are drawn using a level, and vertically using plumb lines. The guide bars of the frame are installed at a distance of 50 cm.
wooden frame
The bars are installed on the wall with dowels. A hole is drilled in the plank, a dowel is inserted into it and a self-tapping screw is screwed. Fasteners are placed in increments of 40 cm.
Metal carcass
The metal profile is also attached to the screws. First, it is pressed against the wall and the location of the screws is marked, then holes are punched and then the profile is screwed. After its installation, suspensions are attached to it.
Fastening MDF panels to the wall. The evenness of the subsequent installation also depends on the location of the starting bar, so check it with a level. Fasten the panel in the corner to the guide profile using the spike. Additionally secure it with self-tapping screws. Next, the spike is installed in the groove of the previous panel. Thus, the wall is completely filled. The last bar usually has to be cut. It is fixed with self-tapping screws and subsequently closed with decorative corners.
Interior decoration of premises is a task that is relevant for both residential buildings and public buildings. Among the offered range building materials various panels made of synthetic and natural raw materials are very popular. The last group of products includes MDF panels, whose variety of types allows you to choose the material for facing rooms of any type.

Peculiarities
natural materials have always been at the peak of popularity, but, unfortunately, their volume is very limited. In this case, correct and effective solution was the use of various production waste from a natural product, which allows to reduce losses, as well as to obtain attractive and high-quality raw materials.
It was in this way that materials such as chipboard and fiberboard appeared on the shelves of construction stores, and subsequently fibreboard called MDF.
Similar products received wide application during the finishing of the walls in the premises, they are preferred to be used in apartments, for lining bedrooms, kitchens and bathrooms, for finishing office premises, etc. This trend is due to the environmental safety of raw materials, reasonable cost, as well as ease of installation, due to which it is quite possible to fasten these products at home with your own hands.


The main components that make up the MDF panels are wood chips and other waste from this raw material. Special substances are introduced into a similar composition and compressed.
The manufacturing technology of the material includes the following processes:
- The threshing device grinds wood into elements of a given size.
- The resulting fragments are washed and sieved. As a result, larger chips and various debris are sifted out.
- After that, the resulting composition undergoes steam treatment.
- In the finished and purified raw material is introduced epoxy resin and carry out the mass under a press under high pressure.


- Received sheet material cut into pieces of specified dimensions.
- To give smooth surface panels go through the process of grinding and processing decorative compositions. Works to make products visually attractive consist in covering the base of the material with a film, laminating or staining. The first option allows the panels to become similar to wood or stone.
Besides, decorative coating provides products with protection against dirt and moisture, which greatly expands the range of applications for products.

The positive features of MDF panels include the following properties:
- Environmental friendliness of the material - phenol is not used during the manufacture of products, which indicates the safety of the raw materials obtained.
- It is possible to sheathe walls or ceilings without the involvement of hired workers.
- Cutting the material is quite simple, with almost no debris left during this task.
- Presented for sale today a large assortment similar products, among which there are panels with different color and invoice. Due to such a variety with the help of products it is possible to realize almost any design solutions not only for small intermediate rooms, such as a hallway, corridor or toilet, but also to decorate the main living rooms - a hall or a living room.
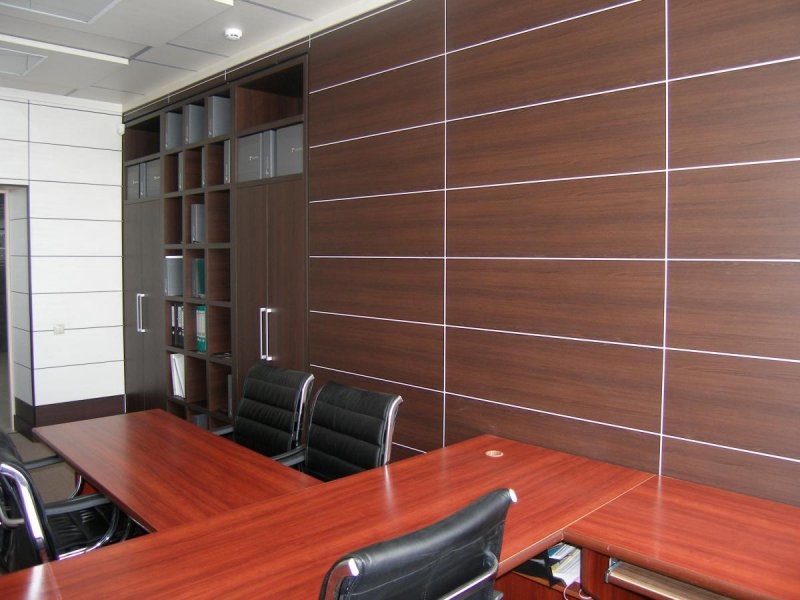
And cabinets decorated with MDF panels will emphasize the good taste and status of the owner.


- The material is inherent in heat-insulating and sound-proofing qualities, due to which the level of comfort in the room increases.
- The product does not require any specific maintenance, any dirt can be easily removed with a damp cloth.
- Since the main raw material used for the production of products has low cost, the material itself is distinguished by an acceptable price.
- Surfaces can be sheathed in several ways, so that in some cases there is no urgent need to level the bases.
Fasteners on the frame will hide all the existing defects on the walls.

In addition to the advantages, the products have some negative qualities:
- the presence of an additional coating on the products does not provide 100% resistance of the material to moisture;
- it should be borne in mind that the design will take up some area of \u200b\u200bthe room when mounted on the crate;
- despite his environmental safety, products belong to the category of fire hazardous building materials.


Kinds
Taking into account the specifics of the production technology at each individual stage, MDF panels have the following characteristics common to all products:
- material strength varies from 600 to 1200 kg/m3;
- the average tensile strength of the product is 0.55 MPa;
- the allowable leaf moisture level should not exceed 10%;
- in percentage terms, the level of various additives in raw materials is 10%;
- the thickness of the product varies between 6-40 mm.


Based on the production method, there are several main types of MDF panels:
- Moisture resistant products. The material is notable for its high strength and high cost. Such products do not deform even with prolonged contact with water, they tolerate mechanical stress and loads well. The panels are recommended for use in rooms with high humidity, and in some cases the products are used for exterior finish structures.
- Whole-piece products. The material is produced by hot pressing of the panel components. Finished products has a smooth base, the level of strength of the panels is average in comparison with other types. Based on the cost of the product proposed by the manufacturers, it can be attributed to economy class products.
- laminated products. The product manufacturing process is similar to the method described above. Among the individual features, it is worth noting the ability of the material to repel water, abrasion resistance, as well as resistance to contact with chemicals. Due to their features and strength, the products can be installed not only indoors, but also outside, however, for constant contact they are not suitable for moisture.

Taking into account the variety of external design of the rails, products can be classified as follows:
- Veneered panels. They are similar in texture and color to natural wood. To achieve this effect outside covered with veneer with a layer of about 3 mm.
- Glossy. They have a laminating film layer. Due to its presence, the material becomes shiny appearance and moisture resistance.
- Painted panels. Used for work special composition, which sets the desired shade and hides possible irregularities in the base.
Painted products can be either matte or glossy.


Given the differences in product density, manufacturers distinguish the following types of material:
- HDF - where the value exceeds 800 kg/m3;
- LDF - density is from 200 kg / m3 and above.
The front surface of the panels can be milled or flat.


Focusing on covering possibilities, the material is divided into the following types:
- rack;
- tiled;
- sheet.


Scope of application
MDF panels have found their application in several industries at once. These include the production of furniture, the construction industry, with the help of products you can mount partitions, arches, etc.
Can be distinguished the following types jobs where this product is in demand:
- production of door panels;
- roof lathing device;
- production of window sills;
- using panels, protective screens are made for ventilation and heating devices;
- products are used for suspended ceilings and flooring;
- during wall finishing work.


Preparatory work
To determine the amount of material required for the design of the bases, certain measurements should be taken - measure the width of the walls. Since the panels are produced in various sizes, having decided on a specific type of material, the width of the wall should be divided by the same value of one product.
However, even correct organized work may be associated with various injuries facing products, so it is best to purchase a little more material.

Preparatory process, preceding the installation of MDF panels on the frame, includes the following set of works:
- In order to fix products on a wooden frame or metal type surface alignment is optional. In this case, it will be enough to clean the walls from dust and dirt. But serious defects need to be fixed.
- All wiring that is available in the room is hidden in corrugated pipes.
- If you plan to lay the material in fairly damp rooms, the walls should be pre-treated with an antiseptic primer.
Preparatory work, which precede the installation of products on glue, are reduced to the mandatory cleaning of the base, after which the walls must be primed.
Panels rack type are cut taking into account the height of the walls, the corners are cut off, the edge is processed with sandpaper.
If you plan to glue square products, their size is adjusted after fitting.


How to fasten?
The choice in favor of one or another method of installing such products is based on the condition of the walls, as well as the specifics of the room and the conditions in which the material will be used in the future.
The frame mounting option is reduced to installing lamellas on a specially equipped crate.
- if there are serious defects on the wall that cannot be repaired;
- when there is a question about the need to provide sound insulation and thermal insulation;
- you need to hide various communications under the finish, for example, wiring.


The frame can be made from wooden beam or galvanized profile. Each option has positive and negative features. The wooden structure does not need a large number of fasteners, it can be attached with self-tapping screws, in addition, the raw material has similar characteristics in terms of moisture absorption as the finishing material itself.
The crate needs additional processing antiseptics, because it is susceptible to moisture.
The metal construction is distinguished by a long service life and moisture resistance. In addition, the metal frame guarantees a more reliable and rigid fastening, which is important in wet rooms, where the panels can deform and elongate.
But the construction of the crate, which will be many times more durable than the finish itself, is impractical.


Products can be mounted both horizontally and vertically. in addition, to create a specific pattern, some experts mount products diagonally. Regardless of the installation direction chosen, the frame and panel rails must be perpendicular to each other.
Vertical installation is considered the most common, since during such work a minimum amount of waste remains after cutting products.
After the construction of the crate, you can begin to install the panels.

There are the following cladding options:
- The panels can be glued - in this version, the products are processed with the composition in those places where they will be fixed with the frame. This method is relevant for products with a small thickness of the plates.
- Mechanical fastening with hardware - this option will be acceptable for rooms with a stable temperature and normal air humidity.
- Fixing the elements with clamps - the essence of the installation is to put a clip on the edge of the rail and connect it to the frame with nails. This method is the most popular.


Installation is carried out in the following sequence:
- The panels are adjusted in length, the edge of the products is sanded.
- It is best to install in the direction of the window opening, if any.
- The first bar is installed in such a position that its edge with the comb is directed into the corner. Next, the panels are fastened to the frame guides, a clamp is put on the edge.
- The following panels are fixed with a comb into the groove to the previous element. The corners and the upper edge are formed with a universal corner.


Frameless way choose only when the bases in the room have a perfectly flat surface.
Installation involves the following steps:
- work must begin from the corner of the room, moving towards the window;
- before mounting on a concrete or any other surface, it is necessary to make markings on it that correspond to the dimensions of the facing material;
- for high-quality sizing, the adhesive composition is applied to the back of the product in a zigzag pattern, after which the element is pressed against the wall and immediately removed;
- after a few minutes, the product is finally pressed to the surface;
- installation can be performed both end-to-end and overlap;
- corners and edges are closed with skirting boards or corners.


