Do-it-yourself poplar hanger. Wall hanger in the hallway: buy or do it yourself. Wooden hangers
The hallway is a place where things are usually stored for going out, so it cannot do without a hanger. Some people attach a board with nails to the wall, but it doesn't look very nice. Therefore, it is best to use a floor or wall hanger that you can build yourself. A product created by oneself will not only save the budget, but also add uniqueness to the home.


Preparation of tools and materials
Before starting work, you need to prepare everything the right tools: drill, screwdriver, self-tapping screws, hacksaw, measuring tape. It is important to have the skills to handle them so as not to make a lot of mistakes and not harm yourself. To give the product a neat and aesthetic appearance you will need varnish or paint.

As for materials, you will need:
- Wooden blocks or metal elements, which will create a strong and reliable base that can withstand heavy jackets. You can use the base from an unnecessary artificial spruce or from a sturdy floor lamp.
- A column that is suitable in size, which is easy to purchase ready-made. The cheapest option is a dry and bare trunk young tree(without knots and bends), treated with sandpaper. Its height should be 15-20 cm.
- Hooks, the number of which should be sufficient to freely position on the base.

- Glue designed for reliable fixation of all elements, including self-tapping screws.
- In order for the hanger to stand firmly on the floor and not slip, thin rubber must be glued to its base.
- To strengthen the center of gravity, it is necessary to make a shelf for storing accessories, which will need to be fixed above the cross mount.

Manufacturing process
First you need to create the bottom part of the hanger. To do this, pre-prepared bars need to be cut in half, sanded and connected at a right angle. In order for the joints to be strong and not to stagger, you need to make recesses along the width of the bar and connect all the parts. Then you need to cut out four bars and attach them with self-tapping screws to the legs and trunk, which will become a reliable support for the hanger.


You can unscrew the screws only after the holes made by the drill are ready. This will help protect the future product from the appearance of cracks that can render the piece of furniture unusable. The diameter of the self-tapping screw must be larger than that of the drill.

For reliable fixation, you must first lubricate the holes with glue, and only then - screw in the screws.
To make the upper part of the structure, you need to attach a pre-prepared square with hooks. You can also attach four bars to the trunk, which will be aligned with each other with corners. It is necessary to fasten not to the very top, but a little lower. Holes are drilled with a drill, which are filled with sealant, and only then self-tapping screws are screwed in. This will help the product hold heavy items.

Having finished creating the hanger, you need to start designing it. First, the entire structure must be processed with sandpaper. Then it should be treated with a paint and varnish agent. Can paint the surface different colors or draw patterns to get an original product.


original solutions
The following interesting options can be distinguished:
- Making a hanger in the hallway can be much easier if there is an old (rather heavy) floor lamp at home. It needs to be freed from unnecessary elements (wires), cleaned and painted. Metallic paint will look spectacular. Iron hooks are inserted into pre-drilled holes. You can weave hooks bent from strong wire.


- It will look very unusual hanger made from real wood. To do this, it will need to be thoroughly dried, the bark removed from it, it should also be sanded. IN this case you don’t have to make a stand, as the roots of the tree will securely hold the structure. But it is necessary to file and bring the roots into the proper form so that they do not interfere and look beautiful. Tree branches can be used as hooks, shortening the strongest to the right sizes. Such a hanger will become a decoration of the house, and it will simply be impossible not to notice it. However, finding a suitable tree is not an easy task, which makes it very difficult to translate this idea into reality.


- Save space while maintaining functionality a wall hanger will help. To create it, you will need bars, two boards for making a frame, one board for creating a shelf, metal corners, slats and hooks. To speed up the process, it is better to use processed materials. To build a structure, you need to mark the place of attachment on the wall and mount two boards to it, located vertically to the floor. The length of the fasteners depends on the length of the product. It should fit the length of the shelves.


At a short distance, slats are attached to vertical boards. From the bars below you need to build a shelf for shoes. The height of the shelf should be sufficient to allow sitting on it. All joints are fixed with corners to increase the reliability of the structure. Sheathing with slats will help to make the product beautiful and neat. Installation of the top shelf begins with the attachment points. Using a drill, holes are made into which self-tapping screws will then be screwed.


For beauty, you can use forged corners and hooks, and the finished product can be treated with stain or paint.
- You can combine a hanger with a small cabinet by making deep shelves and hooks. To do this, prepare a few durable boards highest quality that have been pre-processed. You can use boards from an old bed or sofa, because wood remains strong for decades. It is well processed. Before work, it is worth making a drawing, which will display the dimensions and number of shelves. Following the drawing, you need to cut the boards, then you should attach them to the bottom shelf. Boards are attached to the back of the side boards, the height of which depends on the number of shelves.

It must be remembered that the hanger will contain not only outerwear, but also various accessories, so it must be especially well attached to the wall. You can use iron corners and self-tapping screws, or you can screw them onto dowels.
You can decorate the finished structure with a small mirror, which will be located on the side. If it is frameless, then you need to attach it to a solid plywood shield. It needs to be fixed. The mirror itself is glued to a special glue, and a shelf is closely installed under it, which will serve as an additional support. If this design does not seem safe, then you can build a frame for the mirror. You need to make it from a textured board, pre-processing it with sandpaper and covering it with stain.


A little imagination - and the simplest hanger will become an interior decoration. It can not only be painted in one color, but also pasted over with a cloth or wallpaper. Well for this case, the decoupage technique is suitable, which will give the product an extraordinary look.
- You can decorate the corridor with a non-standard product, which (in addition to storing things) will also perform other functions. A hanger in the form of a chair will be designed for storage outerwear and seating. There will be a shelf for shoes under the seat, and hooks for clothes and a shelf for hats and gloves will be located on the high back.


A strong branch found in the forest or in the park can become the highlight of the hallway. It is worth covering it with varnish and screwing in the hooks, and it will become a worthy element of the apartment.
- Hangers made of water pipes will look very unusual. In this case, you can hang clothes on valves or taps.
- It is very economical and original to use wooden hangers that can be built into the wall at different levels. Already in the products themselves, you can make holes for hooks or use store options that have a self-adhesive surface.
- Old skis are another interesting corridor design idea. Paint them in fresh shade and attaching hooks to them, you can organize a storage system in a few minutes.

Agree, hooks and hangers are an indispensable thing in everyday life. Without them, one could only dream of order in the house. If you are now thinking about how to drive a nail into the wall so that things are not scattered anywhere, for you our review of what people thought of when inventing ... a hanger.
As they say, everything is useful in the economy. What could be easier than hangers from already unnecessary things? Eg, original hooks obtained from old forks. Of course, antique silver ones with a pattern are preferable, as they look more spectacular than aluminum ones from Soviet canteens.
You can make a hanger kitchen towels from knives in which the blade broke, but the wooden handle remained.

Or from old scissors. Although, probably, such an idea is not harmless if there are children in the house.

Old (or new) door handles- also an option for a stylish wall hanger.

Someone made a creative hanger for the kitchen out of wooden rolling pins. Would you like to try again?

Even old skis can be given a second life by "forcing" them to "keep" clothes and bags in the hallway.

A snowboard nailed to the wall and decorated with golden hooks - that's it original hanger. Who would have thought that such a simple invention would fit perfectly into the interior of a modern apartment?

And here the designer's fantasy was based on a clothespin. It turned out multifunctional item interior - hook-tuck.

Clothes hooks in the form of a cardiogram will surely please not only doctors.

It is possible that some plumber or housing office worker will be inspired to work water pipes and valves. A hanger in the hallway from a large diameter pipe can also serve as a temporary container for small items - glasses, scarves, gloves, keys, phones.

It’s hard to imagine how this happened, but a manual plumbing tool for cleaning pipes - a plunger, also inspired someone to create a holder for a clothes hanger.

And in an electrician's house, a key holder might look like this.

It will be more interesting for children to hang their clothes not on a boring hook, but on the ears of cats, dogs and donkeys.

Another interesting option a children's hanger can be obtained from a board on which they write with chalk. Just to the bottom wooden lath you need to nail the hooks.

Outerwear is better, of course, to hide in the closet. However, there is not always a place for him in the hallway. If your home is small, we suggest making a ceiling clothes hanger from an ordinary pipe with your own hands.

It will be interesting to complement the design of the corridor or hallway with another simple in execution, but unusual in shape hanger.

An even simpler, but original thing for storing chains, bracelets and other hanging jewelry would be appropriate in the bedroom near the bed.

Shoe storage traditional ways As a rule, you need to find a lot of space in the apartment. And you try to make a practical and ergonomic shoe rack out of wire yourself.

The original hanger-shelf for can be made from wooden pallets(pallets) intended for the transportation of goods.

IN country house a hanger from an old ladder would be quite appropriate and organic.

Such a device is just a godsend with a lack of space in the home. For a hanger-ladder, both twigs and trimmings are suitable plastic pipe small diameter.

Retro style in country houses Europe and the United States has recently become very popular. The interiors use authentic items of the 50s and 60s of the last century or stylized for that time.

For example, practical option for the hallway there may be a hanger with a shelf for wicker baskets, which was common among Americans in the last century in coastal vacation houses. By the way, such a thing is not difficult to make yourself, and baskets can be bought in a store or also made by hand. We assure you that the effect of putting things in order in the house will be significant.

IN skillful hands craftsmen, a metal rod twisted in a spiral can also become a hanger.

Another option for men who know how to hold tools in their hands. Functional hanger, consisting of a wooden board with holes and dowels that can be interchanged at your discretion.

Hanger from hangers. To some, these figures may seem like hunting trophies. This is not so important, the main thing is that it is convenient to hang and cling to them not only clothes.

For those who do not want to part with the childish habit of hanging clothes on the back of a chair, designers have come up with such a compromise.

Collars can also be turned into hooks. On such a hanger it is convenient to leave hats or outerwear.

The intricate design of this natural wood hanger will appeal to lovers of everything original.

About others interesting ideas Read on for our review. Many different ones are in the corresponding FORUMHOUSE section. And home craftsmen will useful video on the arrangement of the premises for work and storage of tools -
Today I want to tell you about how you can make homemade hangers for your home wardrobe at home. I have been using this technique for a long time. I hope that this option will be of interest to someone.
I usually make hangers in batches of 15-20 pieces. In this case, they can be made step by step, which greatly simplifies the whole process.
Materials and tools
For manufacturing you will need:- A piece of plywood or fiberboard for making a template;
- Cutting boards 15-20 mm thick without cracks;
- Wire 4 mm thick;
- Nut M4;
- A cap from a felt-tip pen or a soft plastic tube.
- Tools and hands.
DIY manufacturing
First, I made a template from a sheet of fiberboard, sawing it with an electric jigsaw. I took the size of the template from a standard plastic hanger.
Then he transferred this template to the boards with a pencil in such a way as to avoid getting into cracks, and the existing knots were inside. They can then be cut out.

I drilled two holes from the inside with a Forstner drill with a diameter of 22 mm.

I sawed out my future hanger with a jigsaw along the contour and cleaned it with a grinder.

I marked the future hole for the hook and drilled it with a 5 mm drill. To drill the hole evenly, I used a vise when drilling.


From the inside drilled hole I made a groove with a rasp into which the nut holding the hook will be placed. This is necessary so that the hook does not cling to clothing.

He clamped it in a vice and sawed off a 20 cm long wire with a hacksaw, rounded one end with a file, and chamfered the other. sandpaper removed the rust from the wire.

From the side chamfered I cut an M4 thread with a die, about 5 mm long.

To bend the hook, I made a special mandrel from a birch blank. I drilled a hole in it with a diameter of 6 mm, clamped the mandrel in a vice, and then inserted the end of the wire into the hole and bent the hook.

So that the hook in the hanger does not fall through, I made a limiter from a cap from an old dried felt-tip pen. I sawed off the upper part of the cap and inserted the cap into the hook.

Then I inserted the hook into the hanger and secured it with an M4 nut.
That's the whole structure.
Making video
And you can see more about the process of making this hanger in my video:Such hangers can be used not only for outerwear in the hallway, but also as mini-wardrobes in the room. It all depends on which type and design you choose. Clothes rack hangers are functional, easily moved from place to place, and free the backs of chairs from unnecessary clothes there.
This article contains some interesting and simple ways Make your own outdoor clothes hanger. They don't take much time or effort.
Choose your favorite option and go ahead to change the interior!

Necessary materials:
- Two copper pipes long 3 m and 2 cm thick, each of them will need to be cut into such parts (this can be done at a hardware store where you will buy everything):
- 1.5 m long- the height of the hanger (this height should be enough for both jackets and coats, but you can take more or less if you wish);
- 1 m long- the size of the pipe on which you will directly hang things (you can also take it longer or shorter, calculate how many things you want to put there);
- two tubes about 20-25 cm long- we will make hanger legs from them.
That is, it turns out 2 copper tubes by 1.5 m, 2 by 1 m, 4 by 20-25 cm.

- 4 copper elbows (tubes bent at an angle of 90 degrees) for attaching pipes to each other, select according to the diameter for the pipes (approximately 2 cm);
- 2 T-connectors;
- 2 caps for pipes;
- Glue (epoxy glue or ask the seller in the store which of what is available is suitable);
 Step-by-step instruction:
Step 1: Measurements
Measure the space on the floor where the hanger will be, make sure it will fit. If you take the indicated dimensions, you will end up with 150 cm x 100 cm x 45 cm.
TIP: Adjust the dimensions if necessary.
Step 2: Assemble the legs of the hanger
We begin to fold the floor hanger itself from the legs, make a support and a rack. To do this, take the first pair of tubes of 20 cm each and fasten them between a T-connector, and then we do the same with the second pair.
Step 3: Attach the protective caps
To prevent dust and dirt from getting into the middle of the pipes, which will serve as legs, you need to close the holes. On each of the two legs folded in the previous step, attach a pipe cap at one end.
Step 4: Foundation
- On tubes with caps on the other side, attach a corner in this way: when the corner is on the floor, the T-connector located in the middle of the leg should be pointing up.
- Take one of the meter-long pipes and insert it into the corners, now the base of the hanger is ready.
ATTENTION: To securely fix the structure, you can use glue (at least in all joints), but then the hanger cannot be disassembled and folded again (when moving, for example).
Step 5: Side Racks
Insert a one and a half meter pipe into each of the T-shaped connectors, thus forming the side racks.
Step 6: Finishing touch
- Attach a corner to each of the newly installed racks (they should be directed at each other), and insert a meter pipe into them.
- You can also attach felt pads to protect the floor. The floor hanger is ready!

Note: Because this design easily disassembled (if you did not use glue), then you can change its length, for example, depending on the time of year: in winter there are more things - they put longer pipes, in summer they are shorter.
Hanger made of PVC pipes (budget option)
The method of making this floor hanger is similar to the previous one: the pipes are folded like a designer to form a hanger. But here we do not use copper pipes, and PVC, so it will be much cheaper. And, of course, one more new idea design.

Necessary materials:
- PVC pipe with a length of 2 m and a diameter of 2.5 cm, it must be cut into the following parts: 12 cm (6 pieces), 80 cm (1 piece), 20 cm (2 pieces) and 10 cm (1 piece).
- PVC pipe 50 cm long and 2 cm in diameter, cut it into 3 pieces of 15 cm.
- 4 bends-corners with a diameter of 2.5 cm.
- 3 bends-corner with a diameter of 2 cm.
- 6 T-connectors with a diameter of 2.5 cm.
- Adhesive for PVC.
- Aerosol paint.
- 4 PVC adapters from 2.5 cm to 1.25 cm.
- 3 PVC adapters from 2.5 cm to 2 cm.
- Felt pads to protect the floor (optional).
Step-by-step instruction:
Step 1: Cut the tubes into desired sizes
First of all, we have to cut PVC pipes for rack mounting. You can do this yourself at home with a PVC cutter or ask at a hardware store.
After cutting the pipes into pieces, their edges can be sanded so as not to be scratched when assembling the hanger.
Step 2: Sort the materials
Now we have all the necessary parts and for convenience it is better to sort them, then the assembly process will be faster and more orderly. Arrange the materials in piles, depending on their purpose.
- For the hanger stand you will need: 4 elbows, 4 adapters from 2.5 cm to 1.25 cm, 3 T-pieces and 6 tubes 12 cm long (diameter 2.5 cm).
- For each arm hanger: T-connector, PVC adapter from 2.5 cm to 2 cm, 15 cm PVC pipes with a diameter of 2 cm and a corner with a diameter of 2 cm (you can still put a cap for pipes on it).
- For rack: one PVC tube 80 cm long, two 20 cm each, one 10 cm and a cap.
Step 3: Assemble the hanger
- stand

Fasten each two tubes with a T-piece. Insert one of the three resulting structures between the other two, as shown in the photo. Put the corners on the edges of the other two, turning them down so that a hanger stands on them.
- Hands

Put together the T-piece, adapter, tube and cap as shown in the photo.
- rack
Insert a tube 80 cm long into the T-connector into the stand, attach one of the arms of the hanger to it, then attach a tube 20 cm long, another arm of the hanger, again the same tube and arm, a tube 10 cm long and finishing touch put a cap on top.

To keep the structure better, it can be fastened with a special glue for PVC. Be careful with the arms of the hanger to stick them turned in the right direction - corners up.
Step 4: Painting
The design of the hanger is ready, but it still does not look very aesthetically pleasing. Carefully and evenly apply the spray paint in the color of your choice, do not stain the room.
TIP: to make the hanger more stable, sand can be poured into the pipes from which the stand is made. After such a little trick, the hanger will not fall and turn over.
Hanger made of pipes with several levels
Another hanger of this type, only with extended functionality: here you can not only hang clothes, but also put shoes. Compact and comfortable wardrobe.

Necessary materials:
- PVC tubes with a diameter of 20-25 mm:
- 4 long 100cm
- 2 long 65cm
- 4 long 48cm
- 6 long 20cm
- 8 long 5cm
- 10 T-connectors
- 6 elbows
- Plate for bottom shelf

We fold it completely in the same way as the two hangers described above.

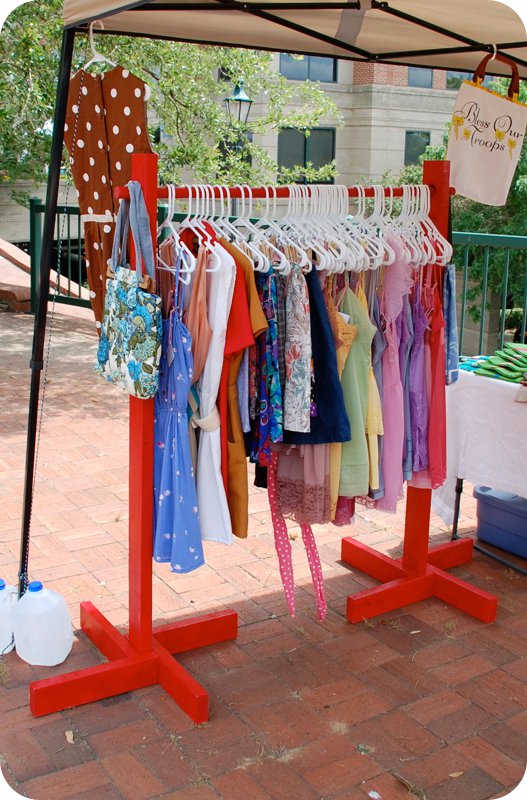
Wooden floor hanger in 10 minutes

Necessary materials:
- Wooden sticks (4 pieces) 180 cm long and 2 cm in diameter.
- Rope: This will be used to tie wooden sticks together (you can also use leather cords, wire, or some other decorative material, the main thing is that it firmly and reliably fixes the structure).
- Spray paint: we used golden color to paint the bottom of the hanger legs (you can also use a different shade or color).
- Paint: we used four various colors paint, one on each leg of the hanger (but of course you can use the same color for all legs).
- Masking tape: When using spray paint, this will help keep the paint off.

Step-by-step instruction:
Step 1: Paint the supports
- Paint the legs in your chosen colors, let the paint dry.
- Apply painter's tape where you want the spray paint to end, and gently apply the paint to the legs. It is better to do this outside, or cover the floor with newspapers so as not to stain anything. Peel off the masking tape.

Step 2: Shape the Hanger
Connect the wooden supports together with a rope, and then gradually push them apart. You should get something similar to the basis of a wigwam, the legs should be spaced wide enough so that the hanger is stable and easy to use.

Such a hanger takes up a lot of space, so it is best to put it in the corner.
Interesting ideas and photos
Tree hangers
It can be a neatly sanded tree trunk or branch, or a folded wooden structure. The main thing is that there should be one support and branches from it - hanger handles. An original and useful addition to the hallway. 

Hangers-constructors
The number of elements and design may differ, but unites all of these floor hangers the fact that they can be quickly folded, and just as quickly disassembled (if you did not use glue). Sometimes more expensive and noble materials are used, such as copper, sometimes wood or PVC, in any case it turns out beautifully and extraordinary.


Coming home, we try to quickly take off our shoes and outerwear. Simply tossing it on a chair or chest of drawers is a sure way to wrinkle your wardrobe and bring even more clutter to a small room. The problem is solved in 2 ways - by installing a closet or equipping a small hanger in the hallway, in case there is very little free space.
These small storage systems will be discussed in today's material. Today, picking up furniture for a home is not difficult, and regardless of the size of the room. But if you decide on suitable model failed, rely on own forces, having previously prepared a sketch.
Do-it-yourself suspension manufacturing
For hospitable hosts - a product of paramount importance, it is she who is used to place things in the corridor. Traditionally, it is located in close proximity to front door to in dirty shoes no one walked on the floor. The variety of this furniture is impressive even experienced designers. Pick up beautiful model matching the interior easily. It can also be made by hand.

Wall furniture must meet 3 criteria:
- reliability;
- constructive lightness;
- convenience.
Before, it is necessary to determine in advance its appearance and functionality, clarify the material from which the walls are made.
In the case of drywall, wall furniture is not suitable. The best option– floor solutions. From mount to surface finishing material It is better to refuse initially, so that you do not have to restore it.
To attach products to such walls, special dowels, special tools and equipment are required. Without preparatory activities the structure may not support the weight of furniture and things, which is fraught with the fall of the structure.

In this case floor models with a number of hooks look more advantageous. They do not fall as things are evenly distributed along the entire length. The main advantages of such products are mobility and minimum weight, with high reliability. For the hallway, the easiest way is to make a hanger with your own hands from wood, chipboard or fiberboard. Ready product decorate with an ornament, pattern, or simply paint with paint, open with varnish.
Step-by-step instructions for making a wooden hanger
Traditionally holds the palm natural wood, since it is easy to give it any shape, in accordance with the prepared sketch.

The most beautiful hangers are made of wood. The structure of this wood is fragile, so when screwing the hooks, you must be extremely careful.
It is necessary to prepare in advance the following tools and materials:
- set wooden planks suitable shape and size;
- screwdriver;
- sandpaper ("micron");
- jigsaw;
- hooks;
- hacksaw with small teeth.
Prepare wooden blanks of a suitable size. The material must be sanded. Ideal for shaping smooth surface, on the tree are passed with "sandpaper". As for the finish, here you can be guided by your own taste - open the surface with paint, varnish or stick on it decorative paper. At the final stage, hooks are attached to the board (with a screwdriver).

wall mount
A do-it-yourself hanger in the hallway should not only be beautiful and comfortable, but also securely fixed to the wall, withstand the weight of outerwear. Experts distinguish 2 ways of fixing furniture.
- The easiest way is to drill the hanger through with self-tapping screws, thereby securing it to the wall.
- More complex method- prepare 2 metal loops on the back of the hanger, and then use them to fasten the hanger.
The process is completed - the wall furniture is ready for use.

Before making a final decision on the manufacture or purchase of a clothes hanger, it is important to consider a number of nuances. First of all - the presence and area of a free zone for furniture placement. In the second - the style of the hallway and other rooms in the apartment or house. Thirdly, the height and location of the furniture.
Criteria for choosing a hanger for a corridor or hall:
- the product should visually echo or complement the main style of the room;
- For classic interior suitable wall hanger;
- decoration of minimalism will be a floor model.
Outdoor furniture is characterized by conciseness and lightness. If necessary, it can be quickly removed or moved to another place. This is one of the best options for a medium sized hallway. Be that as it may, a hanger is an important practical attribute of any interior, regardless of size and style.

Such furniture takes up a minimum of space, but accommodates a large number of things. A separate hook is allocated for each wardrobe item, so there are no problems or inconveniences with finding the right things. Near the front door, you can organize a compact storage system in which there is a place for hats, umbrellas, and bags.
Fixing hooks and hangers
There are several basic ways of attaching hooks and hangers to the wall. You can go the path of least resistance and fix the product without special equipment. But connoisseurs of sophisticated and original solutions This issue deserves to be considered separately. In case of wooden hangers are often limited metal hooks. Such systems are attached to the wall with screws.

As for the hooks, they differ in the way they are attached:
- magnets;
- suckers;
- adhesive segments (horizontal or vertical orientation).
Their installation requires a minimum of time and practical skills, which is why they have gained immense popularity among consumers. But the elements listed above also have a significant drawback - they do not withstand heavy weight(you won’t be able to hang a sheepskin coat or a fur coat on them). Their scope is limited to headwear and light accessories.


