Step by step instructions on how to assemble a corner cabinet. Do-it-yourself corner cabinet Do-it-yourself corner cabinet from chipboard
The closet plays an important role in any interior. It is not surprising that stringent requirements are imposed on it: not to take up too much space, to be roomy, to have a sufficient number of shelves and drawers. Models on the market do not always fully satisfy individual wishes.
Apartment owners non-standard layout it can be even more difficult to choose an option that fits into the room. In this case, you can order a cabinet from specialists who will take into account all the wishes for the design and internal content.

Unfortunately, this option is not for everyone. Then best solution problems will be the use own hands and ingenuity, because it’s not difficult to assemble a wardrobe on your own!

Preparatory stage
Each room has its own type of construction, so you should familiarize yourself with the main ones.
Wardrobe with closed front - straight model with hinged doors. To open them, you need to provide extra space, do not forget about this if you are making a closet for the hallway.

The cabinet with an open facade has no doors, and its contents are in plain sight. It imposes certain requirements on the order.

The wardrobe doors are mounted on a rail mechanism and open, moving apart. There are designs with an upper and lower rail, which one to choose is a matter of taste.

Ideal design for a built-in wardrobe
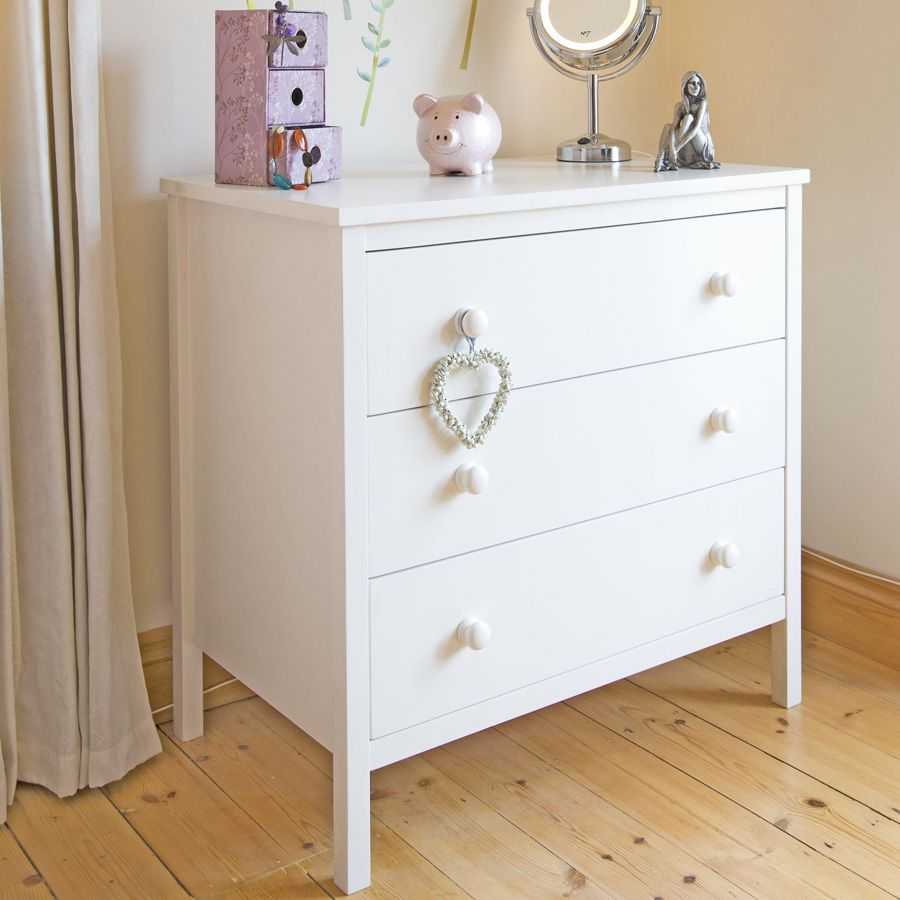
Corner cupboard fills the corner. Suitable for a room of any size, if it is square or close to it.

Having chosen a suitable design, you can begin to create a project for the future cabinet. Since this piece of furniture has been serving for more than one year, it is worth considering what functionality may be required of it. It is better to build a drawing on whatman paper, entering all measurements there.

Decide on the location and dimensions of the cabinet. If a niche is provided in the room, it is ideal, but if it is not possible to build it in, choose a place where neither he nor he will interfere with anything.
think over internal filling: the location and number of shelves and drawers, their dimensions, additional elements like mezzanines or interior lighting.

Don't Forget Your Choice exterior finish, decorations. The colors "oak", "alder", "beech" are the most popular today. And you can choose wood with an interesting pattern and leave your native pattern. Get creative, decorate the doors with a carved pattern.

materials
The material can be natural wood, plywood, MDF or chipboard are all used by furniture manufacturers.

The tree is environmentally friendly, does not require additional decorations, it is convenient to use. A wooden cabinet will last more than one year and will look solid and impressive. Perfect Choice for the interior in a classic style.

Plywood is glued sheets of veneer (birch or trees are used). conifers). This cheap one practical material suitable for the manufacture of almost any furniture. It is best to choose laminated plywood (FOF brand).

Chipboard ( chipboard) is the cheapest and most common option. When assembling your own closet, they usually use it. Short-lived.
A self-adhesive melamine film is also useful for processing the side faces.

The rod diameter must be at least 22 mm. The easiest way is to buy it in a specialized store. You can also buy pens there.

Tools
- Ruler, tape measure, pencil and others for taking measurements and building a drawing.
- Level.
- Electric jigsaw or hacksaw for cutting.
- Screwdriver or drill and screwdriver.
- Glue.
- Ratchet key.
- Iron for gluing edging film.
- Accessories. Each door opening mechanism has its own set.
- It is better to buy confirmations for a chipboard cabinet with a length of 7 cm and a diameter of 0.5 cm.

Progress
First of all, measurements are taken and a drawing of the future cabinet is built. The final result depends on a correctly drawn up drawing, so approach it with all seriousness.
Making cabinet doors with your own hands is not difficult, the main thing is to correctly calculate the dimensions. If its vertical height is less height opening, the door will not completely close it, and if more, it will not fit. Finding the horizontal dimension, we must not forget about the fastening elements: they will add a few millimeters to it. The width of the doors should be ~3 mm less than the opening.

Now you need to mark the placement of the mounting bolts on the sawn parts and drill all the holes.

The assembly begins with the installation of the bottom and attaching the walls to it. Make sure that assembled cabinet fits into the allotted space and other furniture will not interfere with the opening of the doors. If you are making a wardrobe, guides are installed at this stage.


The location of drawers and shelves is outlined, shelf holders and guides are installed. They must be strictly parallel so that they do not skew.

It is time to install the upper shelves and roof. A gap of ~ 7 cm is left between the ceiling and the roof for the installation of confirmations. Fasteners are made by hand, finally tightened with a ratchet.

The side shelves are attached to 4 confirmations (two on each side), in some cases dowels (small wooden cylinders) are used. One end of the dowel is inserted into the wall of the cabinet, a shelf is put on the other.

The last step is to install the doors. Before installation, attach the handles with an outward bend. For sliding doors is especially important correct installation mechanism. Don't rush, be careful.
It's time to start final touches. Treat the cuts with a decorative film, decorate the facade. Put mirrors, interior lighting and other elements.


Tricks and nuances
lean on existing schemes cabinets, designing your own.

A corner cabinet requires more care in design and assembly than a straight one, so it may be too complicated for an inexperienced person.

If you do not have enough experience, it is better to entrust the cutting of parts to the master. His hand will not tremble, and the cuts will be even and neat.

In order not to get a piece smaller than necessary, consider the thickness of the saw. The wall thickness must be at least 18 mm. Otherwise, the strength of the structure will be insufficient.

When working on the drawing, pay attention to the curvature of the floor. If the floor is not level, gaps may appear between the doors. To avoid this, adjust the mounting canopies for the swing mechanism, and change the height of the wheels for the sliding mechanism.
Guides for sliding doors should be parallel. Be very careful when marking and installing guides for drawers and shelves.

Drill holes for confirmations symmetrically. Use a drill of the correct size. The exact number of confirmations depends on the number of parts. Confirmates are covered with plugs to match the color of the structure.

Installation of the mirror begins with the installation of a seal around the perimeter. The film is glued to the slices of chipboard with an iron. Smooth it with a cloth, pressing it as tightly as possible. The edges can be trimmed with a regular knife.

Study photos of handmade cabinets: you will get a boost of inspiration and mark interesting ideas for yourself.

We hope our tips have helped answer the question of how to make a wardrobe with your own hands.

DIY cabinet photo

Sometimes creating some kind of furniture with your own hands is much easier and cheaper than buying ready-made headsets in salons. For example, to create a corner cabinet with your own hands, it is not at all necessary to be seven spans in the forehead and have a whole set of skills. In fact, the design of such a piece of furniture is simple, and there should not be any problems in its implementation.
Making a corner cabinet
We will create a wardrobe that will have a sliding system of two facades. At the base of the box there will be a square, one corner of which we will cut off. Before we make a corner cabinet with our own hands, we need to measure two quantities: the depth of the sides and the distance between them (the sliding system will be built into it). The height of the cabinet also matters. Let's say our design will have the following parameters: 600 mm by 1500 mm by 2300 mm.
We draw up a project, first we draw a diagram of the upper part, two sides and a corner support. The latter will be two parts that are connected to each other at a right angle. The same parts will partially be the back wall of our cabinet - shelves will be attached to it. WITH right side we will have shelves, on the left - a pipe on which outerwear is hung. Thus, this will be the foundation for the cabinet.
Box preparation
Our corner cabinet will consist of two boxes. The first one will be represented by a module with shelves (you may have a different number of them). The second module will consist of two elements - straight and angular, which will allow access to the pipe for outerwear. The first module is assembled simply: a chest of drawers and shelves are built into it. At this stage, it is very important to correctly calculate the depth, because otherwise the sliding system will not close completely and will rest against the facades. With the second module, there is even less work, since only the installation of the bar is required here.
How to choose a configuration?
Before you make a corner cabinet with your own hands, it's a good idea to understand its dimensions. So, the standard height is 2200 mm and above, which means that the opening for the facades must be at least 900 mm. If the doors are hinged, then the sashes should be as small as possible in width. In addition, the load on the hinges will be moderate, and therefore the cabinet will last longer.

Second important point- taking into account the parameters of the room and the expected load of the cabinet. For each specific room, you can choose a specific design. For example, cabinets in the form of a trapezoid and a triangle are too complicated in terms of calculations, besides, they will have to take into account both special fittings and certain details. Fitting the facade correctly without a professional measurer in this case is almost impossible.
Or maybe a classic?
The classic version of the corner cabinet has five walls: it is inserted between the sections in the furniture set. The system seems complicated, but in fact it is the most common and easy to manufacture. But if we put such a structure as independent element- it is too complicated, and it will take a lot of materials to create it. The closet will turn out to be overall, it will take up a lot of space, but it simply will not work to put a lot of things into it. So if possible, it is best to create a built-in corner cabinet with your own hands: working space there will be more in it, and much less materials will be required.

Kitchen options
Of course, creating a huge one with your own hands is not easy. And therefore, most often this piece of furniture is bought in the bedroom or dressing room. But what to do when required constructive solution for the kitchen and at the same time it is impossible to buy a separate cabinet? The answer is simple: "Make it yourself!" For example, for a kitchen, an L-shaped design, consisting of two modules that are installed in a corner, could be an ideal configuration.

It is very easy to create such a corner kitchen cabinet with your own hands. Its design will be compact and ergonomic, and therefore even in the smallest kitchenette it will look harmonious. As for the number of shelves and the opening-closing system, the preferences of the owners play the main role in this matter. At the same time, it is worth remembering the mandatory nuances.
- You should not try to cut chipboard at home on your own, since the peculiarity of the corner structures is that they need to be precisely adjusted to each other and the geometry must be carefully observed.
- Creating a corner kitchen cabinet with your own hands, you should not save on fittings. For example, using a sliding door mechanism, buy full fittings for openings, and savings can lead to the fact that in a year your locker will die.
- You should carefully consider the alignment of the floor and ceiling so that your design fits perfectly into the opening allotted to it.
How to assemble?
Assembling a corner cabinet is not the easiest process, and therefore you can spend a lot of time on it. To do this, you will need to stock up on a screwdriver, hammer, nail puller, hex keys, puncher or drill, hacksaw. It is worth remembering that all modules of this design are attached with the help of which they are inserted and fixed immediately. Be sure to make sure that the holes match each other. Before mounting the doors, it is worthwhile to install the mounting strips and plastic linings for the corner hinge - it is fastened with self-tapping screws.
If you need to attach the corner module to the cabinet, then you need to fasten it in several places. This will make the structure stronger and more reliable, and it will last much longer. As you can see, creating the simplest corner wardrobe with your own hands is not very easy, but it is quite possible. This is a universal element of furniture, since it allows you to more rationally and competently use free space. If you create it yourself, you can give the system any constructive and stylistic features making it perfect for a room or kitchen. Well, do not forget about the timely drawing up of drawings - they will definitely be useful if you want the corner cabinet, created with your own hands, to be solid and of high quality.
Modern furniture has high cost, and for its manufacture can be used various materials, in addition, the models differ in size, shape, appearance and content. An excellent solution for a living room, bedroom or other room would be a corner cabinet that does not take up much space, is characterized by high capacity and interesting appearance. It is easy to create a corner cabinet with your own hands, if you carefully understand this process.
Immediately before the process of creating a structure, you should decide on the dimensions, materials and tools that will be used, as well as consider the purpose of the cabinet. Initially, a project is formed, for which drawings are created, according to which parts are prepared that are firmly connected to each other. A decision is made whether the corner cabinet will be triangular or L-shaped, trapezoidal or five-walled.
If you decide to assemble furniture yourself, you should prepare for this process and purchase the necessary materials and tools:
- direct material for creating a cabinet, and the formation of a drywall structure is considered relevant, which differs affordable price, ease of use, environmental friendliness and durability;
- profiles from which the frame will be formed;
- suspensions;
- screws and glue;
- mirrors, if you plan to decorate the cabinet with them;
- fittings that ensure ease of use of the structure;
- rollers and guides, if compartment doors are being made;
- sheathing material for the cabinet;
- drill, screwdriver, grinder, sharp knife for cutting drywall, level and other small tools.
Working with drywall is considered so simple that it usually does not require specific tools.

Tools

Drywall sheets
Part preparation
Do-it-yourself drywall cabinet is made only after the preliminary creation of the scheme. Initially, you should determine the dimensions of the structure, for which the dimensions of the corner where the furniture is planned to be installed are taken into account.
It is necessary to decide what parts the corner cabinet will consist of. Usually one large department is made for things that are located on the shoulders. The other department is narrow and divided into several small compartments, which are separated by shelves. Often, an open pencil case is additionally formed on either side. The standard dimensions of such elements are:
- the height of the cabinet itself can vary from 180 to 220 cm;
- the width of two different elements of the corner cabinet can be from 45 to 80 cm;
- between the shelves it is desirable to leave a distance in the range from 30 to 35 cm;
- boxes and shelves usually have a width of 40 to 45 cm;
- it is desirable to make boxes with a depth of 25 to 30 cm.
It is considered optimal to have two large departments on top, called mezzanines, which are used to store large and rarely used products and things, and a narrow compartment for shoes is organized below.
After determining the dimensions and compartments of the structure, you yourself need to perform the following steps:
- determine the corner where the cabinet will be located;
- depending on its parameters to determine exact dimensions cabinet;
- create a sketch that will allow you to calculate the base, cover and base;
- divide the entire internal space of the cabinet into separate sections, for which vertical and horizontal partitions are used;
- calculate the doors of the structure;
- calculate right amount ends closed with end tape.
Based on the scheme obtained, it is possible to prepare the main parts of the cabinet. To do this, in accordance with the sketches, the main elements of the frame are made. Metal profiles are cut with a grinder, and the cuts are cleaned. Further, on the basis of pre-made drawings, drywall parts are formed, and it is desirable to use thin and sharp knife. All elements must have the same thickness.

materials
Site selection and marking
It is advisable to decide on the installation location of the cabinet in advance, since the design itself is made according to the available parameters of a given angle. It is usually installed in the living room, but can be intended for the bedroom or children's room. Filling and dimensions depend on the number of things that will be stored in the furniture.
After determining the installation location, marking begins, which allows you to determine where the main elements of the cabinet will be located. Since the drywall product will be created, all the elements of the frame will have to be attached to the wall, therefore, attachment points are outlined. You will have to navigate along them during fastening and creating a frame.

Surface preparation and marking
Frame installation
How to make a corner cabinet with your own hands using drywall? To do this, you first need to do the installation and fastening of the frame. The whole process is divided into stages:
- if it is planned to have fixtures in the cabinet, then the areas where they will be fixed are marked, after which electrical wiring is supplied to this place;
- shock-absorbing rubber insulation is glued to the guide profile, and it is important to place it from the part that will be laid further on the base of the furniture;
- along the lines of the previously applied markings, all guides are fixed, and dowel nails are used to securely fasten them;
- further, direct suspensions are fixed on the wall, and for this you need to constantly focus on the markings;
- fasteners for fixing suspensions depends on what material was used to create the base, since if it is concrete or brick, then it is advisable to use a dowel with nails, and if the base is wooden, aerated concrete or expanded clay concrete, then strong self-tapping screws or even nails are suitable, and it is also allowed use special dowels equipped with expansion mustaches and notches;
- vertical racks are inserted into the fixed guides, after which they are fixed with suspensions, and for this it is advisable to use short self-tapping screws equipped with a press washer;
- between rack profiles strong and reliable stiffeners are installed, and the more these elements are used, the more stable the structure will be obtained, and there should be especially many of them in areas where it is planned to store heavy objects.
It is allowed to use not only metal profiles to create a frame, but also wooden slats, but this solution is used extremely rarely, since wood can absorb moisture or dry out, so the dimensions of the cabinet will change, which will lead to distortions or increased fragility.

Pasting profiles with damper tape

Metal profile is easy to cut

Finished frame
Frame sheathing
A drywall corner cabinet is created quite simply, since after the formation of a high-quality, durable and stable frame, you can begin to sheathe it with drywall elements. For this, the following steps are performed:
- drywall blanks are made, for which parts are cut in accordance with the drawings, and it is recommended to use a hacksaw or an electric jigsaw for these purposes;
- it is desirable to choose a durable one to create a cabinet wall drywall, the thickness of which will be at least 1.25 cm;
- all edges are processed with an edge planer;
- finished drywall elements are inserted into the corresponding sections of the frame, after which they are screwed with special self-tapping screws for metal;
- the sheets are finally fixed, for which it is important to calculate the number of self-tapping screws so that there is a distance of 20 cm between them;
- all caps of self-tapping screws are recessed by 1 mm;
- in the areas where the shelves will be located, furniture corners are installed;
- rods and lamps are mounted;
- according to the available dimensions, the creation of doors begins, which can be ordered ready-made.
After the completed work, a full-fledged cabinet will be obtained, but in order for it to have an attractive appearance, you should take care of the use of finishing materials.

Plasterboard marking

Drywall cut

Fixing plasterboard panels

Driving screws with a screwdriver

finished wall
Finishing
Finishing involves the following steps:
- all surfaces outside and inside are covered with a high-quality primer;
- joints are filled with gypsum plaster;
- then a sickle is glued;
- painting corners are mounted on the corners;
- putty is applied, which is polished after hardening;
- it is desirable to make two layers of putty;
- then the primer is applied again;
- after the final Decoration Materials, which can be presented decorative panels, tiles or other materials.
It is advisable to use a mirror during finishing to increase the comfort of using the structure.

Perforated Corner Corner

Cabinet finishing
Drawings and diagrams
The most important thing during the creation of a corner cabinet is the construction of a correct and accurate diagram and drawings. If there are any errors in them, then it will not work to build a full-fledged, durable and stable structure.
Drawings and diagrams can be obtained in different ways:
- self-creation, and the process can be performed manually or using special programs for computer;
- order from specialists, which will require significant financial investments;
- look for ready-made drawings, but you should only use them if you are sure that they are correct and accurate.
Corner cabinets are considered the perfect solution for different rooms. They can be created from different materials, but the most optimal is the use of drywall, which is sheathed with a frame made of metal profiles. Such a cabinet does not require significant investments, and is also easy to create. During independent work own wishes and available dimensions of the selected corner are taken into account, so the design will be ideal for the installation site.
Finished corner kitchen cabinet
When the dimensions of the room allocated for the kitchen are not impressive, you have to think about the smallest components of comfort, using every centimeter of usable space. Speaking of kitchen sets, we mean, among other things, the corner where two walls meet - a place that, with an ill-conceived approach, becomes useless. However, it can become quite tangible help if you find the right approach. This approach is usually to create a corner cabinet that fits perfectly into general scheme headset and allows you to use additional space.
Main settings
Kitchen furniture is manufactured to standards that depend on the parameters that determine the height of the cabinet you are going to assemble.
We list the main indicators that will be taken into account in the process of creating a corner cabinet:
- The width of the plinth - this indicator ranges from 10 to 12 cm, while its value is not affected by what type of stand will be used - solid or legs.
- The height of the locker is usually 70 cm if you are not going to equip the cabinet with a sink. In this case, you need to make it a little lower than the level of all other cabinets. This is done for convenience when washing dishes.
- The height of the countertop varies from 2 to 4 cm. It depends on the material used, primarily on its structure.
- After all measurements, the height of the corner cabinet is usually about 84-85cm.
- The most common parameters for cabinets are 90x90cm. Of course, the dimensions primarily depend on the parameters of other parts of the headset.
Important to know: the distance between the tiers of the headset is usually 60cm, while standard height hinged corner cabinet, creating the possibility of its comfortable use by people of average height is 70cm.
What product shape to choose?


Once you decide on the dimensions, it's time to think about what shape of the product you would like to fit into the kitchen space. We list the three most important varieties:
L-shaped pedestal - this form of pedestal is different in that the best door shape for it is folding, like the one used in trolleybuses. So you can get the most out of inner space, which, by the way, can be turned from ordinary shelves into a carousel with best angle rotation.
A wall cabinet of this form will serve as an excellent helper in saving space. The cabinet itself is also good because you can successfully place a sink in it. Since in Soviet apartments water supply and sewer communications are usually placed in the corners, you do not have to extend the pipes.
Attached structure - less convenient option pedestal location. A small cabinet with a door at an angle of 90 degrees is added to a deaf cabinet located in the corner. The problem is that in this scenario you only have access to the interior of the smaller cabinet. This design also allows you to place a sink, however, plumbing is located in a blind module, and in an accessible one they arrange a place for dishes and kitchen utensils.
Remember that when the sink is located in a blind section, you greatly complicate the access to it for a plumber in case of a need to repair work, and if the sink is removed from a deaf cabinet, it will remain empty and useless.
However, practice shows that it is better to place the sink in another place, and equip an empty cabinet in a place for cooking or put a microwave oven there.
The space in the accessible module can be equipped with a carousel with a small angle of rotation or pull-out baskets.
Trapezium-shaped pedestal - original and stylish option, which, however, has its drawbacks. This form has one door, and sections are adjacent to it on the sides. kitchen set. The trapezoidal cabinet looks quite solid, especially in kitchens with a large area, but it is not entirely rational.
Firstly, a straight door makes it difficult to access some areas of the cabinet, especially near the wall. And secondly, it is better to avoid the simultaneous installation of a carousel and a sink in such a pedestal at the same time, since the first one will constantly damage the second one due to the friction force. So it is better to put a microwave or other equipment on the cabinet.
Finished corner kitchen cabinet
Getting ready for assembly


Any product must be designed before assembly. This process can be divided into several stages:
- Determine special purpose curbstones - whether it is arranged for washing, cooking or you want to hoist kitchen appliances on it.
- You should have before your eyes the overall dimensions of both the cabinet itself and its components.
- Decide on the insides of the cabinet - whether it will be regular shelves, a carousel, or pull-out baskets. It is important to calculate the convenient distance between the shelves and their number.
- Consider design and color scheme.
- Determine the material from which you will make a cabinet or cabinet.
- Create a drawing that will clearly show what and where is located and how it is attached.
Of the materials, chipboard or chipboard is best suited, which is strong enough, resists moisture and required processing looks very attractive, while having a small price.
Materials and tools
Sheets of chipboard or chipboard;
Facade PVC, which will cover all visible ends and edges of the product;
Euro screws with dimensions 40x4.5 or 50x7mm;
self-tapping screws;
Hangers;
sealant;
Furniture coupler;
All necessary accessories like hinges, handles, etc.;
Drill and drills with a diameter of 4.5, 7 and 8mm for working with wood;
Emery skin;
Key for working with hexagons;
Level;
Roulette.
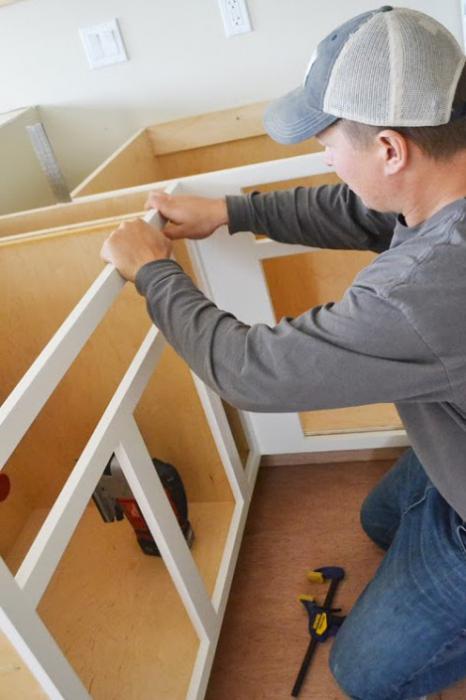
Do-it-yourself corner module
The next stage of work will be the preparation of the main parts for the future cabinet. They will have to be cut from solid chipboard boards, so you will need maximum accuracy and accuracy. However, this does not guarantee good quality works. At least at home, some factors can interfere with this.
If you use a power tool for sawing, then keep in mind that it cuts the laminate well. Yes, in general high level vibrations can simply prevent you from fulfilling your plans with good accuracy.
To simplify your life, contact a company that, according to your project, can cut and even trim fragments of a future pedestal.
We assemble the cabinet
Now directly about the build process itself:
- Make non-through holes and insert dowels into them in order to pre-fix the components of the cabinet. So you and the frame can align and increase the strength of the future product. Chopics are pre-coated with glue.
- As soon as you insert the dowel into one part, thread its end into the hole in the other and firmly press the two parts of the cabinet together.
- Before complete installation of the future product, check all its parts for evenness.
- Now confirmations will be screwed into the dowels. This is done with a hex wrench.
- If legs were provided in your design, it's time to mount them to the main structure and adjust in height.
- Make holes in the sides of the future cabinet and insert cross-shaped fasteners for the doors into them using two self-tapping screws.
- On the side walls, build fasteners for the rails along which the boxes will slide out, and fix the rails themselves.
- Once the frame is created, attach a fiberboard sheet to its back wall.
- In the case of a wall cabinet, you need to attach fittings to it, with which it will be attached to the wall. Adjustable suspensions will perfectly cope with this role.
How to collect boxes
- The walls for the boxes are pulled together with screws. As soon as you assemble three walls, insert pieces of fiberboard into their bottom, which are created according to the parameters of these walls.
- Drawer fronts must be secured with eccentric ties. In this case, the screws are screwed into the facade, then the side with the cap is inserted into the bushings located on the sides of the drawers. The main thing is to pre-make nests in them. Once the bushings are in the holes, turn them until they catch the screw heads.
- If we are talking about the corner cabinet, you need to screw the guides for the rollers to the lower corners of the drawers.
When it comes to assembly oven, final stage excluded due to the absence of drawers in this type of cabinet.
How to install modules and embed a sink
At this stage ready product placed in a corner. If we are dealing with an attached lower module, then first it is worth installing a cabinet with a sink with a ready-made hole for pipes. Only then you need to install a cabinet with a door.
You will need furniture intersection ligaments when it comes time to connect cabinets to each other. In total, four fasteners are required.
When it comes to corner kitchen cabinet, in which the sink will be mounted, under this sink you will first need to make a hole in which the sink will be placed.
To make a cutout for the sink, attach it to the countertop and create markings with a pencil, and then drill a hole of such a diameter at the edge of this marking line that the jigsaw file can freely enter it.
Once the nest has been cut out, the sink will be inserted into it and screwed on with the help of a special fastener supplied in the kit. The cut line after this operation is treated with a sealant.
We fix the countertop and doors (video)
When the cabinet or wall cabinet took their places in the headset, it remains only to solve the issue with the countertop and doors:
- The kitchen worktop is marked with an additional allowance of half a millimeter from each edge. If, after mounting the cabinet, a small gap remains between it and the wall, the plinth will help hide it.
- Using a jigsaw, the tabletop is cut according to the given dimensions.
- To secure it, align it so that there is a 3cm allowance at the front to bring the edges together. Using self-tapping screws from below, we fix the table top.
- When assembling corner cabinets, the docking points with other modules can be hidden using special metal strips that are attached to the ends of the tabletops using small self-tapping screws.
The last final stage is hanging the doors:
- The doors are put on cross-shaped plates, which were screwed in advance, after which we tighten the bolts.
- Close the doors and make sure they fit properly. In the absence of a nice-looking picture, adjust their location with bolts.
Based on everything described above, you can understand that making a corner cabinet or cabinet with your own hands is not so difficult. Nevertheless, this is a rather responsible matter, requiring you to be accurate in size and action. Therefore, in case of insufficient self-confidence, do not hesitate to ask for advice from knowledgeable people.
The problem of limited space and the desire to use every meter of living space pose a challenge for a person, what furniture to choose for the house, and how to arrange it. Convenience and comfort in use will depend on how rationally the elements of the interior are thought out.
In addition, not every wardrobe can be as functional as possible and act as a decorative element. Only angular will cope with this task. After all, it occupies the place that usually remains unused - the corner of the room, at the same time, without cluttering it up. You can buy, or you can make a corner cabinet with your own hands.
Basic corner cabinet configurations:
- Triangular shape.
- Trapezoidal shape.
- The shape is in the form of the letter "G".
- Form "five walls".
Triangular and trapezoidal shapes are difficult to self-manufacturing. The fact is that there are diagonal elements here that require individual schematic detailing and the use of special fittings. preparation necessary materials It is recommended to carry out in the presence of a specialist measurer.
The five-wall corner cabinet is the most common configuration. Used in all kitchen models corner cabinets. Two planes are adjacent to adjacent walls forming an angle, while the facade consists of three planes, the middle one of which is the door leaf.
The shape of the corner cabinet, in the form of the letter "G", is quite functional and compact. It consists of two double boxes placed in a corner. The advantage of this model is the saving of consumables, compared with the installation of two separate products.
Doors in any configuration can be hinged and coupe. In the first case, the width of the door panels should be minimal - up to 450 mm, in order to avoid excessive load on the hinges. In the case of compartment doors, their width cannot be narrower than 450 mm, with a total height of 2200 mm. It is necessary to maintain the ratio of the width of the wings to the height of the facade - 1:5, for the normal operation of the cabinet.
 Corner cabinet with hinged doors
  Corner wardrobe with sliding doors
How to DIY
Corner cabinets with hinged doors differ in the number of doors: two doors, three doors, and more. They are opened using handles or a special mechanism by pressing the door leaf. The material used is wood or chipboard. The surface can be covered with plastic, enamel, paint. The product is decorated with gilding, carving, mirror and glass inserts. For ease of use of the cabinet, lighting is built in on its inside or outside.
Before starting work, you need to decide on the product configuration and draw up a drawing of a corner cabinet. It must display the shape of the cabinet and its dimensions, and include internal elements. The dimensions of the corner cabinet and its configuration directly depend on the size of the room where it will be located.
 Examples of cabinet sizes
 Required Tools and material:
- chipboard, boards or MDF;
- self-tapping screws, dowels;
- accessories;
- profile;
- drill and perforator;
- screwdriver;
- roulette;
- building level;
- electric jigsaw or hacksaw;
- hammer
- glue;
- mirror.
Consideration should be given to several important features, before starting the manufacture of the cabinet:
- Boards chipboard is better take ready-made, in size, or resort to the help of a professional to cut them. It is very important that the parts fit together as much as possible during assembly. They should be even and exactly the right size.
- Don't skimp on accessories. It must be of high quality and be a complete set. This is especially true for elements for sliding doors, the wings of which should open smoothly and not jam.
- It is worth paying close attention to the surface of the ceiling and floor. It must be even. For example, for a built-in wardrobe, this is of paramount importance, because if this rule, the design will not fit into the opening.
A classic five-walled wardrobe, at the base of which lies a square, with a cut corner, consists of two double parts. Two planes embedded in a corner - located at an angle of 90 ° to each other and form back wall. On the sides of them are two vertical panels that form the sidewalls. The upper and lower planes are the pallet and cover of the structure. Inside the corner cabinet there are shelves and bars of different sizes for clothes. Swing doors complete the look.
Such a separate cabinet, in most cases, looks bulky. Therefore, if possible, it is better to install the built-in corner system. The advantage is that less material is used for installation, due to the absence of top, bottom and rear modules. In addition, the utility of using free space higher than that of a free-standing structure.
Preparation
In order for the work on the manufacture of a corner cabinet to proceed correctly and without errors, you need to follow the step-by-step instructions:
- first, you need to decide on the place and room in the house where the product will stand;
- take measurements of space and put them on the diagram;
- determine the configuration of the product and apply it to the drawing;
- mark the dimensions of the corner cabinet on the drawing and compare with the dimensions of the space being prepared;
- determine the right amount of material and tools, and prepare them.
The dimensions and internal content will depend on what you would like to fit in the closet, and on the layout of the room. It is better to choose the configuration based on the skills for manufacturing furniture designs and cost. consumable. The height of the shelves and the level of the bar should be located at such a level that it is convenient for use not only by yourself, but also by all family members.
To facilitate design, you can use computer program PRO100. She will help considering the right dimensions, and calculate materials and fittings.

The layout of the corner cabinet is drawn by hand, starting with the side panels, which will be load-bearing. They must be made from solid boards. Then, the height of the cabinet is determined - from 2200 mm, if space is left above it, and higher if the cabinet is up to the ceiling. In the first case, you need to install a solid upper canvas, and a lower one of the same type.
After that, the horizontal details of the cabinet and shelves with rods are determined. Large shelves are best placed at the top level of the cabinet, and a clothes rail in the corner section. Further, the diagram indicates the mechanism for opening the cabinet (). Upon completion, details (mirrors, pens, painting) are applied to the drawing.
Assembly
The assembly process corresponds to the drawing sequence of all elements in the project. All wood parts must be picked up in the store, and then sawn to size. Accessories are recommended to buy high-quality - German or Turkish. Depending on the filling of the cabinet and the door opening system, the following are purchased: handles, hinges or a sliding system, confirmations, closers, legs, dowels and hooks for clothes.
Corner cabinet, in fact, consists of 2 or more boxes. When preparing these boxes, it is very important to observe the proportions of height, length and depth. Otherwise, it will turn out skewed, and door mechanism will not close. Modules are fastened with ties. This steel fastener, made of a screw and a nut, prevents the product from loosening and firmly fixes the structure, forming a single ensemble.
When installing a hinged cabinet opening mechanism, the doors are fixed with canopies, and can be opened in any convenient direction. In the case of a sliding mechanism, guides are attached along the upper and lower parts of the opening, along which they will move door leafs.
Brief Assembly Instructions
The corner cabinet, depending on its configuration: built-in or freestanding model, is installed in different ways. But there is universal instruction how to make a corner cabinet with your own hands, which must be followed:
- According to the drawing, you need to cut the material and check the availability of components.
- Install the legs on the bottom of the structure.
- To the installed bottom, with the help of confirmations, attach the side panels.
- At the upper ends of the side walls, you need to drill grooves for dowels. Moreover, they should be located at the same distance from each other as the holes on the lid.
- Treat the dowels with PVA glue and fix in the lid.
- Install the cover on the side walls.
- When mounting the cabinet to the ceiling, the legs must be installed so that there is a maximum stop of the cover against the ceiling.
- After assembling the "skeleton" of the cabinet, you need to install hinges for the doors swing type, or guides for sliding doors. Hang doors.
- Install shelf fasteners.
- Install shelves and other fittings.
- Decorate the hats of confirmers.
Thus, you can independently make a corner cabinet, following the instructions for preparing materials and assembling the product. After choosing the cabinet configuration, it is important to correctly draw up a drawing and manufacture the product according to the indicated dimensions.


