Finishing the foundation with basement siding, facade panels and other materials. Facing the basement of the house - finishing options with various materials Sheathing the foundation of the house with metal corrugated board
The construction of any building always begins with laying the foundation. This is an integral part of construction work, without which it will not be possible to achieve structural strength and balance.
Most often, the foundation rises above ground level by several centimeters, and sometimes even meters. This part is called the base. A bare concrete wall looks unsightly from an aesthetic point of view, so designers recommend decorating it.
Installing panels on the basement of the house
For decoration, there are many different materials that differ:
- price;
- quality;
- operational abilities;
- physical and technical characteristics.
Before you start construction works, namely laying the foundation, you need to think in advance about what type of material you would like to finish the basement of the building. In this case, one should take into account the features of the exterior, climate and financial capabilities.
In addition, it is necessary to know and clearly understand why exactly finishing with facing materials is needed: is it just an aesthetic whim or important detail designs?
For most people, the exterior design of the house is one of the important points in its construction. Such nuances are negotiated in advance with builders, designers and architects.

Covering the plinth with decorative tiles
However, few people know that the plinth lining is not only decorating cold, sloppy concrete. Finishing work initially has a completely different purpose:
- Protection of the foundation from damage. Fungus or mold colonies can grow on concrete over time. Also, the base is not protected from corrosion and erosion. Constant rain, snow, frost or heat contribute to the appearance of cracks, splits, which in turn threatens the integrity of the building.
- Contamination protection. The ecological situation in the world contributes to the fact that acid rain falls, and polluted air contains elements that destroy even concrete. If the base is often susceptible to such pollution, then very soon it will begin to collapse without the possibility of recovery. The result will be irreparable destruction of the house. Facing saves the foundation from such processes.
- warming function. Despite the fact that the basement is much lower than the floor of the living quarters, its excessive cooling contributes to lowering the temperature in the house. This is due to the fact that the concrete instantly absorbs the cold and spreads it vertically along the walls. Even an insulated floor cannot always prevent this process. At the same time, huge financial resources are spent on heating. However, this has little effect. In addition, due to exposure to cold, erosion processes can begin or mold can grow, for which cold and dampness is an ideal environment for existence.
- Protection from external influences. The strength and durability of concrete, brick and any other foundation is affected by weather and atmospheric conditions. Ultraviolet radiation gradually destroys the structure. Negative influence Strong winds, frosts, excessive air humidity, etc. also have a negative effect. Facing materials protect against such factors, which, if necessary, can be easily replaced. With the base, the situation is much more serious.
Based on the above factors, we can conclude: plinth finishing is a must. No builder can guarantee the strength and reliability of a building without finishing.
Plinth cladding options
To prevent the destruction of the foundation and to ensure comfortable conditions living in a house, the basement must be finished with facing materials. You can choose the lining of colors and textures that match the rest of the materials of the building.
There are also special wall insulation systems. Can pick up protective covering against corrosion, erosion, fungus and mold.
If you do not know what type of lining fit better Anyway, consult with a specialist. The architect or builder who is building your home is competent in this matter.
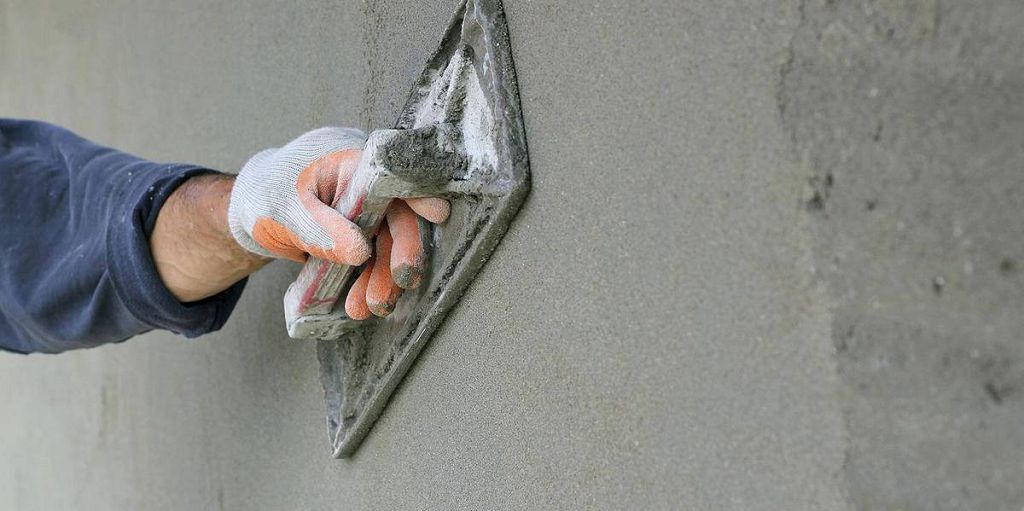
Cladding option No. 1: Plastering or painting
The most popular method of processing the basement is plastering. Its fame is associated with availability and reliability. A layer of plaster strengthens, decorates and protects the structure from impact. environment.

Plastered house plinth
Material Features
In order for the plaster to perform its function, it is necessary to follow the rules for its application:
- The level of protection and thermal insulation depends on the thickness of the layer. The thicker the layer, the better.
- To make the finish durable and moisture resistant, apply a cement base before plastering.
- The coating will be uniform when applying two layers. As a final coating, use decorative plaster.
- Reinforcing the structure will help to avoid cracking and falling off the top layer.
Important: Classic mortar, cement-sand, is best suited for lining the gap. From above, apply a composition intended for decorating the facade.
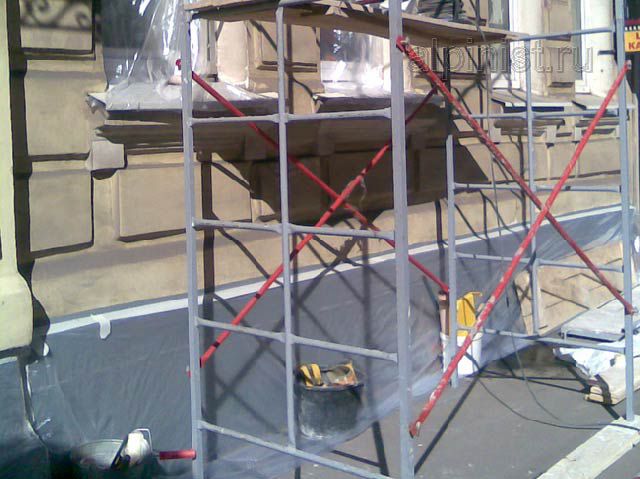
Installation

Plastering the basement of the house
| Step-by-step instructions for plastering the plinth | |
|---|---|
| Free the basement gaps from excess layers and remove dirt and dust. Also get rid of oil stains. |
| Treat a clean surface with a primer. |
| Stuff plaster mesh. For 1 sq. m must be at least 16 mounts. It will be better if you make 20. Use dowels with wide caps. |
| Screw in the screws and fasten plumb lines to them. The distance between the screws and the corners of the wall is 30 cm. Pull the thread in vertical position on loose screws. Connect the screws with horizontal threads. Place the threads at a distance of 2 cm from the wall. |
| Make beacons and fix them with cement mortar. Step - 1.5-2 m. Distance to corners - 30 cm. Most reliable material lighthouses is a steel profile. |
| After the cement has set, apply cement-sand mortar between lighthouses. For sketching, use a bucket, level the protrusions and depressions using the rule. Leave to dry for 6 hours. |
| Remove the beacons and rub the surface with a plaster float. |
| Cover the plinth plastic wrap. Leave to freeze for 2 weeks. Moisten the surface with water once every 2-3 days. This will help ripen. |
| Prime the base and cover it with decorative plaster. |


Advantages
Plaster for cladding is chosen for the following reasons:
- Relatively low cost materials and installation work.
- Installation is done by hand: no special tools and equipment are required.
- Simple repair.
- Reliable coverage.
- The possibility of applying decor.
Flaws
The negative features of plaster include:
- Low level of strength compared to analogues.
- Short service life.
- Low thermal insulation.
- Water and moisture permeability.
- Strength deteriorates over time due to freezing and thawing.
- It is impossible to carry out installation if direct lines fall on the structure. Sun rays. Negative temperatures and precipitation are also restrictions for the work.
Since plaster and paint peel off quickly, you need to constantly monitor the condition of the coating on the facade and regularly make cosmetic repairs.
On a note
- You can cover the base with several layers of plaster yourself. To do this, you do not need to perform any preliminary work. Enough to buy plaster desired color and cover it with concrete in several layers.
- If for some reason you don’t want or can’t plaster the plinth yourself, hire a master painter-plasterer. A professional to do this work instead of you efficiently and quickly. However, don't forget that good specialists take it cheap. But the result is worth it: the base will be durable and protected from all types of damage.
- If you are not satisfied with the color of the plaster, then after drying, you can apply two layers of facade paint on top. To date, there are more than 50 shades with which you can decorate the foundation. In addition, special decorative plasters of different colors and textures are sold in building materials stores.
- An interesting option would be to decorate the facade with homemade stones. They can be molded from ordinary concrete. To do this, form the desired shape of the stones with a spatula and let them dry. Then cover the artificial stones with paint or plaster. This design will be cheap, but it will look just great.
Facing option number 2: Use of natural and artificial stones
To make the facade look elite and rich, make stone cladding. Each stone has its own advantages and features. Experts advise to consult with builders or architects before buying, since in a particular case one or another stone may not be suitable. Take into account: the strength of the foundation, weather conditions and the size of the house.
Types of stone

Types of stone for plinth cladding
In addition to choosing between artificial and natural stone, decide on the texture. The stone comes in the following textures:
- smooth;
- polished;
- chipped;
- sawn.
Peculiarities natural stone
Natural stone has various forms: rectangle, square, circle, custom (custom made).
Also has different thickness: 0.5 and 1 cm.
This thickness is determined by ease of installation and durability of the structure. With increasing thickness, the stone becomes heavy and there is a risk of delamination.
To the positive features natural stone relate:
- High level of durability.
- The surface is made using special equipment. Therefore, the coating will be uniform without additional work.
- Long service life: more than 10 years.
- Installation can be done independently.
The complexity of the finish is determined by the size of the stone and the tools to work with. You also need to consider that stone is a heavy material. Therefore, not every surface is suitable for cladding. In cases where the surface cannot withstand the stone, it must be strengthened.
How to prepare the surface:


Installation of stone on the reinforcing mesh
Important: Tight fastening of the mesh is provided by metal plugs. Screw them into the grid.
After strengthening, level the surface with plaster or concrete mortar. remember, that concrete mortar cannot be smoothed out with sandpaper.
For facing you will need the following materials:
- building level;
- concrete mortar;
- putty knife;
- tile cutter.
Cladding tips:
- Work from the bottom up.
- First of all, lay out the corners, fasten them tightly.
- Create additional insulation with the following materials: polystyrene foam, extruded polyurethane foam, polystyrene foam, mineral wool. This is necessary because the stone itself is cold.

Facing with artificial stone
Natural stones look noble, but have significant drawbacks: big weight and high cost. Therefore, if you do not pretend to be aristocracy and royal nobility, artificial materials may well replace natural ones. The main thing is to choose the right shape, texture and type of attachment.

Finishing the plinth with artificial stone
Surface types:
- smooth;
- torn;
- structural;
- embossed.
Used for cladding: shell rock, granite, sandstone, etc. (see table below).
A feature of artificial stone of different structures is the possibility of creating an individual facade of the house. For such purposes, a stone with a torn structure is most often used.
Finishing with artificial stone is practically no different from cladding technology natural material. Recommendations for leveling and insulation are similar.
Technology differences:
- There is no need to insulate the surface, since artificial material has less weight.
- You can finish any surface when closing the insulation layer with materials such as drywall, plywood or OSB. Stone is mounted directly on top of these materials.
For installation, concrete mortar and ceramic adhesive are used. A durable and fresh surface is ensured by applying a primer layer.
When finishing decorative stone the following works are carried out:

features of natural and artificial species stones
Find out the features of the most popular stones from the table below:
| Coating type | Material | Photo | Advantages | Peculiarities |
|---|---|---|---|---|
| A natural stone | shell rock |  | Low cost, high strength, visual appeal. | Heavy weight, difficult to install. |
| Limestone |  | Affordable price, decorative effect, choice of shape, color and texture. | Heavy weight, difficulties in operation, the risk of making the foundation heavier. | |
| Granite |  | Exquisite and rich appearance, resistance to cold and heat. | High cost, heavy weight, risk of foundation collapse. | |
| Marble |  | Durability, aristocratic and rich appearance, 100% damage protection. | High cost, complexity in laying and operation, heavy weight. | |
| Gabbro |  | The appearance and color resembles the starry sky, high strength, protection from cold, heat and moisture. | Exorbitant cost, heavy weight, difficult to operate. | |
| labradorite |  | One of the most beautiful facing stones. Durable, reliable and weather resistant. | The material is more expensive than all the others. It is difficult to lay it, it weighs a lot. | |
| artificial stones | Panels "Canyon" |  | The panels are not much different in appearance from natural stone, but are much cheaper. They are durable, there are options with insulation. | They are attached to special iron hooks, which is very convenient. |
| Adhesive tile |  | The panels are lightweight and easy to use. There is a choice of different colors and textures. | They are attached with glue, so they do not always fit. It is better to choose models that are attached to iron hooks. |
Option number 3: Brick or brick finish
Brick or its imitation is a classic decoration. The material is suitable for any type of exterior, without making the structure cheap.
Brick can be combined with any type of wall and roof decoration, as it looks equally neat and harmonious with all building materials. A special substrate is made under the brick, which serves as insulation for walls and floors in residential premises.
Benefits of a brick
The positive aspects of finishing the basement with bricks:
- High degree of structural strength.
- Possibility of self-assembly.
- Care is not needed.
- Service life - more than 10 years.
- High maintainability.
How to choose a brick?
If the foundation is designed for heavy loads, choose the usual building brick. If the building is on a columnar or strip foundation, use facing brick with light weight.
Properties that a good brick should have:
- Low coefficient of moisture absorption.
- Frost-resistant, tolerates low temperatures. Frost resistance is determined by the endurance of thawing and freezing cycles.
- High tensile strength, since the plinth accounts for part of the weight of the walls.
Preparatory work
The plinth is finished with bricks at a distance of 2-3 cm from the external wall insulation. This creates ventilation and prevents the accumulation of moisture. Normal ventilation will also be facilitated by mortar-free seams, which must be left in the first row.

Finishing the plinth with bricks
Facing and load-bearing walls are connected in two ways:
- Placement of galvanized anchors. One end is attached to bearing wall, the second - between the rows of masonry.
- Fixing a dowel tied with wire. The ends of the wire are attached between the rows.
Important: Each 1 sq. m must have at least 5 ligaments with a bearing wall. Arrange them horizontally every 50-70 cm, vertically - every 3-4 rows. In the openings, make a tighter strapping.
Solution preparation methods:
- Cement and sifted sand 1:4.
- Cement, sifted or river sand, limestone dough 1:7:2 or 1:8:2.
Add water and stir. Make balls from the resulting mixture: they will not crumble in your hand.
The cement sets fairly quickly. Therefore, prepare the solution in small batches.
Display features
Accuracy and accuracy in the formation and jointing of seams are 2 basic rules for laying a plinth with bricks.
Consider the methods of facing over the foundation.

Chain ligation masonry
Lay out 2 rows of bricks for hatching inner wall. Align the height of the masonry with the help of brick scraps. They are mounted above the rows laid end to end to the bearing wall.
Use a multi-row dressing system. Eliminate the dressings after every third row.
Pay attention to the condition of the foam concrete: if it is poorly dried, after a while the bonded brick, sandwiched in the rows, can be cut off. This is due varying degrees shrinkage of bricks and foam concrete.
Important: So that shrinkage does not stop, foam concrete blocks must lie down for some time before starting construction work.

If the final surface will be laid out with decorative bricks, start with the installation of a facing verst.
1st row is laid with a poke, the 2nd and 3rd - with a spoon.
If using halves of finishing bricks, lay them with a poke.

Laying in reverse
This method differs from the previous ones in the order of installation. First, a row is laid exterior finish, then an inner verst and backfill are constructed.
In this case, perform dressing with bonded masonry. Since the bonded masonry has a height of two rows, the dressing is half included in the finishing row.
The main advantage of this method is the reliable fastening of internal and external walls.

- When applying the mortar, make sure that it does not reach the edges of the brick.
- Wipe off excess solution.
- After laying several rows, wipe the walls with a damp cloth.
Features of the types of bricks are presented in the table:
| Coating type | Material | Photo | Advantages | Peculiarities |
|---|---|---|---|---|
| natural brick | hyperpressed |  | Available different sizes(Russian, American). Strong, durable. | The heaviest option, does not absorb water well. |
| Silicate |  | More economical option. It has a light weight, easy to operate. | Fragile in quality facing material, poor hydro and thermal insulation. | |
| Ceramic |  | The best option for cladding among all types of natural bricks. It has an internal filled structure, light weight and high strength. | The material is easy to use, rather high price. | |
| artificial brick | Clinker tiles |  | For technical and physical characteristics not inferior to natural brick. | Light weight, easy to work with material. |
| Plinth panels |  | It looks like a real brick, you can order a panel with insulation. | It has a polyurethane foam or polystyrene base, easy to install and operate. |
On a note: If you decide to finish the plinth with a brick or “brick-like”, make a separate strip foundation for facing material. The brick is laid with a slight gap from the wall, and the cladding foundation must be attached to the main foundation.
Option number 4: Siding as a finish
It happens that in no case can brick and natural materials be used to finish a particular building. At the same time, plaster may not quite satisfy aesthetic needs. In this case, it is best to give preference to basement siding. It comes in the form of panels and mimics the pattern, color and texture. natural material. Moreover, siding can finish not only the base, but all the walls completely.

Plinth siding options
On a note: In order for siding walls and the same plinth to look harmonious, it is recommended to select material of different colors for their decoration. As a rule, darker shades are suitable for the plinth, and light-colored siding should be tiled on the walls.
The material consists of the following components:
- polyvinyl chloride;
- fiber cement;
- polymer sand mixtures, etc.
Types of siding
| It is mainly used for roof lining. Can be either solid or perforated to ensure better ventilation roofs. |
|
There are three subtypes:
|
|
| Such panels are used exclusively for vertical mounting. | |
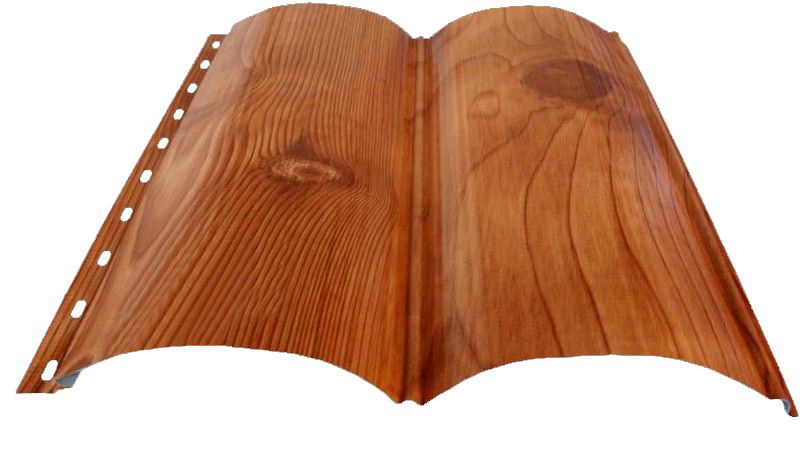
| Metal siding "under the bar". This type of siding outwardly imitates a round log and is similar to wooden lining block house type. |
Metal siding "under the beam" |


The siding is equipped with special panels for fastening. This leaves a gap between the cladding and the wall. It should be filled with insulation or shell rock. Thus, the structure becomes more durable and the level of thermal insulation of the house increases.
In hardware stores, you can pick up any color, texture and shape of building siding panels. In addition, there are original variants imitating not only stone and brick, but even wooden beams, roughly chipped shingles, ship planks etc.
Benefits of siding

How to clad a plinth with siding
Siding is chosen due to a long list of positive features:
- Simple installation without calling specialists. Details are connected by locks and latches. Fastening - screws and nails.
- The panels do not lose their original appearance: they do not deform and do not fade.
- The surface material does not lend itself to peeling and delamination.
- Chips and scratches do not form on siding panels. They are not afraid of wind pressure and blows.
- Designs are durable: they serve more than 50 years.
- The material withstands temperatures in the range from -50 to +50 degrees, is not affected by ultraviolet rays.
- The panels look like natural materials.
- PVC does not rot or corrode.
- The material is not interesting for insects, small rodents and other pests.
- Easy care: once a year it is washed with water and detergent.
Installation
Instructions for finishing work in the basement area using siding:
| Clean the plinth, remove protruding parts, repair cracks and other defects. |
| Attach the profile strips to the wall. Use dowels for fastening Fix the bottom bar horizontally. It should be located at a distance of 2-3 cm from the ground. The top bar is attached at the top. Parallel to the upper and lower bars, the middle one is attached, exactly in the middle. |
| Lay down a layer mineral wool and cover with a windscreen. You can use polystyrene foam. |
| Make a starting strip along the bottom bar. The strip must run in a horizontal position. Measure the distance between the basement and the wall. These data will be the dimensions of the corner bar. Attach the corner bar to the corner that is to the left of the structure. |
| Trim the panel along the left edge. Then insert it into the starting bar and slide it into the corner. Leave a gap of 6-10 mm. When fixing, do not tighten the screws to the end by 1-2 mm. |
| Then do everything in the same way to the corner. Before the corner, cut the panel and insert it into the starting strip. Dock with the previous part and fix. Put the bar on the corner and fix it. |
| Close the top edge with a cornice. You can also use the finishing bar for this purpose. |


Installation of ebbs for finishing the plinth
First of all, it is worth noting that the base can have a different location. The most successful option is the one in which the foundation protrudes slightly forward from behind the walls, forming a small step. This arrangement is ideal as the plinth is protected from excessive moisture, dirt, etc.

Installation of ebbs
However, it must be remembered that the obligatory stage of facing is the installation of ebbs. Otherwise, the finish will not make any sense.
Types of low tides
There are such types of ebbs depending on the material of their manufacture:

Installation

Drip fasteners to protect the cladding
Step-by-step instructions for installing a low tide:

Important: To prevent water from lingering during the drain, bend the side of the visor facing the wall up and the opposite side down.

Important: If you hit the plastic with a hammer during the bend, spoil the design. Lay on top of it rubber gasket. Felt can be used for the same purpose. Leave one end unfolded.

Gloss black option

Video instruction for installation of ebbs on the plinth
Consider the following nuances when installing socle ebbs:
- To avoid distortions, be sure to mark up before attaching to the foundation.
- Flush joints with frost-resistant sealant.
- Cut out the outer and internal corners from a single plank.
- The width of the tide should be no more than 50 cm.
- If the house is wooden, take care of reliable waterproofing: Do resin or copper plating.
There are a lot of options for finishing the basement and ebbs. The main thing is to reasonably calculate how much building material is needed and which cladding will look most advantageous, while approaching the type of structure. You also need to assess the financial and physical capabilities. Initially, it is better to entrust the work to specialists in order to prevent annoying mistakes due to inexperience.
The foundation requires protection even more than the facade of the building. The load-bearing structural element must not only be strong, but also retain strength for a long time so that the structure can last a long time.
An affordable and quick option for finishing and protecting the basement is corrugated board. This material will not only protect against negative impacts, but also give a more attractive look.
Previously, corrugated board was used only as roofing material for industrial buildings or warehouses. All because he had a completely unattractive appearance and one shade. Modern technologies metal processing allows not only to paint the material in different colors and shades, but also to imitate the laying of brick or stone, as well as wood.
Now it is also used in private construction for:
- fences and gates;
- facade cladding;
- roof coverings.

But when choosing a profiled sheet, you need to consider that for various works There is different types material.
Profiled sheet characteristics
This method of cladding is gaining more and more popularity due to a number of advantages:
- High levels of strength.
- Resistant to temperature shocks and moisture.
- Inertness to biological organisms. Mushrooms and mold do not develop on the surface, and even rodents cannot spoil it.
- Fire safety.
- Duration of operation. Service life starts from 15 to 25 years, with correct installation. On some resources on the Internet, more numbers are indicated, but given the conditions of operation on the basement surface, you should not count on such indicators.
- Durability of the decorative coating.
- Convenient and fast way installation. The corrugated board is installed on the frame as a ventilated facade. Knowing all the rules for the construction of such a design, each owner will be able to sheathe everything with his own hands.
- Large selection of colors and textures.
- The presence of additional elements will help to make the facing structure more protected from atmospheric precipitation. In addition, the cladding looks complete and attractive.
- Before installing corrugated board, the base is insulated suitable material which will protect against heat loss in the room and make the floors warmer.
- The material is easily adjusted to the desired dimensions with the help of improvised tools. True, the place of processing requires the application of protective anti-corrosion compounds or simple staining.
- Affordable cost. The price of flooring is different and depends on, but still it costs much less than other sheathing material for the base.

Care
Another advantage of this material is ease of maintenance. You won't have to put in any special effort. If the corrugated board was not damaged before installation and in the process of facing, then it is enough to check once every 5 years whether cracks have appeared and whether the decorative coating has peeled off.
The material has bends, which means that dust and dirt accumulate on their surface. Used for cleansing soap solution and a soft cloth. Do not use detergents with chlorine or abrasives.

This cleaning method will damage the polymer layer that protects the skin from corrosion. As a result, the material will lose its attractiveness and will no longer be able to protect the foundation from the surrounding negative impact.
Which profiled sheet to choose for sheathing the foundation of a private house, cottage
- Bearing flooring - has high rigidity, thanks to the impressive size of won and stiffeners. It is made of metal with a thickness of 0.7 to 1 mm. It is used for floors or fixed formwork, as roofing material. Not suitable for plinth sheathing, has a high cost and excessive strength.
- Wall profiled sheet is used for cladding walls and plinth, construction of fences. It is quite flexible, therefore it requires competent installation of the frame. To create such a corrugated board, choose a metal with a thickness of 0.4 mm. The wave has a lower height than the previous version, in addition, there are no additional stiffeners. Prices for wall view significantly lower than the carrier.
- The generic view is used for both roofing works and for wall decoration. It is marked NS. The thickness of the material can be in the range of 0.4–0.8 mm. There are options with different wave heights. Because the universal view flooring is suitable for different jobs, then it occupies a central position, both in price and in strength.

Overview of sheathing materials
After evaluating the information above, we can say with confidence that a wall or universal type of corrugated board is suitable for finishing the basement of a private house. But here the height of the wave is also taken into account. Now consider the wave size options and which one is better to choose in a particular case.
Professional sheet C8
Such a marking on the material means that it is a wall profiled sheet, with a wave height of 8 mm. It is used for lining the basement only if a little snow falls in winter or the owners clean it regularly. It is suitable for cottages and residential buildings in which they live all year round.

Professional sheet C10
This option is also wall, only with a wave height of 10 mm (1 cm). Its rigidity is slightly higher than that of the previous version, but still you should not use it for giving. The owners of such houses rarely appear in winter, which means that a lot of snow accumulates near the walls. These sheets will not be able to withstand the load, as a result, dents will appear.

Professional sheet C20
This wall decking has a wave height of 20 mm. Such rigidity is enough to withstand both strong heaving of the soil and a large accumulation of snow near the wall. It is perfect for a wooden cottage and a permanent residential building. The cost of this option is slightly higher, but the owner will not worry about the skin after severe frosts or snowfall.

Professional sheet C21
The option is not much different from the previous one, except for the wave height, which is 21 mm. It has the same characteristics and approximately the same cost. You can finish the walls, basement, and build fences.

What tool is used to cut profiled sheet
If during the installation process there is a need to trim the sheathing material, you need to do it correctly. The main thing is not to damage the polymer coating, which protects the flooring from the spread of rust. Not all tools will do the job well. Therefore, consider the most common options.

And one more important nuance- after trimming, the processing site must be covered with paint or an anti-corrosion compound. This will help protect the material from premature failure.
Angle grinder (grinder)
Professionals do not recommend this method of cutting material at all. During processing, the corrugated board heats up to critical temperatures, as a result, both the metal and the polymer coating burn out. It is impossible to protect such a cut, therefore, as a result, edge corrosion begins at a distance of 5–6 mm from the cut line.

In addition, when the grinder works, they form sparks. They scatter in different directions, so they can get on the polymer coating much further from the processing line. Influenced high temperatures the paint is damaged. There is a point damage that grows over time.
Hand circular saw
Such a tool can be used if you install a special circle. Its advantages over the previous option are as follows:
- A lower rotation speed, which means that the metal does not heat up.
- The cut will be even, but the work takes practice.
- Large quantities of materials can be processed quickly.
- Circles are sold in all hardware stores and are inexpensive.

In the process of cutting, you need to be very careful, because small metal filings are formed, which often cause damage to the skin, and sometimes to the eyes.
Electric jigsaw
This option will allow you to cut elements different shapes and fit under right size. Before cutting begins, a drawing is made on a profiled sheet and measurements are carefully taken. The edge is neat.

But this method is not suitable for material whose wave height is higher than 20 mm. It is impossible to make a beautiful and even cut, often the metal simply breaks.
Electric scissors
This is the most popular way to fit a profiled sheet among professionals. Scissors are:
- cutting;
- knife;
- slotted.

The last option is the best. A special head helps to make a smooth cut without flaws, chips or bends. Scissors are a good option for cutting corrugated board, but their high cost does not allow home craftsmen to acquire a tool. Yes, and it’s not worth buying if a person will not be engaged in finishing work with corrugated board in the future. Such tools can be rented at a hardware store.
Finishing the foundation of the house with a professional sheet with your own hands
It is necessary to close the foundation of the negative impact of the environment. But in order for everything to be done qualitatively, it is necessary to select right time performance of work. It is better to sheathe the base after:
- Equipped . Between the blind area and the bottom edge finishing material ventilation gap must be left.
- Created waterproofing on the foundation.
- Facade cladding completed. During the work that will be carried out when finishing the walls, the corrugated board is easily damaged.

In the case when laying insulation is provided under the corrugated board, two processes are performed simultaneously. But be careful, the section of the basement, which is located in the ground, is insulated along with the creation of a blind area. The upper part is left until the facing.
Be sure to do all the finishing work and leave until the warm season. It is desirable that the ambient temperature does not fall below 5 degrees Celsius.

Begin facing work with the preparation of the base:
- Eliminate areas that are crumbling or flaking.
- Removes dirt and grease stains.
- Treated with soil.
Waterproofing and insulation
Since the foundation is the part of the building that is subjected to the heaviest load, it must be protected from both moisture and heat loss. Because concrete surface the plinth is covered with waterproofing in the form of:
- coatings;
- plasters;
- films.
The material must fit snugly to the surface in order to reliably protect against moisture. In some cases, I run the lower edge of the waterproofing under the blind area or decorative material with which it is closed.

As a heater, a rigid material is chosen that can withstand severe loads. If it will basalt wool, then it is also completely covered from above with a waterproofing membrane.
Frame preparation
As a crate, a wooden beam or a metal profile is used. If the owner has decided to make the frame out of wood, then it is treated with antifungal and water-repellent impregnations.
Such activities will significantly increase the life of wood, which is important because corrugated board lasts a very long time. The metal profile does not require additional processing. It is cut into elements of the required length.

It is important to choose the right way to install the frame. If the flooring is mounted vertically, then the elements of the crate are mounted horizontally, and vice versa.
For heavier linings, it is also necessary to fix the dressing elements, which will make the structure strong and reliable. This is done in the process of sheathing the basement with porcelain stoneware or basement metal siding.
Organization of the crate
In order to properly make the frame, perform the following steps:
- Perform markup. A metal profile or a wooden beam is fixed every 60-70 cm.
- Holes are made in the base with a puncher, and brackets are installed. They are fixed with dowels. If there are irregularities on the base, use brackets with movable elements, with the help of which they correct the horizontal and vertical.
- Now perform waterproofing and insulation of the basement. Both hydro and thermal insulation should not have cracks or gaps, because the material is put on the brackets and pressed tightly against the wall.
- The protective layer is fixed with dish-shaped dowels.
- After installing the brackets, fix the guides. At this stage, the building level must be used. If the design is skewed, then the strength of the cladding decreases, in some cases even becomes less attractive.

In the case when it is necessary to leave ventilation for underground ventilation, an additional frame is installed under the ventilation windows. It is calculated so that the hole is located at a height of about 20–30 cm from the lower edge of the cladding. At this height, rainwater will not enter the ventilation.
Features of mounting the canvas
Fix the corrugated board in two ways. One of them is chosen depending on the material chosen for the frame.
- Self-tapping screws - suitable for both wood and metal profiles. The bond has weakened over time. But if one or more parts are replaced, the structure can be easily disassembled and returned to its original form.
- Rivets are chosen only for a metal frame. This option is more reliable, there is no chance of loosening the mount. The main disadvantage is the impossibility of carrying out repair work or use of facing material after dismantling.
Before starting installation, holes are cut out in the sheets for ventilation windows. Install corrugated board from the corner of the base. Each new sheet is laid on a whip for one wave of the previous one. The flooring is fixed through one wave. Fasteners are not tightened to the stop. Be sure to leave a compensating gap.
Metal expands and contracts under the influence of high and low ambient temperatures. Fix the fasteners firmly to the facing material not to be able to move freely. As a result, the skin is deformed.
Installation of vents
The gaps that were left in the profiled sheet for ventilation windows are closed only when the foundation is completely sheathed. For this, plastic grids are used. They are fixed with screws or dowels to the frame, which was equipped specifically for such a window.

Final work
At the final stage, additional elements are installed that will prevent the ingress of atmospheric moisture under the facing material.
- Low tide - is installed on the upper profile of the frame under the corrugated board. Fixed with self-tapping screws, rivets. This element removes moisture that flows from the wall of the facade of the house. The detail is selected to match the lining of the basement or walls of the house.
- External and external corners - seal the corners of the building, where moisture can also enter. Color solution the owner chooses, focusing on his own taste and combination with and facade.
It is not difficult to complete the facing of the foundation of a house with the help of corrugated board, and most importantly, it is inexpensive. Because the popularity of the material is increasing every year more and more.
Finishing the foundation with panels is far from the only way decorate and protect this part of the building, but compared to other options, it is more practical and faster. To evaluate the benefits, to study the main features of using this material, to learn how to install it yourself, we will try in this article.
Finishing materials for the foundation - market diversity
Speaking of finishing the foundation, of course, it does not mean the part that is in the ground, because at that level there is enough insulation for protection, and decoration is not required at all. It's about about the plinth, just this small strip at the bottom of the house needs protection from environmental factors, and, of course, it must be decorated, because the grayness of the concrete does not make the house complete and neat. What can be done to cover the foundation?
There are many materials today, in addition to the simplest and most inconspicuous wall plastering. You can work a little and you will get great results. Finishing materials for the foundation can be natural and artificial. The first include stone and brick, the second - fake diamond, various kinds of tiles, siding and panels. The brick looks already somehow old-fashioned, so it is rarely used, probably when the blocks are given for free.
Natural stone, on the contrary, is very expensive, but unusually beautiful and representative, so you can see it only on elite houses. Moreover, finishing them is not the easiest process, it is a very heavy material, and often simple glue is not enough, it is attached to anchors or special fasteners. Artificial stone is lighter in weight compared to its natural counterpart and more affordable, sometimes it is even made by hand right on the construction site. Ceramic tiles are not always as durable as the basement of the house requires, and something like porcelain stoneware already significantly lightens your wallet.
Therefore, the most popular options were siding and special panels for the plinth. Finishing the foundation of a house with siding has been the leading method of protection and decoration for some time, this material is light, affordable, has a variety of colors and textures. In addition, the artificial material from which this finish is made is almost not subject to aging even under the influence of all atmospheric factors known to nature. For a long time this was the most popular type of finish, but now a competitor has appeared - facade panels. In another way they are called basement siding, what is the difference, we argue.
Finishing the foundation with panels - the advantages of special material
All the features of this type of siding come down to reducing the suffering of the basement, because it is not only exposed to wind, sun, moisture, but also, being the part that holds the whole house on itself, undergoes shrinkage, seasonal temperature changes, cracks, exposure to melt water and snow drifts in winter. Any decorative covering of the foundation suffers and quickly becomes unusable, requiring renewal.
Plinth siding provides for these nuances and is ready to challenge all factors, reliably protecting the foundation throughout the year. Outwardly, it is also attractive, like ordinary siding, has many options for textures and colors, and can imitate brick and stone. Mechanically, such panels are stronger, because they are thicker, moreover, they are quite hermetically attached and protect not only from moisture, but also from the consequences of its influence (mold, fungi, etc.).
Facade panels are great for finishing any other surface where reliable and durable protection or decor is needed. They are more convenient to install than conventional siding because they are presented in the form of blocks rather than narrow strips. This is also due to the increased protective function.
Decorative sheathing of the foundation with socle siding
To maximize the effect of protection and durability, you should keep in mind some of the nuances that you need to take into account even before installation. To begin with, seal all entrances and exits from the house through which communications pass, for example, pipes or an electrician. Use a crate for mounting panels, preferably metal. If you want to insulate the basement, then in addition to thermal insulation, do not forget about waterproofing.
It should be clarified that the panels cannot be used as a floor or ceiling finish. Installation of basement siding should be carried out in normal weather conditions, avoid severely high or low temperatures and humidity. It is impossible to work at minus indicators of a thermometer at all. For fastenings, use screws that will not rust, usually these are galvanized options.
A special situation is big wall, whose geometric parameters are about 6 m in length or width, or even more. It is possible to cover such an area with a solid carpet of panels, but even this material can change slightly seasonally, and if its micromovements are not foreseen, the whole picture may warp over time. It is recommended to make expansion joints, which are decorative narrow strips that are laid between large sections of mounted panels. By separating large areas, the seams create a certain margin for the expansion and drying of the material, without showing this process and eliminating the consequences.
Finishing the foundation of the house with siding for the basement - valuable tips
Now that you are armed with the knowledge, we can begin the work of installing the panels on the foundation.
Finishing the foundation of the house with siding for the basement - a step-by-step diagram
Step 1: Lathing
The installation of the crate can be described in a separate large article, which can also be found on our website. Let us recall the main conditions. Use the level more often so that the base of the foundations is even with us, the aesthetics of the subsequent finish depends on this. Purchase only a metal crate for this part of the house, because we remember what loads from the elements it will have to withstand. If there is still a heater, then the rail should be about 50x50 mm in size, if it is not there, then 25x25 mm is enough. Place the slats at a distance of 25 cm from each other.
Step 2: Installing the Starter Planks
So, we are faced with the task of fixing the initial bar, the outer corners and the J-profile. When installing panels, do not forget to make a small gap from these strips, usually 5 mm is enough. When fixing the starting bar, you need to place screws every 30 cm. Screw them only into existing holes, do not make your own, this can cause distortions and other defects.. If such a plank does not completely cover the wall and you need to extend it with another one, then do not place it close to the first one, leave at least 5 mm between them. Sometimes a J-bar is used as a starting one, it imitates a side, making a border.
Step 3: Setting the Corners
The outer corners allow you not to join the planks, but simply cut them off, because they perform a separate decorative function, hiding the edges of the panels underneath. They are also attached to the crate with screws. Do not forget that during the entire installation it is not necessary to recess the screws, you should leave a small gap, providing for a seasonal expansion of the slats. And this must be done strictly vertically, the screw at an angle will eventually displace the panel and all auxiliary elements.
Step 4: Installing J-profiles
They are placed on the inner corners and in places where you need to create a contour, for example, building ledges, communications, openings. The inner corners are especially capricious, they can be uneven, then the picture will turn out, to put it mildly, sad. Therefore, do not be too lazy to measure everything with a level, and in case of violation, align the corners. A J-bar is also suitable as a final side.
Being engaged in facing the house, special attention must be paid to the finishing of the basement. Depending on the construction technology, it can act as a separate element or be separate part foundation that rises above the ground. Unlike the main wall, it has direct contact with the ground, which is why a lot of attention must be paid to finishing this area. It may well be possible to finish the basement with your own hands, but at the same time, experts recommend taking into account some points and nuances.

Before studying the materials and technologies for finishing the basement, it is worth deciding on its type. So, depending on the location of the foundation to the outer plane of the wall, the following main types are distinguished:
- Speaker. Such a foundation is poured for thin walls, so you should first worry about arranging the drain. Otherwise, water will accumulate on the ledge. As a result, it will lead to destruction.
- One level. IN modern construction this technology is rarely used, since it will be too difficult to achieve the desired level of waterproofing in the process of exterior decoration.
- sinking. A common option that will be easy to protect from the effects of natural factors, since it does not need a drain. Facing in this case will be less deformed from snow and rain.
Decorative plaster

A fairly common method of finishing the foundation, moreover, it does not require special knowledge or abilities. Work is performed in the following order:
- Cleaning the surface of the foundation from dust and dirt.
- Applying a deep penetration primer.
- In the presence of clearly defined irregularities, it is recommended to fix the reinforcing mesh. Suitable welded, woven or made of fiberglass.
- Applying a layer of decorative plaster.
- After complete drying, you can start painting.
Preferring decorative plaster, it should be remembered that this option is not suitable for finishing a protruding base. High loads on the material will soon deform the applied layer, and it will lose its attractiveness.
On a still wet layer of plaster, imprints of a pattern or pattern are applied, and structuring is also performed.

It is possible to veneer the plinth with both natural and artificial stone. Let's take a closer look at the natural version. It should be borne in mind that it has a lot of weight, so the finishing process will be quite laborious. Despite the complexity of the process, many decide to do it on their own. The order of work is as follows:
- Surface cleaning and priming.
- Selection of suitable elements in shape and size.
- Application of adhesive solution in a thick layer.
- Laying stone, starting from the bottom row. This will prevent the heavy stone from sliding down.
- Coating with frost-resistant and water-repellent composition.
It is also worth considering that the stone will add load to the foundation. Required to complete additional calculations to make sure that such a finish can be applied.

This artificial material in modern construction and decoration is very common. The list of its benefits includes:
- wear resistance;
- strength;
- resistance to temperature extremes;
- low rate of water absorption.
Due to the presence of the latter indicator, porcelain stoneware is insensitive to frost. To date, the hardware store presents a large assortment porcelain stoneware:
- matte;
- satin;
- polished;
- glazed;
- aged;
- imitating leather, stone and fabric.

Considering the process of finishing the basement with the selected material, it should be said that it is fixed either on the frame or with special adhesive solutions. Wireframe method provided for additional insulation. This method is more laborious, but you can also do it yourself:
- Foundation preparation: cleaning and priming.
- Metal slats with already existing special fasteners act as a frame. It is with their help that the slats are fixed to the base. As a result, a small gap is formed between the wall and the grate for ventilation.
- There should be a distance of 20 cm from the ground to the beginning of the frame. This will be enough to raise the ground in winter.
- A heater of your choice is inserted into the resulting gap. It is best to give preference to foam or mineral wool.
- With the help of kleimers, the frame is sheathed with porcelain stoneware slabs.
If we talk about adhesive solutions, then everything is much simpler here: glue is applied to the prepared foundation and the stone is fixed on top.
The use of cement mortar is prohibited, since in this case the stone will simply peel off in the cold.
Vinyl panels

Among budget ways plinth finishes this one is the best. The whole secret lies in a simple installation method: the elements are joined together in a tongue-and-groove way. The result is a durable surface. Thanks to siding, the foundation of the house will be reliably protected, as the innovative material has significant advantages:
- resistance to high and sudden changes in temperature;
- durability;
- low sensitivity to moisture;
- there is a wide range of colors and shapes of plates.

In most cases, vinyl panels are used when it is necessary to carry out external insulation. The algorithm of actions is quite simple and implies the presence of such processes:
- Waterproofing: the film is laid with an overlap of 10–15 cm and fixed with nails or construction tape.
- Installation of a horizontal crate. Metal rails are used. The step is calculated individually according to the following scheme: 1/3 of the panel length. In this case, the lowest bar should rise above the ground at a distance of 15 cm. The resulting gap should correspond to the size of the insulation plus 3 cm for ventilation.
- Laying a heat insulator and a vapor barrier.
- From the bottom of the crate, at the corners, the first plank (corner profile) is fixed.
- Subsequent panels are fixed to the starting bar and screwed loosely with self-tapping screws. A 3 mm gap should remain from the cap to the panel, since the material can change in volume under the influence of atmospheric phenomena.
- For a protruding base, a special ebb is installed on top.
The unique technology of siding production allows you to convey the texture of expensive wood, natural stone and other materials.
Ceramic tile

Clinker tiles can also be used as a facing material. On modern market building materials clinker tiles are very popular. The surface may be different:
- smooth;
- raw;
- imitate brick;
- imitate paving stones.
When finishing the basement of a house with ceramic tiles, the following work is assumed:
- Surface cleaning and leveling with special mixtures.
- Padding.
- Preparation of the adhesive composition according to the instructions on the package. Applying a 4 mm thick layer to the foundation.
- Start laying from the outer corner. Special attention give vertical seams that should not match. For the convenience of creating even seams, it is recommended to use special crosses, which are then removed.
- The final step is grouting the joints with special frost-resistant compounds.
To emphasize unity created design throughout the house, clinker tiles are used not only for decorating the basement, but also for the corners of the walls.
When applying the solution, care must be taken not to form voids. Otherwise, in winter, they will expand, and the tiles will fall off.
Other materials

In fact, the list of possible materials for decorating the foundation is several times larger. So it is possible to finish the basement of the house with glass, flagstone or ceramic fragments. For these cases, it is recommended to perform the process in this way:
- Surface cleaning and leveling.
- Carrying out calculations of the required amount of material, according to the allotted area for cladding.
- Priming of the base with concrete carbonate. Removal of excess cement on the foundation.
- Application of tile adhesive or cement (depending on the chosen cladding material). Apply it in stages.
- Fixing flagstone or colored glass to the prepared base. Secure with light taps to release air.
- Filling voids between large pieces with small broken elements.
- Seam cleaning.
- Coating the dried surface with varnish and installing a protective visor over the protruding part of the foundation.
Thanks to the finishing of the plinth, several problems can be solved at the same time: immediate protection, additional thermal insulation, as well as giving a complete look. Only the owner himself will be able to choose the best option, since the choice will depend on personal preferences and desires. It is not so difficult to do the cladding on your own, as can be seen from the above article.
Video
How to make a plinth tile finish, see below:
Photo


Modern finishing materials allow you to create a stylish facade in record time. Paneling the exterior walls of your home is quick and easy, and requires no special training. Finishing the basement of the house with siding allows you to achieve a unified style solution without spending time and effort.
Basement siding does not differ much from acrylic or PVC panels, the difference is in terms of strength and size of individual elements.
Material Description
Externally, siding for sheathing the foundation can be an imitation of decorative or natural stone, red or white brick, as well as certain types of wood. To apply the pattern on the panel, a ready-made cast is used, which makes it possible to achieve an ideal resemblance of the original pattern to the manufactured siding. If the work is done by hand, painting the panels in natural colors plays an important role.
Designers often recommend using siding not for one foundation, but for the whole facade. But at the same time it is necessary to correctly place the accents. For example, the base of the building can be finished with brick-like or stone-like panels, and the walls can be finished with ethnic-style material (wooden shingles). Despite the same marking of the siding material, you need to understand the difference wall panels from foundations. Vinyl products rarely exceed a thickness of 1.5 mm, but for basement work, this figure is already equal to 2.5 to 3 mm.
Finishing the basement of the house with siding imposes the following requirements on the material:
- high strength due to close proximity to destructive environmental factors;
- resistance to UV radiation. To do this, special additives are introduced into the polypropylene resin (feedstock) during the production process;
- quality finished products, confirmed by all necessary permits.
 Plinth panels - excellent base protection
 The combination of the above properties makes it possible to obtain a finishing material that is resistant to mechanical shocks and able to tolerate temperature extremes (from 50⁰C frost to 50⁰C heat) and sunlight.
When sheathing the foundation, panels of the following sizes are most often used:
- 470 x 1220 mm;
- 510 × 1265 mm;
- 470 × 1130 mm;
- 395 × 1140 mm;
- 520 × 1150 mm;
- 240 × 2440 mm.
Finishing the base of a private house with siding is profitable, fast and very convenient. The sheathing of such a foundation can last 50 years under the manufacturer's warranty and almost the same due to operation under normal conditions. DIY basement views siding is not only installed, subsequent care involves light rubbing movements with a soft sponge and soapy water.
The low weight of the finishing material does not make the foundation structure heavier - you can safely install any insulation under the panels with your own hands. 1 square meter finished finish weighs about 3.5 kg. For comparison: an artificial stone with the same volume weighs as much as 35 kg, and a facing brick - 190.
Preparing for sheathing
The load on the basement of the house in middle lane Russia is simply colossal, here and The groundwater, and melting snow, and heavy rainfall, and fluctuations in air temperature. Siding for the foundation is called polymer-based panels, the strength of which exceeds that of the material for facade decoration. If the master wants to do the whole range of work with his own hands, he must be well versed in the features of all types of products:
In addition to the main function of protecting the foundation, basement siding allows you to create a real work of art with your own hands. outer side Houses. Unlike plaster or wood, polymer panels last for decades.

Siding finishing is carried out in stages, while the very first steps of work are as follows:
1. Preparation of tools (hacksaw, level longer than 60 cm, self-tapping screws and dowel-nails, twine, chalk or pencil, tape measure, puncher or drill, grinder or grinder, pliers, hammer and screwdriver);
2. In addition to the main material, an auxiliary material will be required, provided by the standard metal profile(UD) or wooden beam (pre-treated with antiseptics), rolled heat and waterproofing materials;
3. An important step is to determine the perimeter that needs to be finished with siding. This value will be required to perform calculations - how many panels will be required to complete the entire job.
Important: when calculating the required number of basement siding panels, 10% must be left for unforeseen waste and damage.
4. If, upon completion of the siding, the foundation A there are pieces of panels left, they can be installed for decorative finishes gate, chimney or find other useful use for them.
Important: stock of material can be stored in a storage room in case of subsequent damage to the finishing areas.
5. Buying siding for finishing the basement with your own hands. In stores, these panels are called differently, but the common name is the facade panel. In addition to the panels themselves, you will need a starting bar, the total length of this bar is the perimeter of the base of the house. If there are protrusions on the base, you need to buy a decorative strip for the ebb device - rainwater drainage.
Important: with an asymmetric foundation (most often this is observed on a building standing on a slope), a starting bar for siding is not required.
For lining the basement, you will need a set of additional elements (corners, planks, etc.), which can be purchased immediately with siding panels. When installing do-it-yourself sheathing, all parts for fixing the panels must be "native", they cannot be replaced with improvised materials.
Basement siding installation
The ground floor of the house must be cleared of foreign objects, decorative elements and interfering objects. If the porch is dismantled, it is dismantled. screw foundation veneered on a hinged crate.
The first stage is a careful measurement of the base to evenly mask the starting guide. If an error is made at this stage of doing the work with your own hands, the appearance of the finished cladding will be unaesthetic.
To fix one panel vertically, you will need three horizontally fixed rails (metal profiles or rails). To fix the siding, dowel-nails are used, under which pieces of plywood or other auxiliary material. Mounting step - 40 cm.
Important: the entry of the nail into the foundation must be made at an angle of 90 °, otherwise the lining will subsequently deform and peel off.
 Profile - the basis for attaching basement siding panels
 The direction of work is from left to right. Mounted on the bottom rail with self-tapping screws start profile, step - 30 cm. A check of evenness by the building level is constantly required. starting bar should not reach the corner by 8-10 cm, because a corner element is fixed in this place.
The panel is placed on the lower chute and shifted to the left. Do not push the siding too tightly; be sure to leave gaps for thermal expansion of the material (2-3 mm). Self-tapping screws are inserted into the special holes in the panel, fixing it in place.
Important: a properly fixed panel should move a couple of mm in each direction.
When installing the next panel, you need to make sure that with its protrusions it goes straight into the grooves of the previous part.
The last cladding panel is carefully trimmed with a grinder or a knife; vinyl generally lends itself well to cutting. After installing the corner panel, you can move on to the next side of the house. And so on along the perimeter, until the entire basement is sheathed with siding.
From above, the edge of the skin is closed with a special bar - a low tide. The resulting gaps are filled with a sealant, which is chosen according to the color of the siding. That's all, the work can be done independently in a short period of time.
Finishing the foundation of the house with do-it-yourself siding updated: February 26, 2018 by: zoomfund


